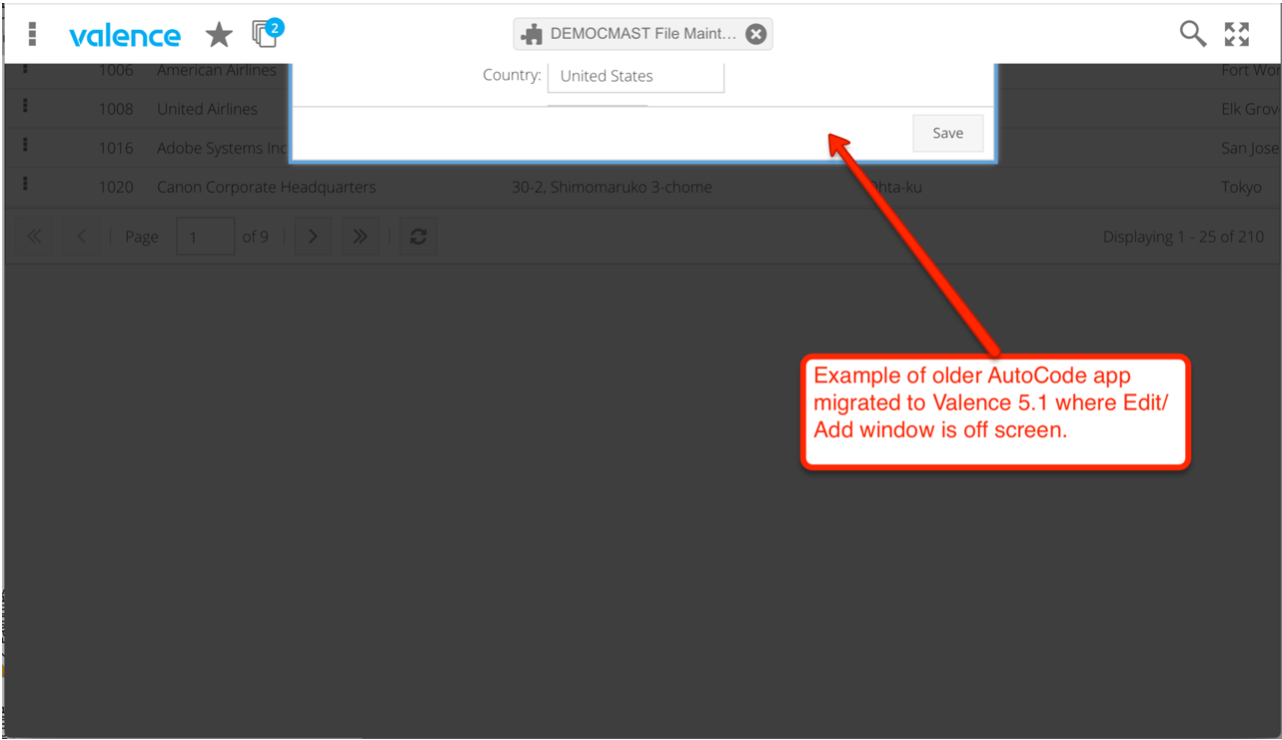
Older Valence file maintenance apps created through Nitro AutoCode can sometimes exhibit a display problem upon migration to Valence 5.1. This can also be true for AutoCode-based file maintenance apps created in 5.1 builds prior to 5.1.20171202.0. The most common symptom is that a portion of the edit/add window displays outside of the portal boundary, as shown here.
There are two methods to fix this problem. You can either go into Sencha Architect to correct the app, or you can edit the source code directly. This post explains both approaches.
Correcting window display problem through Sencha Architect
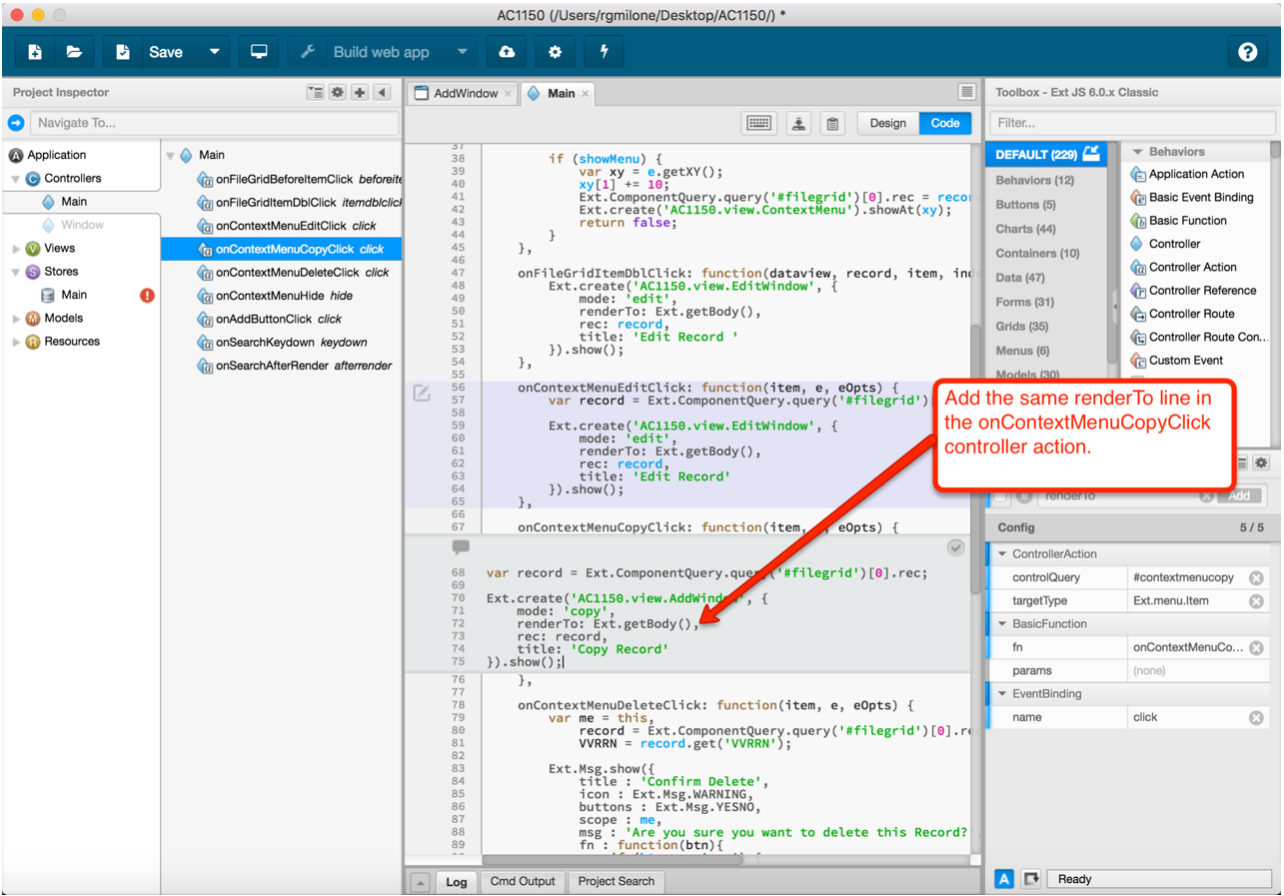
If you are actively making changes to this app in Sencha Architect, this is likely going to be the quickest approach to fixing the rendering problem. If you don’t have access to Architect, or aren’t accustomed to making adjustments to this app in Architect, skip to the next section for alternative instructions. To begin the process, open your app in Sencha Architect and navigate to the Main controller. Locate the onFileGridItemDblClick controller action, scroll to the Ext.create method call and insert a “renderTo: Ext.getBody()” property, as shown here:

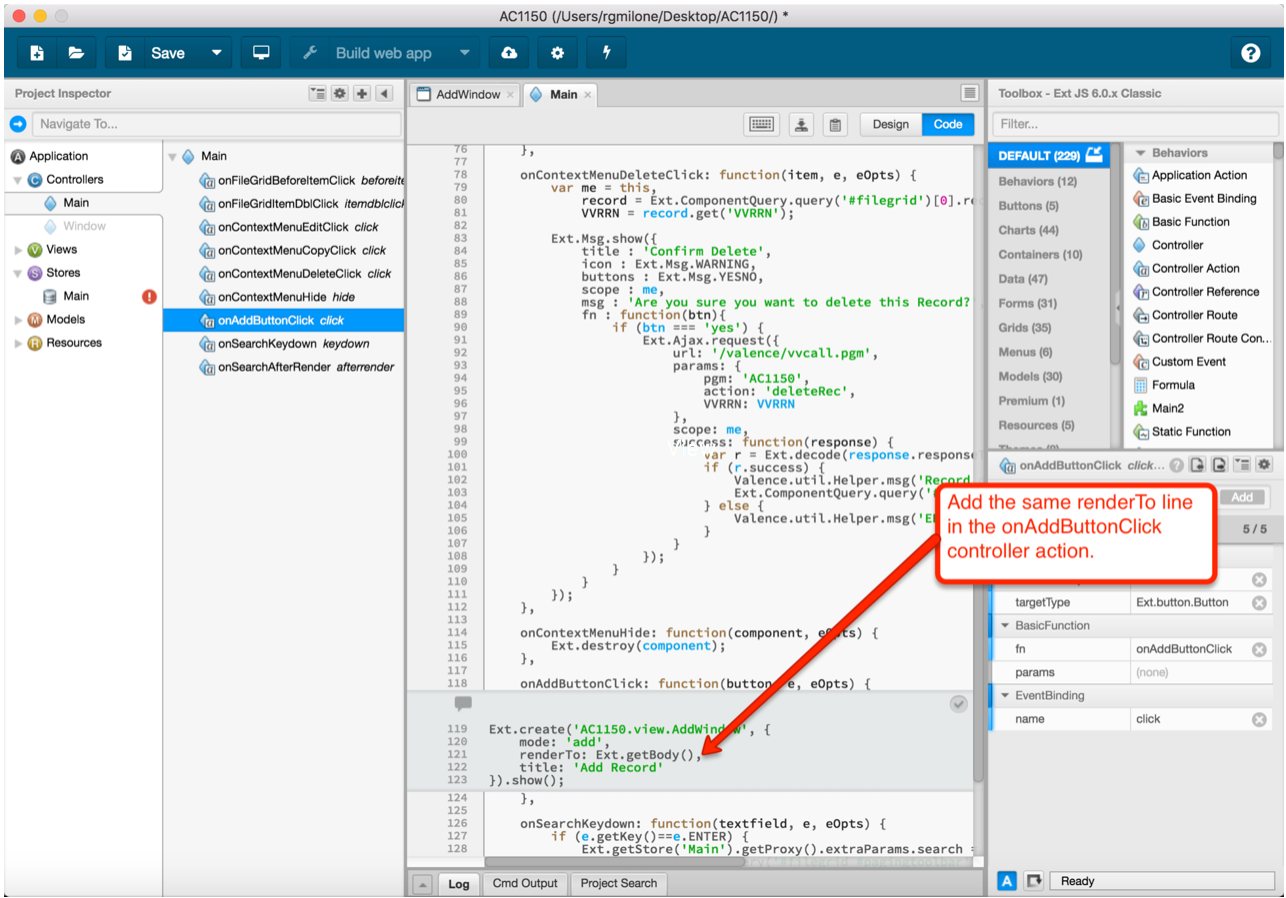
Repeat this action in the onContextMenuEditClick, onContextMenuCopy and onAddButtonClick controllers, as depicted in figures 3 through 5 below:

With these changes in place, save and redeploy your app and the window display problem should be resolved.
Correcting window display problem by directly editing the source files
Apps originally created with Sencha Architect have both .js files, which execute in the browser, and associated metadata files, which Sencha Architect uses to ultimately generate the .js files. If you will never need to edit the AutoCode in Sencha Architect again you can directly modify just the /app/controller/Main.js file as shown in figures 6 and 7. If you also may open and modify this app in Sencha Architect again in the future you should also follow the instructions for modifying the /metadata/controller/Main file as shown in figures 8 through 10.
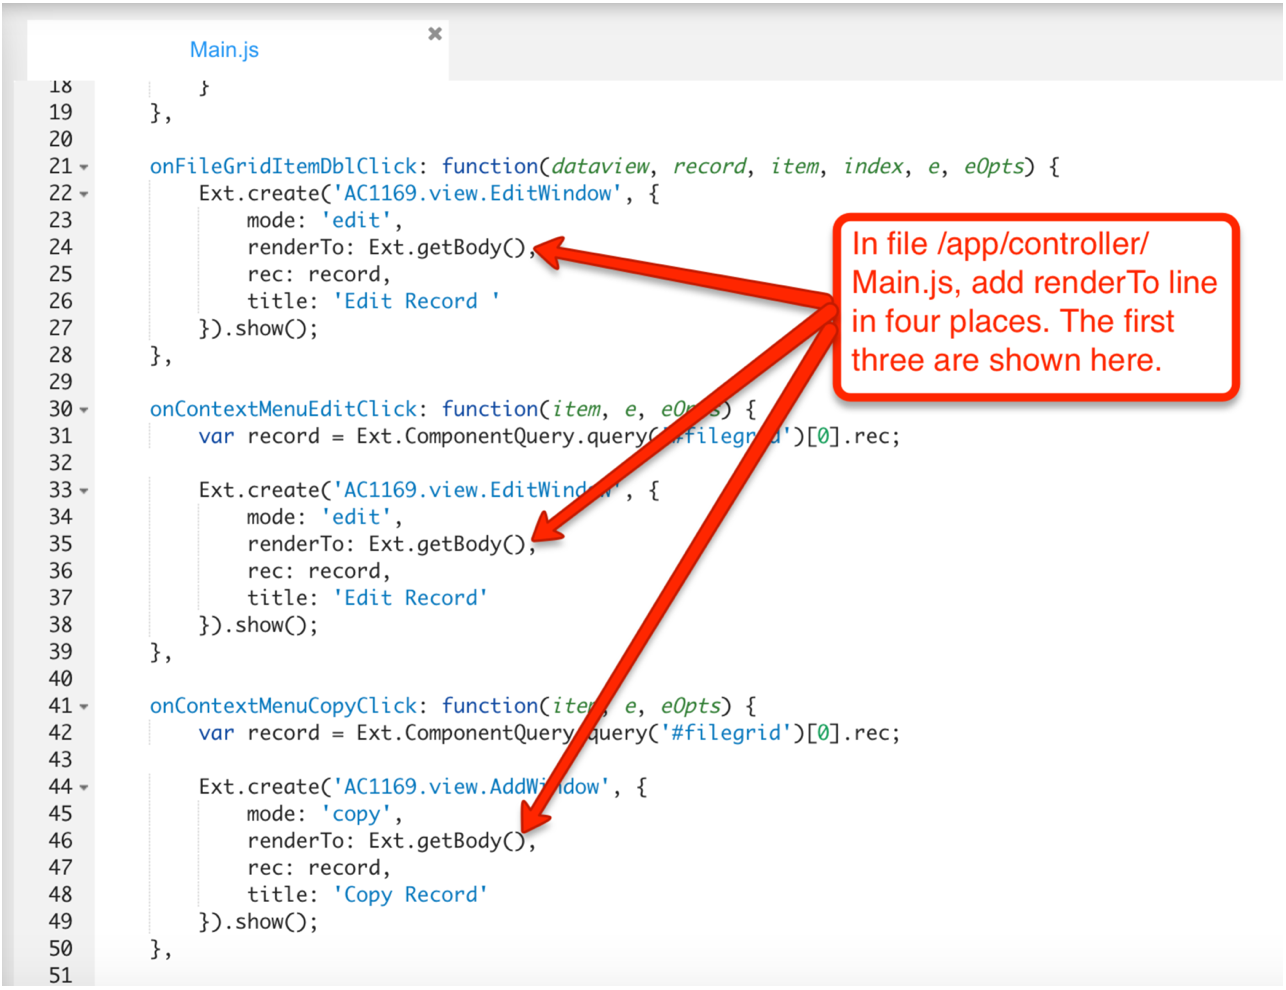
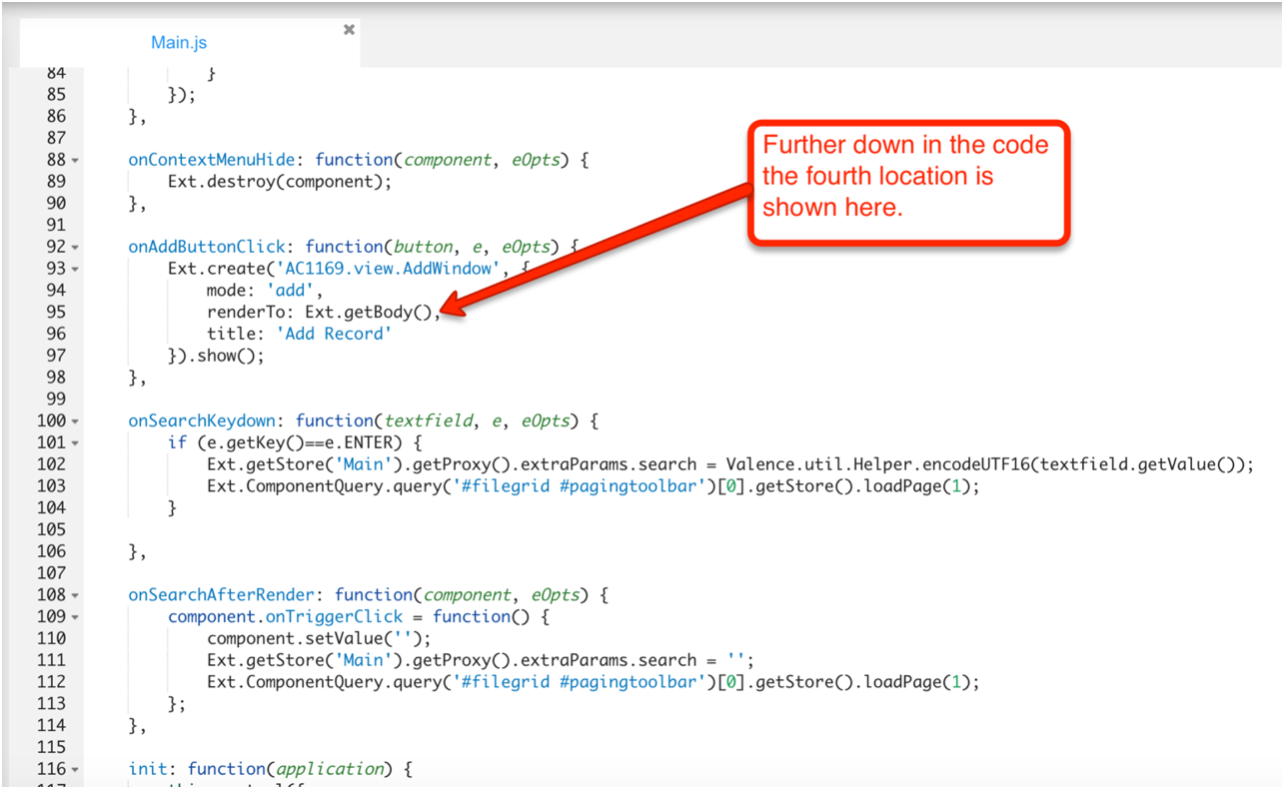
Begin by opening a source editor, such as Valence’s Nitro Source Editor, and navigating to the app’s Main.js folder on your IFS. You will be adding a “renderTo: Ext.getBody()” line in four spots, as shown below:
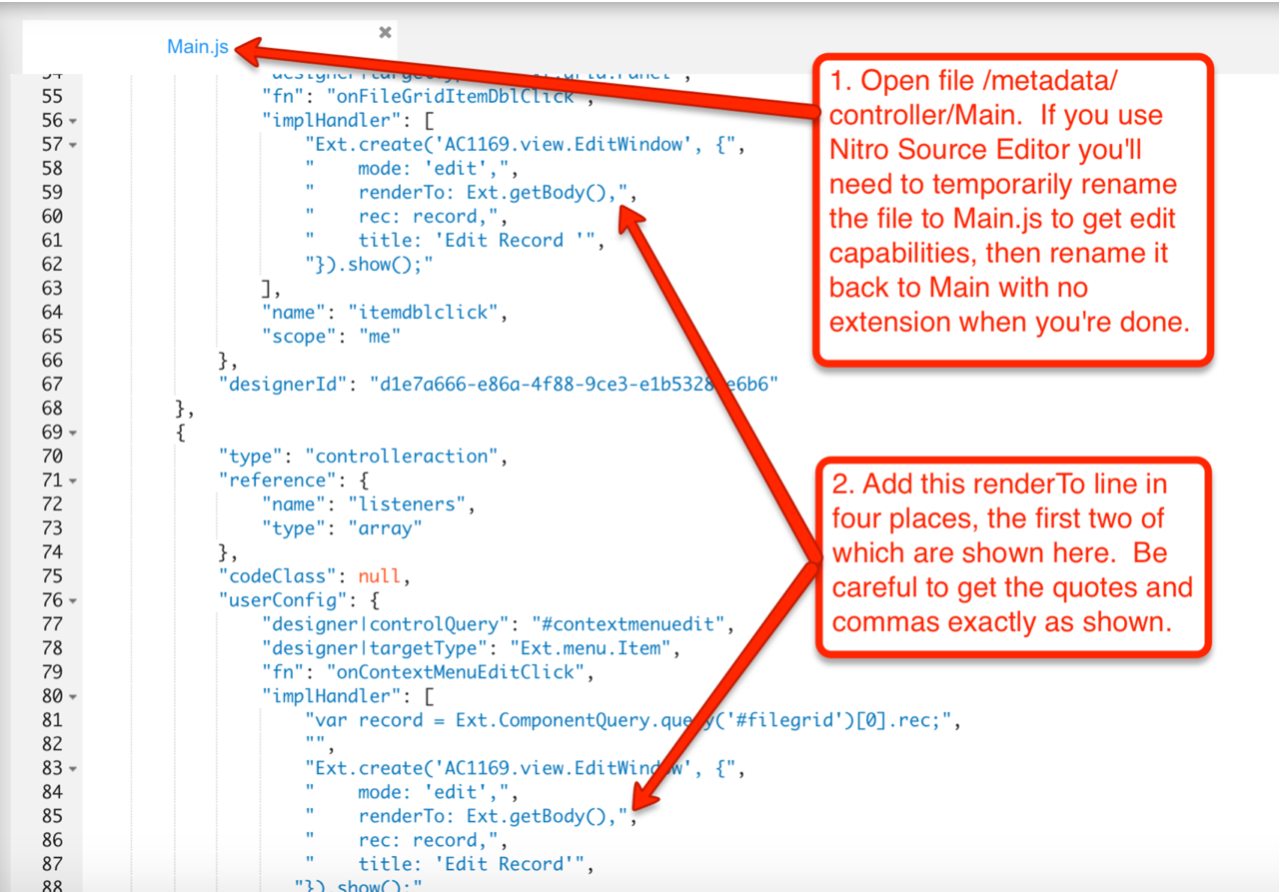
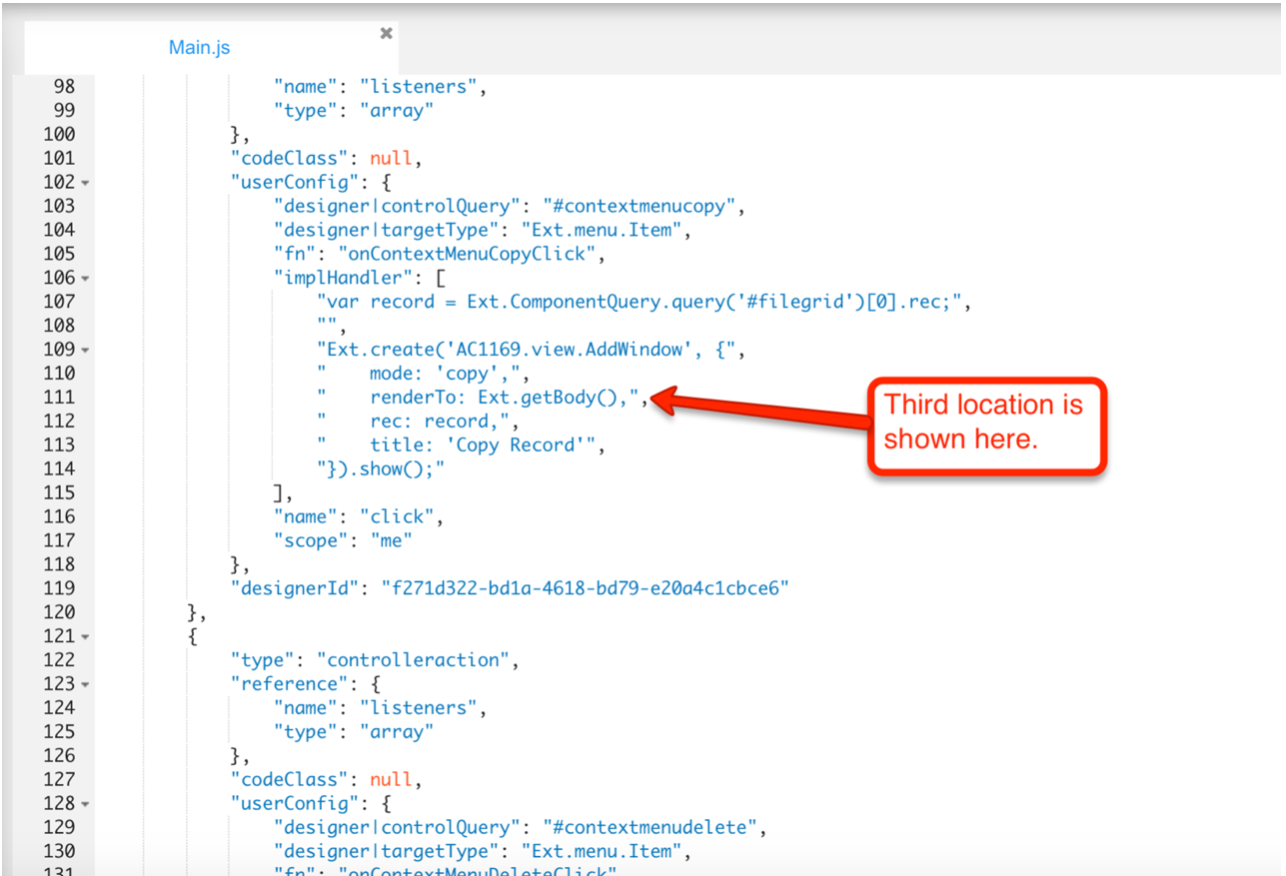
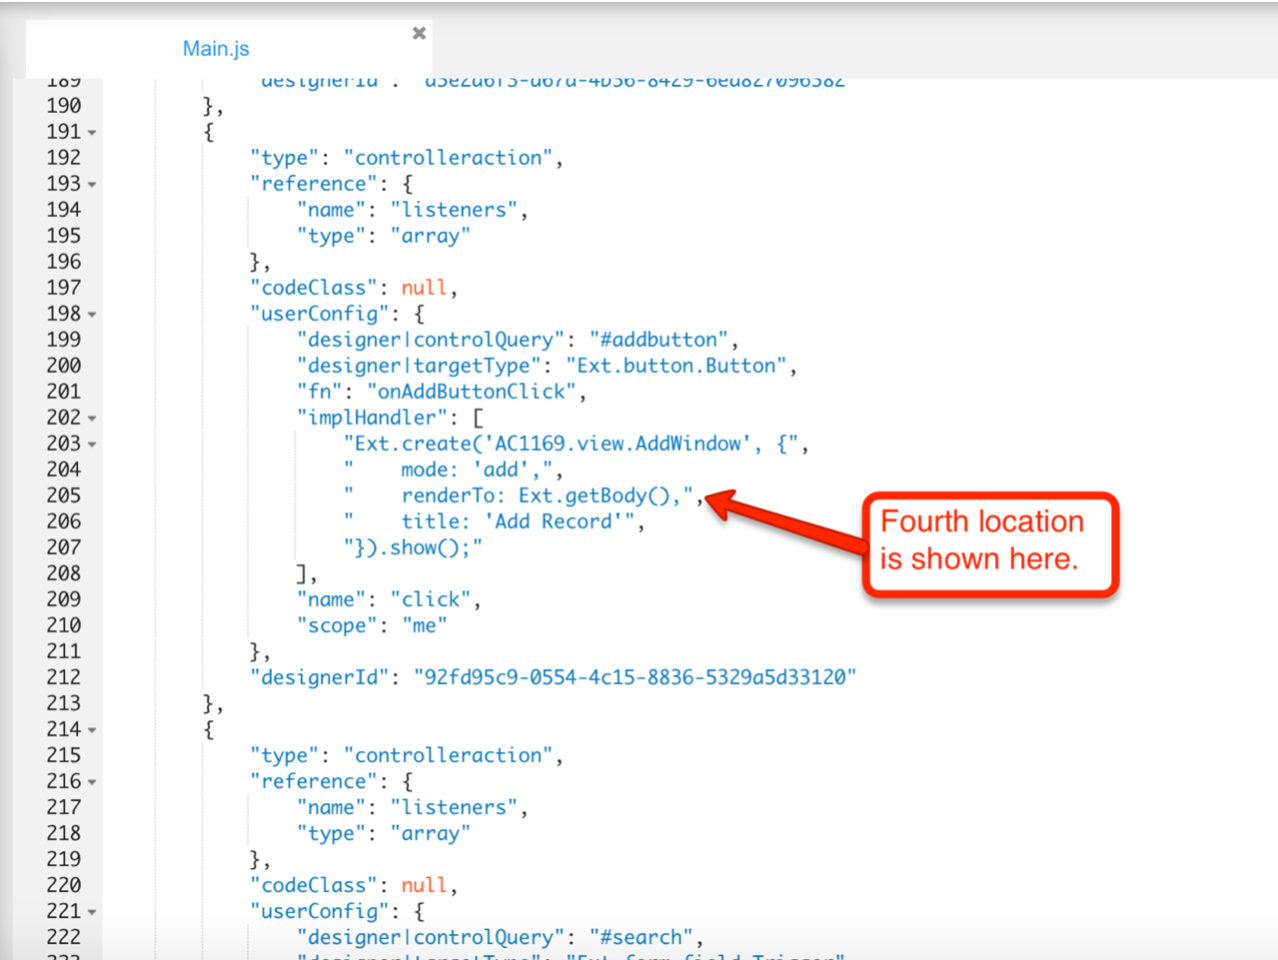
At this point, after saving the changes, you should be able to relaunch the app and see that the display problem has been resolved. If you would like to retain the ability to make changes to this app within Sencha Architect, you must make a corresponding adjustment to the Main meta data file for the app, which is inside the app’s metadata/controller folder. Note that if using Nitro Source Editor, you’ll need to temporarily rename the Main file to have a .js extension in order to have edit capability. Carefully follow the source editing steps outlined in figures 8 through 10:
Save these changes, then be sure to rename the source file from “Main.js” back to “Main” if necessary.