Wrapping up 2017 with a simple but powerful tip for Nitro Query grid apps… Very often lists of business data include columns that can be classified as boolean, with text representing values of yes/no, true/false, 1/0, etc. When you’re creating a Nitro Query grid app that includes such columns, you can make “truthy” values stand out much more clearly by replacing the column text with a visual checkmark.

You can apply the same concept to edit grids as well, so instead of requiring your users to enter a “Y” or “N” into, say, an “Active” field in your physical file, you could present them with a simple checkbox to click on instead. To illustrate the concept in action, consider the following two examples of grid apps mapped over the same data source depicting a list of customers. Which list makes it easier to spot customers who are inactive (third column from left) or on credit hold (far right column)?
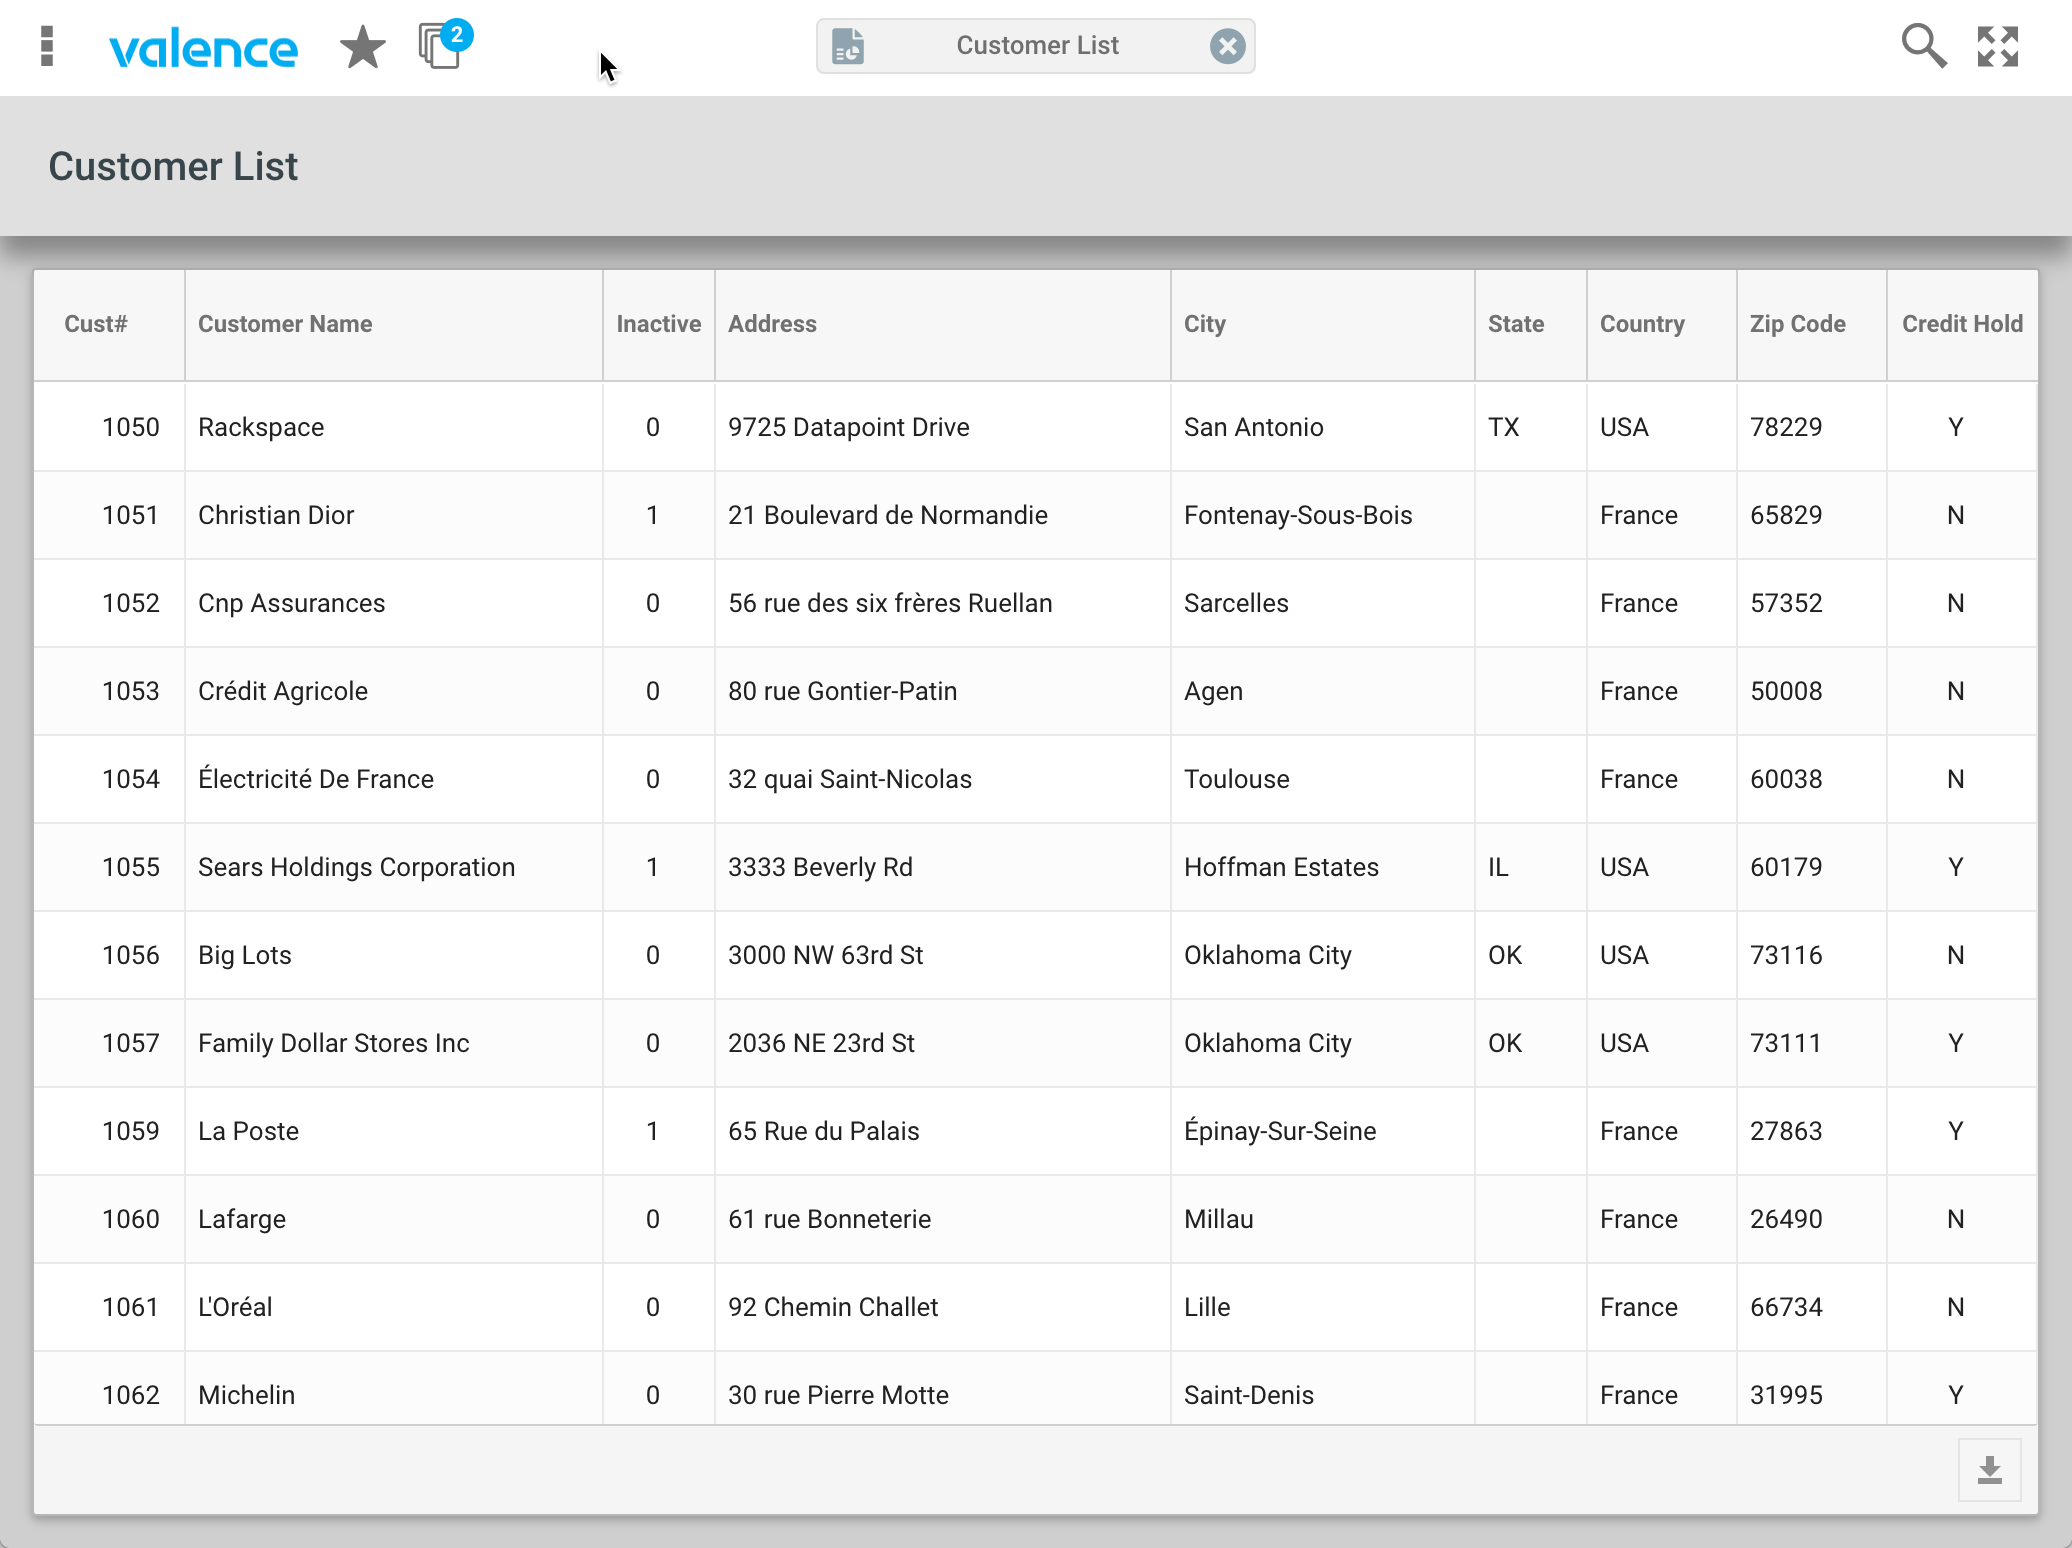
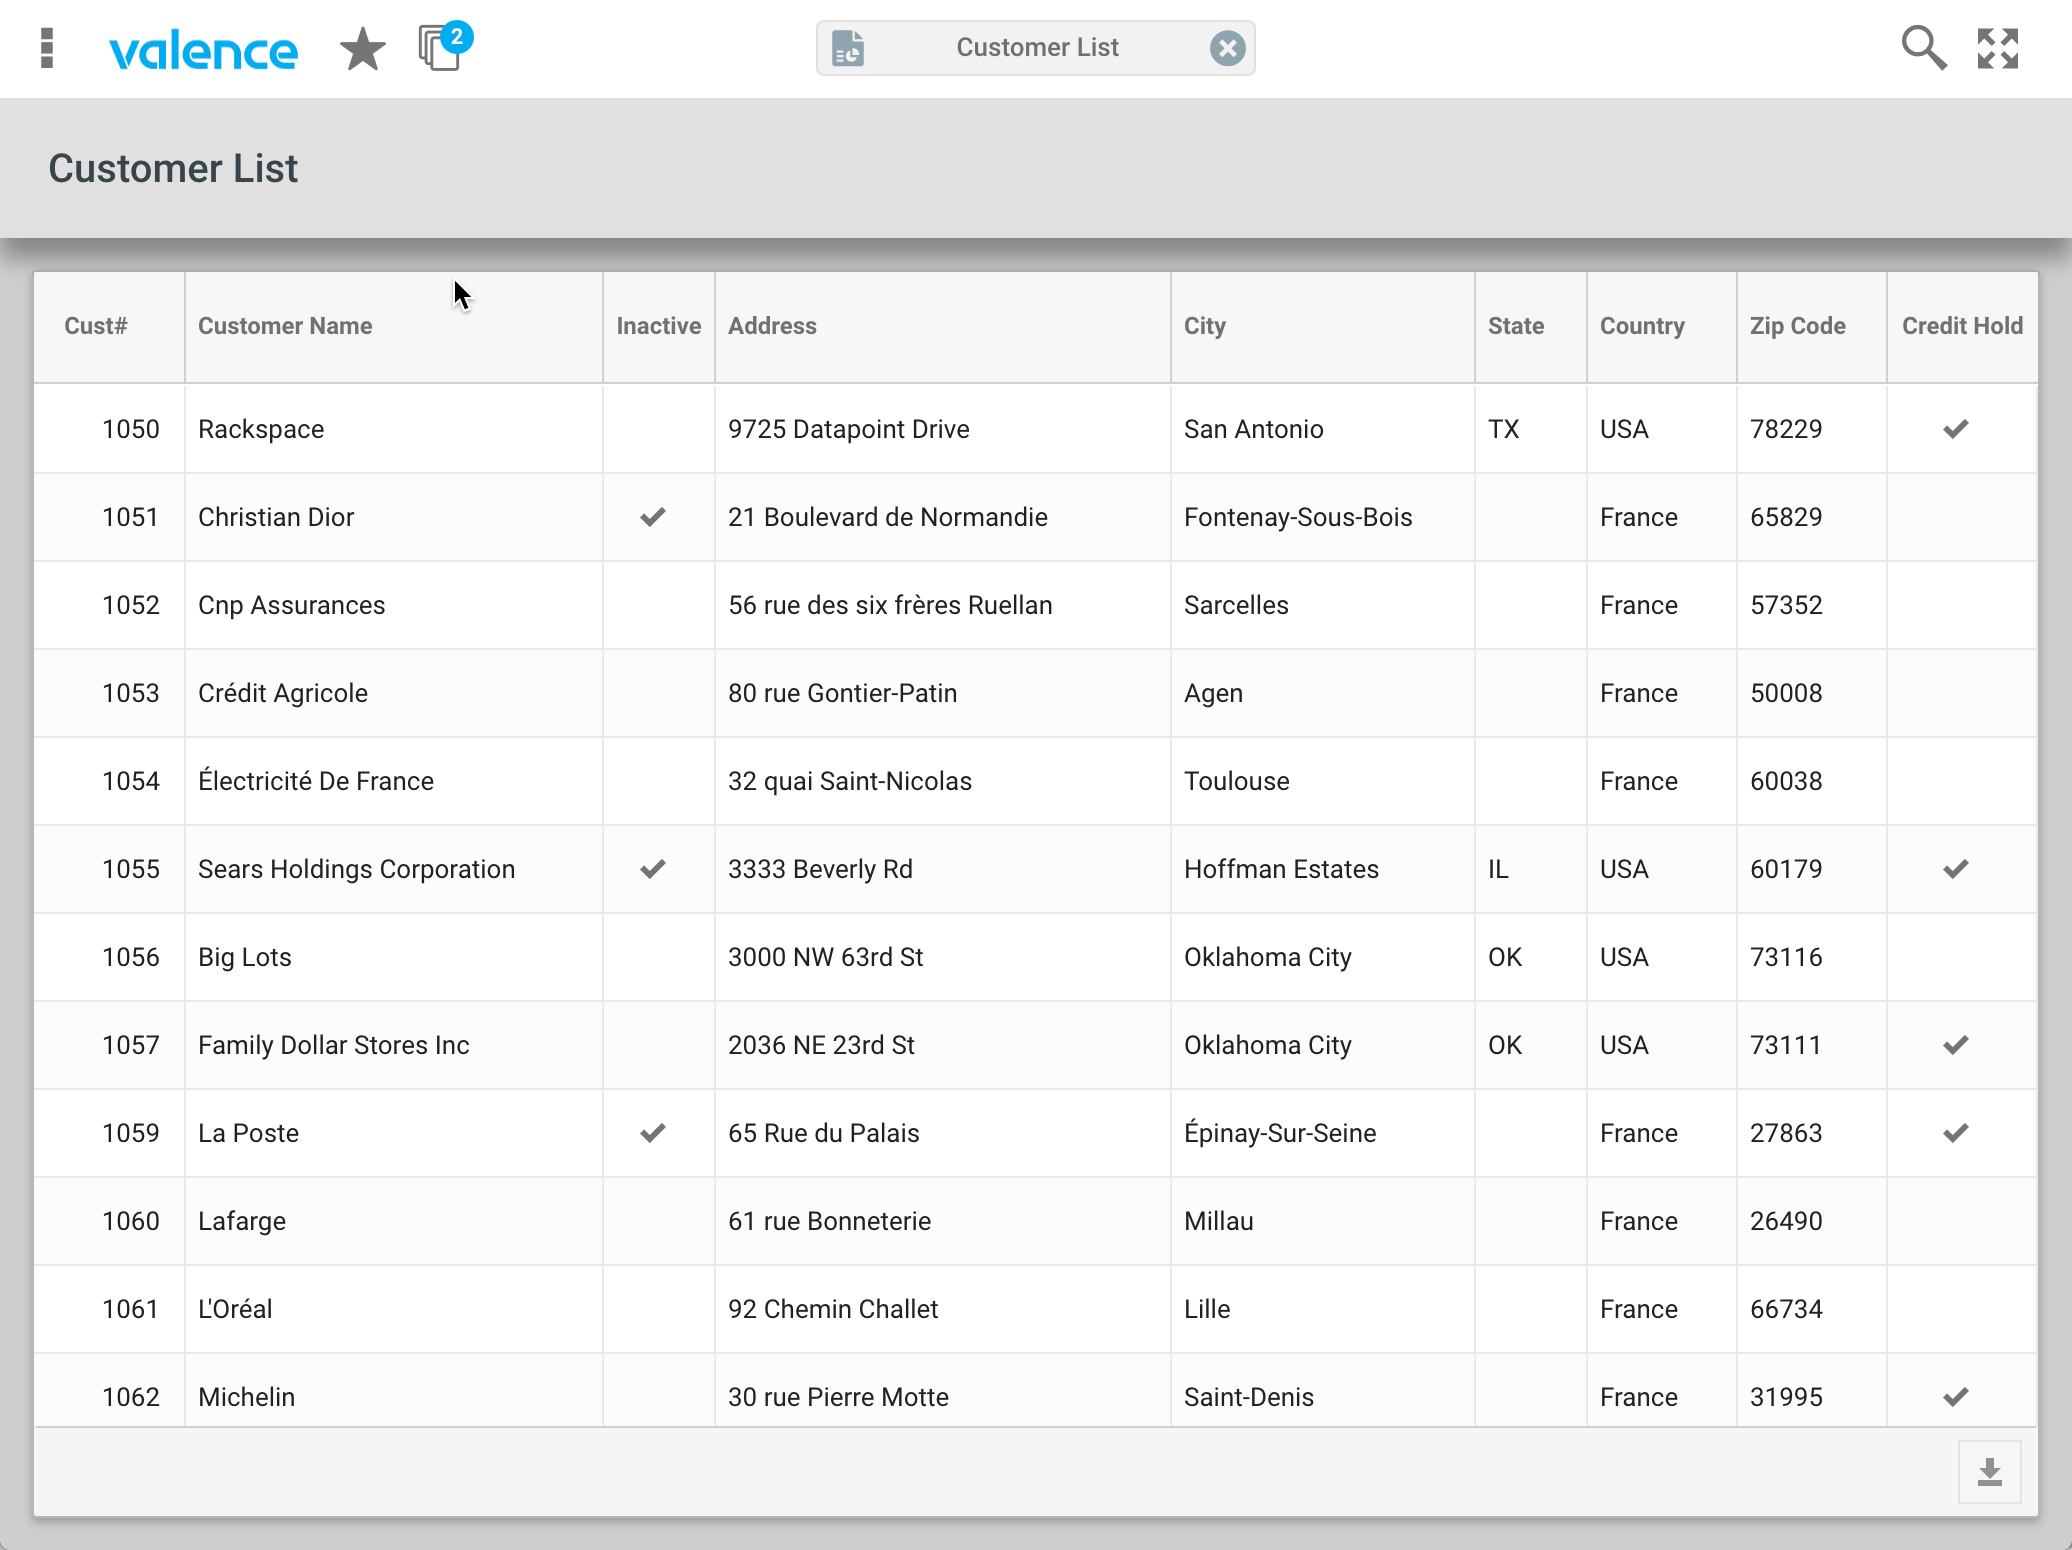
As you can see, it’s much easier for your eyes to spot the inactive or credit-held customers by exception in Grid #2 via the checkmarks, versus sifting through a bunch of 1/0 or Y/N values in Grid #1. Incorporating these checkmarks into your own Nitro Query grid apps is quite simple. The first step is to go to your Grid widget’s Columns tab, hover your cursor over the far right column associated with a boolean field and click on “FORMAT” to bring up the formatting window:
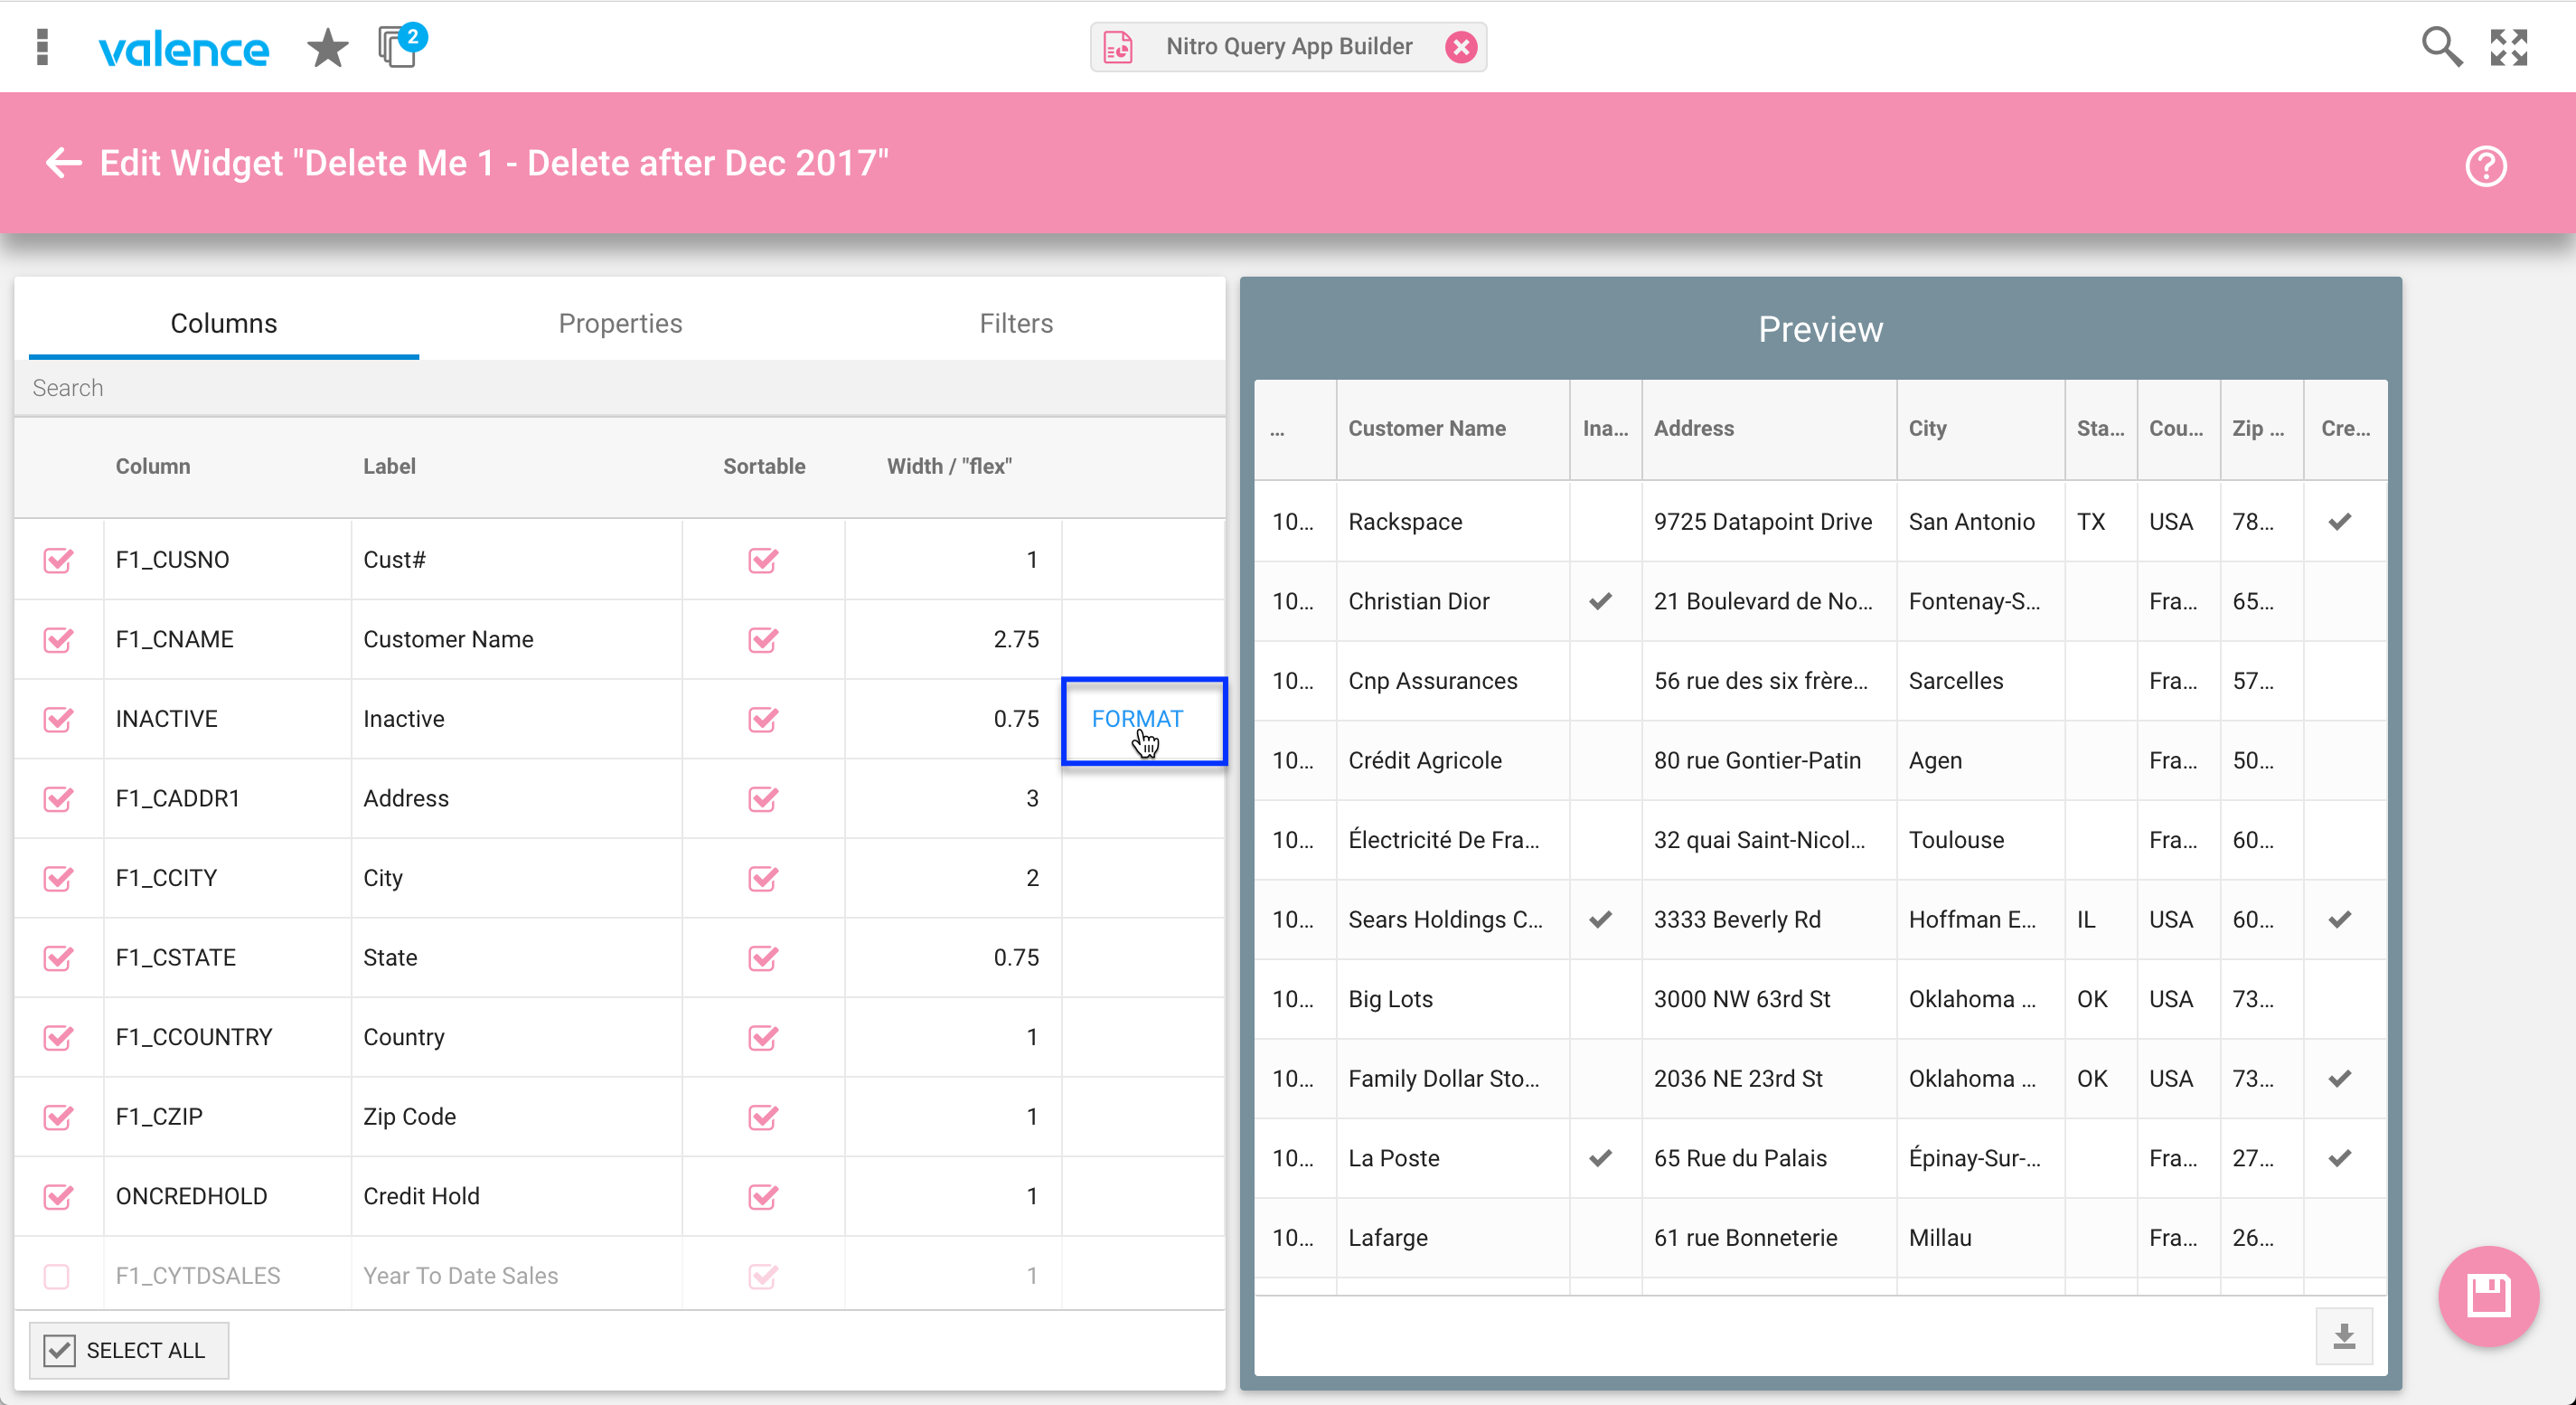
In the format window, expand the “Miscellaneous” section and click on the first row, which converts any positive boolean-like value into a checkmark. Then click OK and save your widget.

As you can see, the boolean configuration assumes your underlying column contains Y/1/true/on values to indicate when a checkmark should show on the grid. This works on most databases, but what if you have some files where the boolean-type data isn’t so conveniently formatted? What if, for example, an “X” is used to indicate a true value in one of your columns? Or what if you just wanted to show a checkmark whenever a status column contains a specific value (i.e., “shipped” status)? In such cases, the easiest way to achieve this is to configure a separate calculated field in your data source that “calculates” when a checkmark should show, then include that calculated column in your grid. To demonstrate, let’s create a “Shipped” boolean field over the DEMOORDER file. On the Columns tab for a data source containing this file, we’ll click the trigger next to the “ADD ALL” button to add a calculated field:
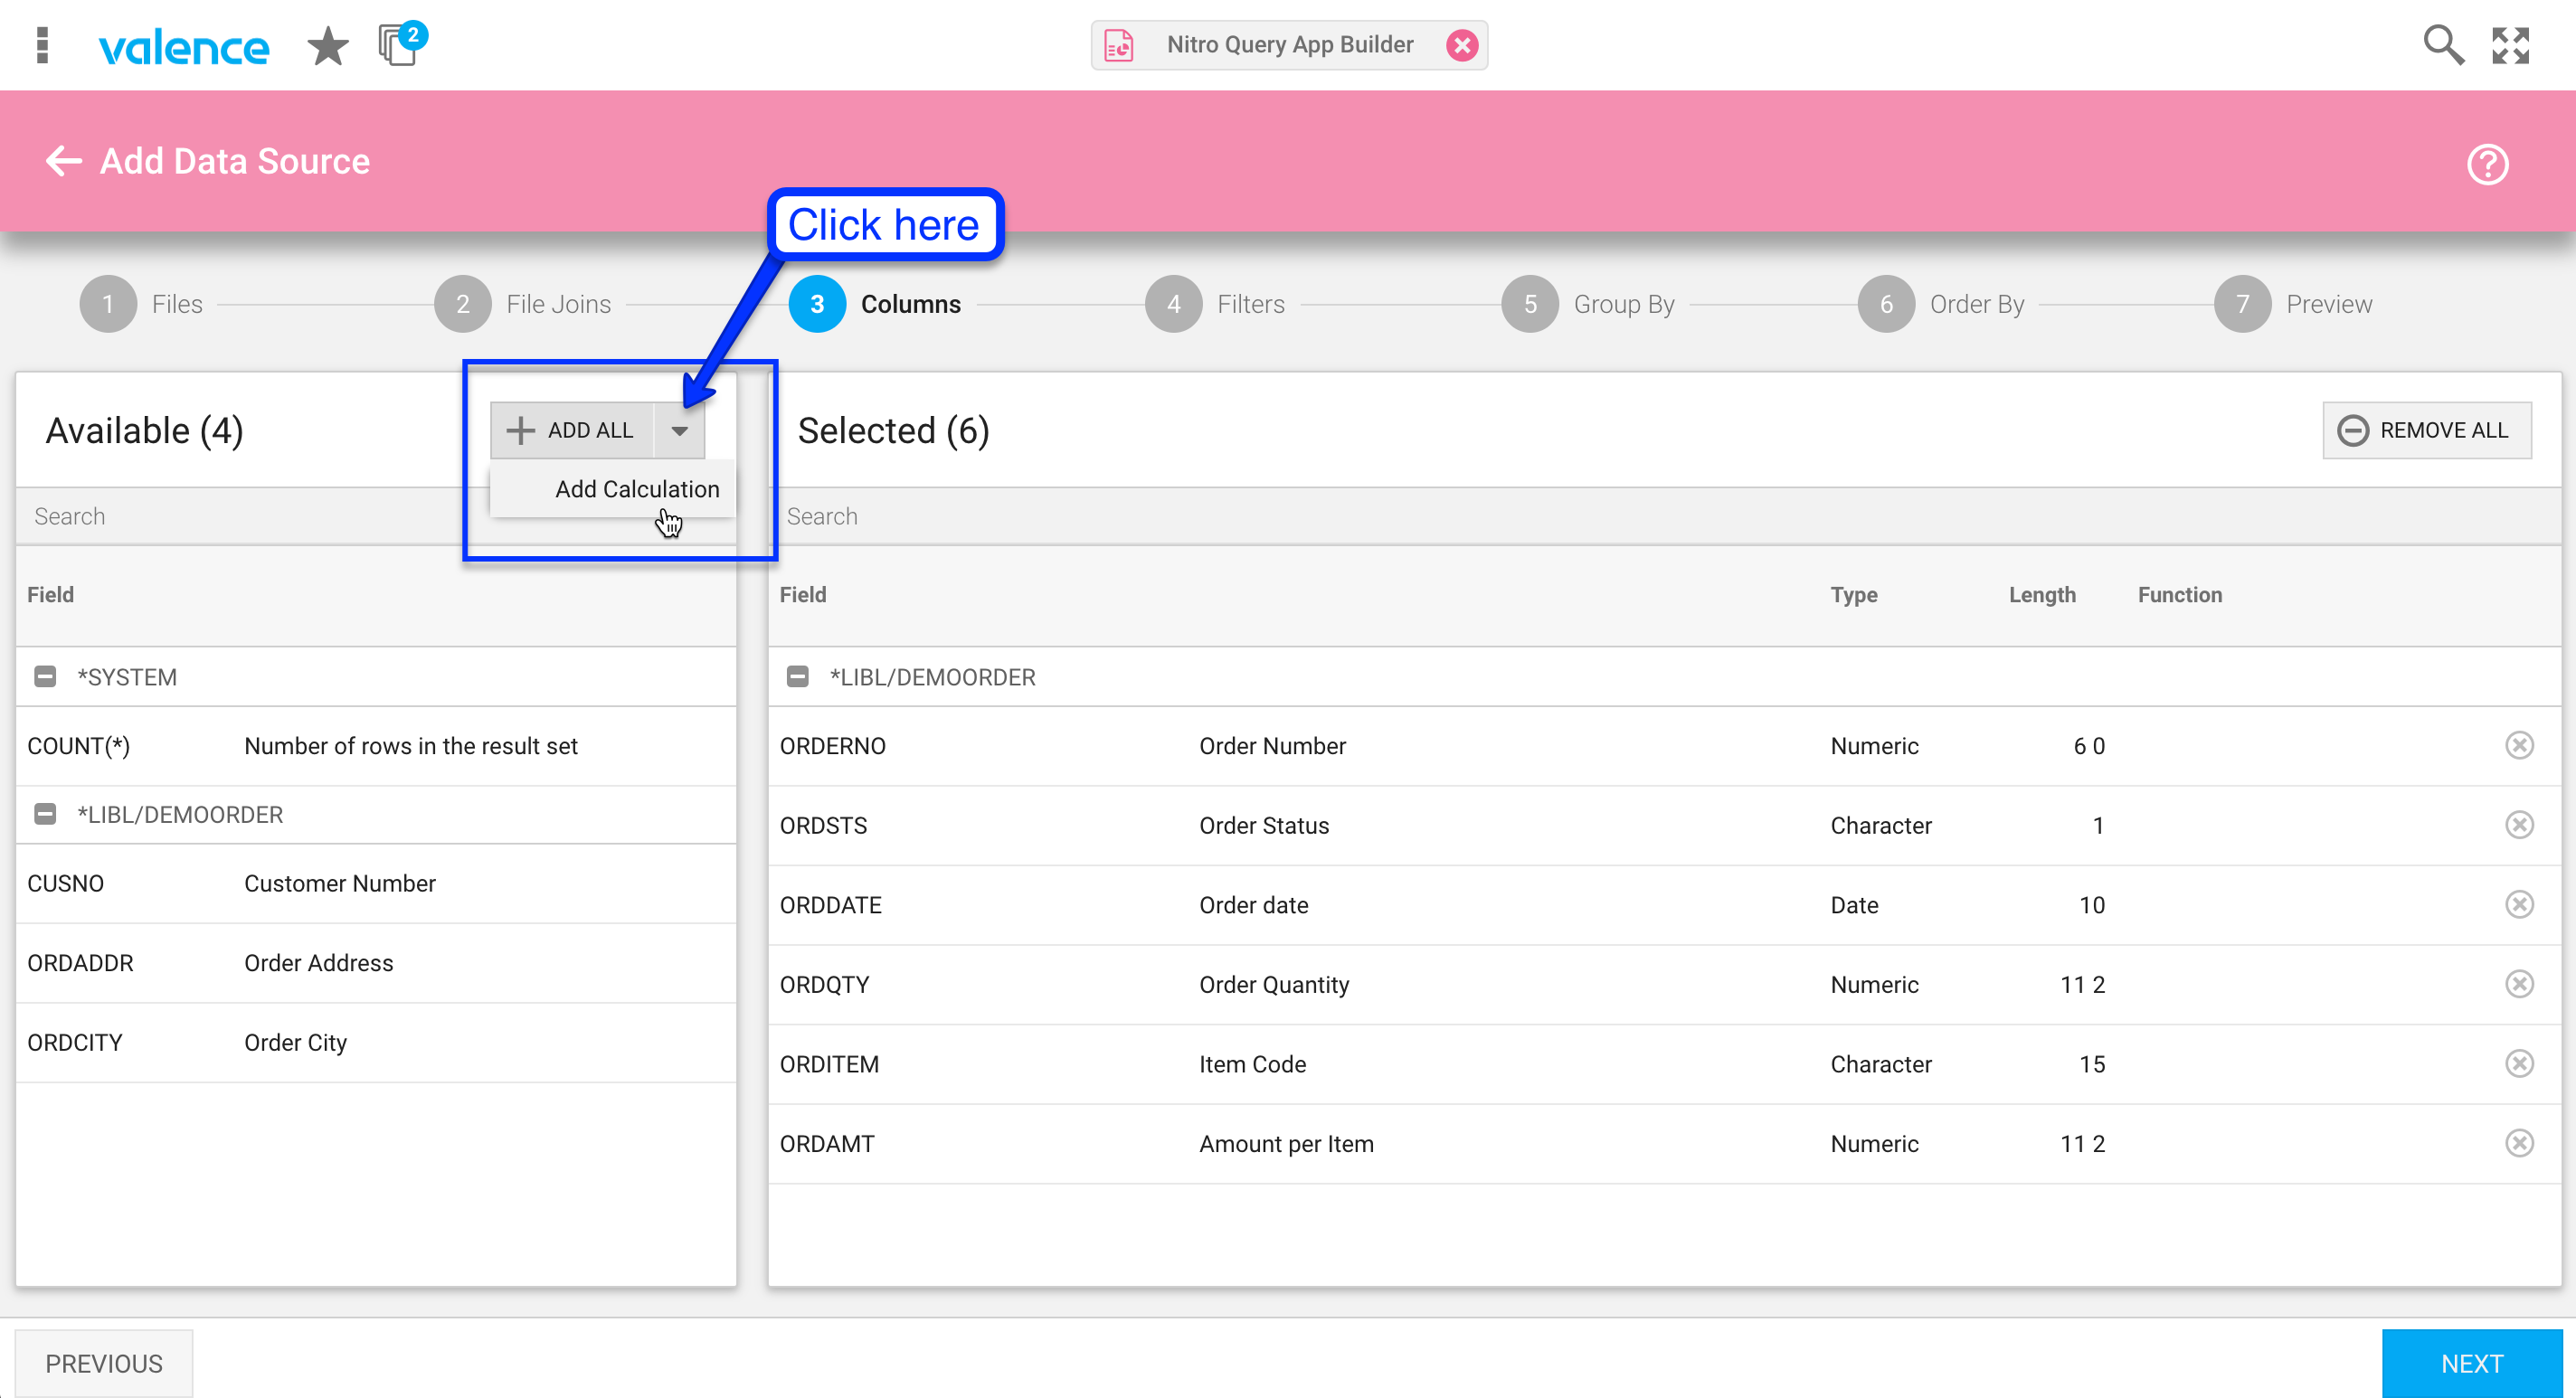
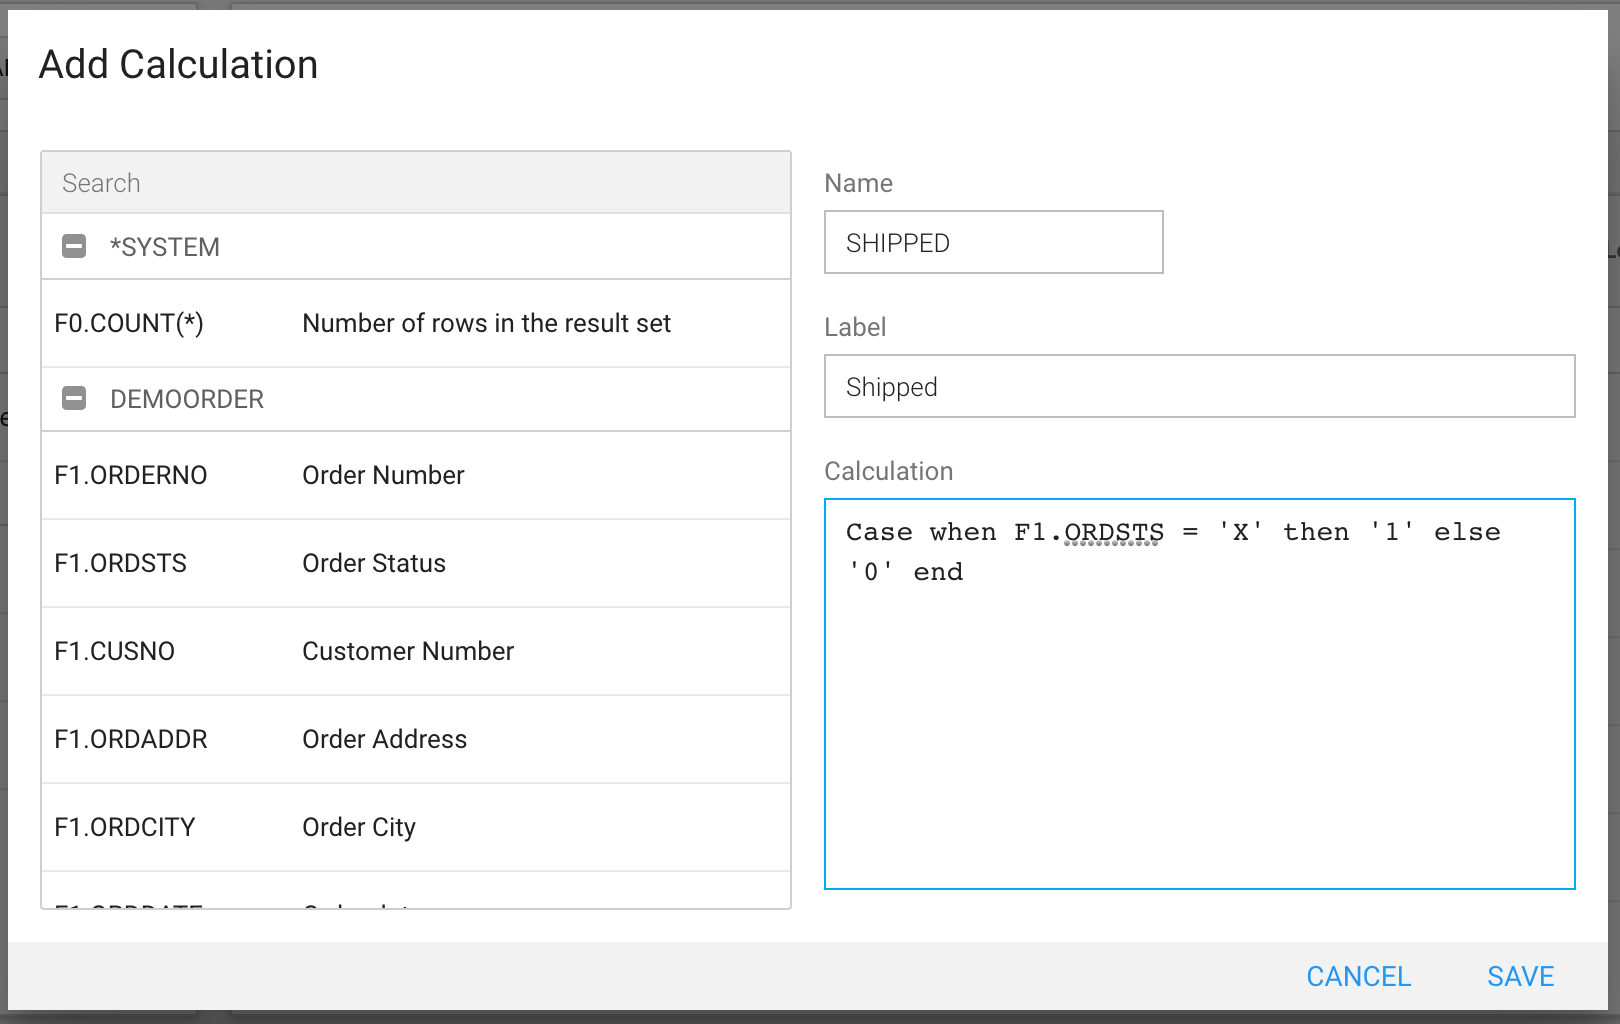
Now we can configure the calculated field, which should follow standard SQL conventions in the form of a CASE clause. So for our “Shipped” example, if we want a checkmark to show in the grid whenever the ORDSTS column is set to “X”, we’d want to insert a statement like this:
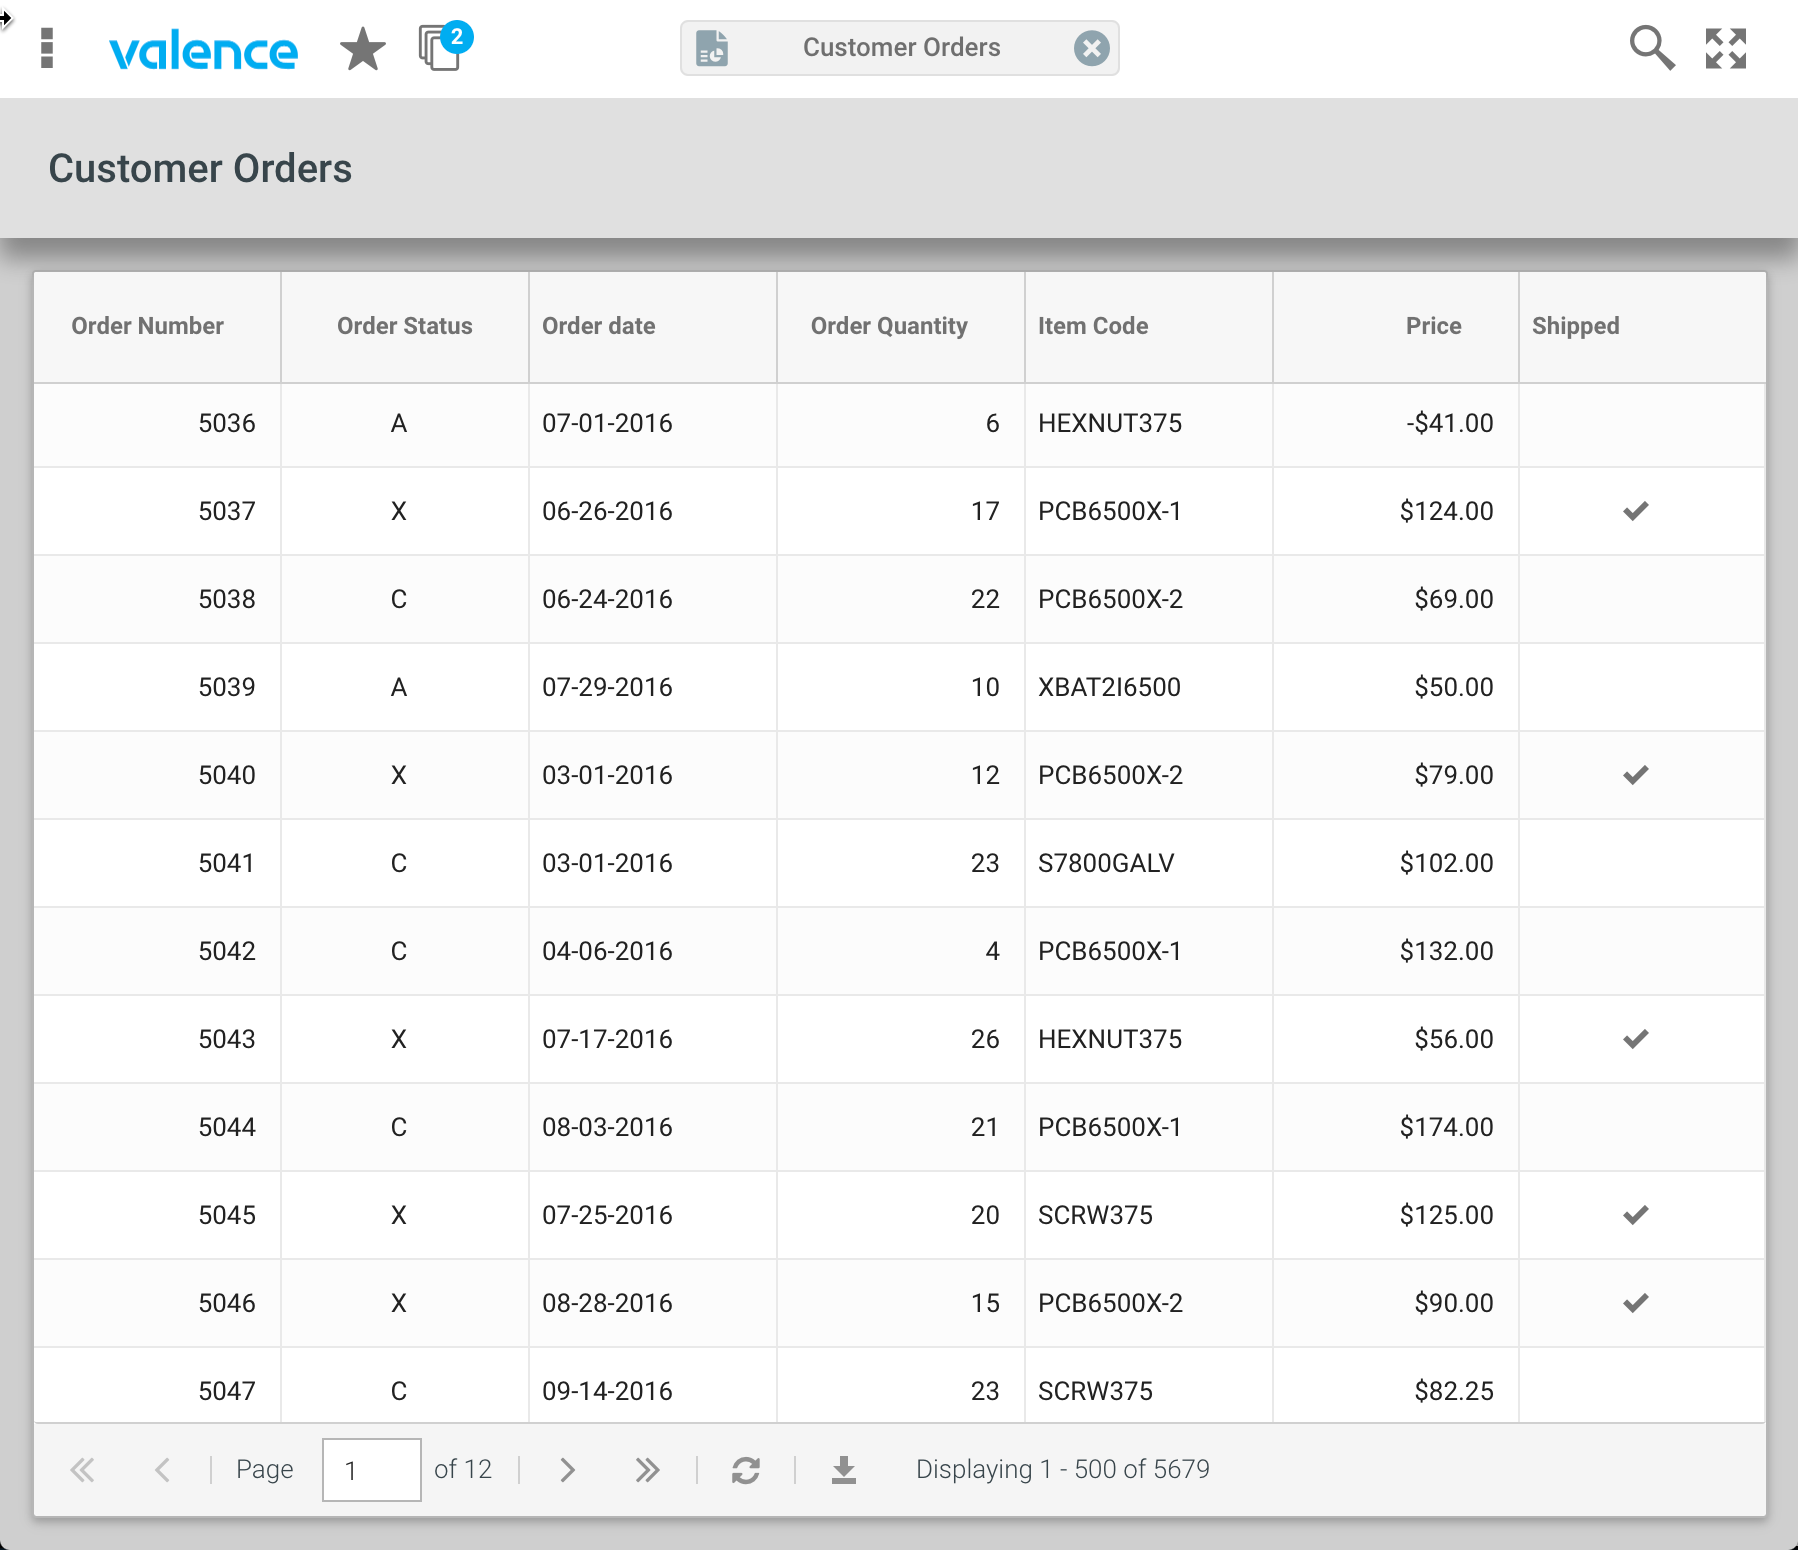
With this new boolean column added to our data source, we can now include it on our grid widget, formatted as described above as a boolean checkmark column. The result is a list of orders where you can easily spot the shipped items.
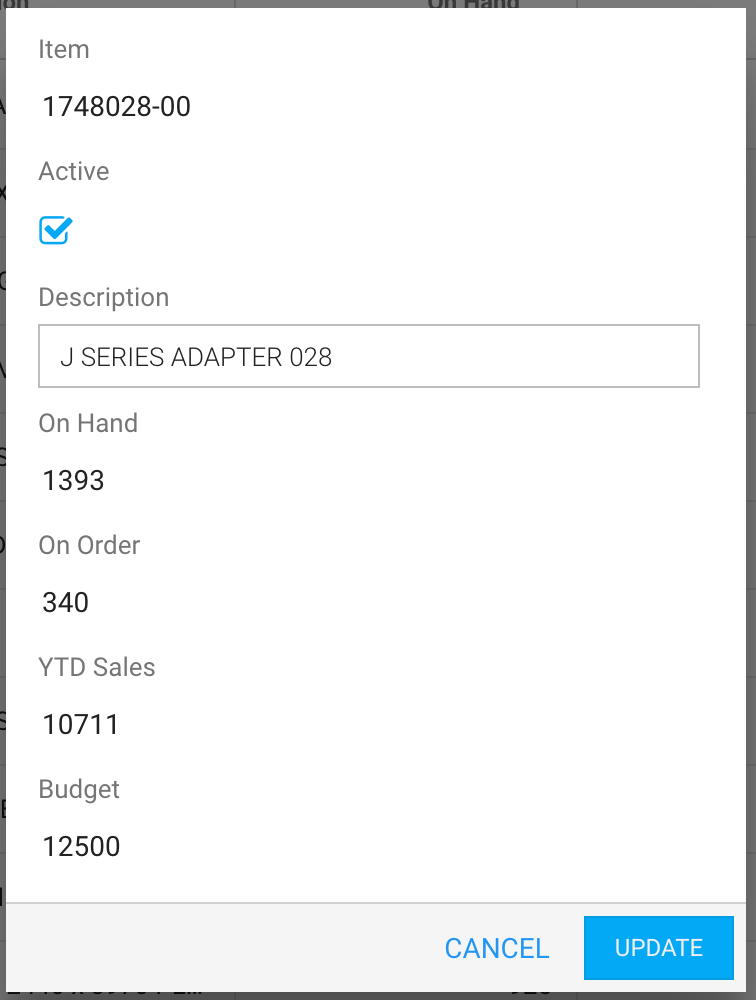
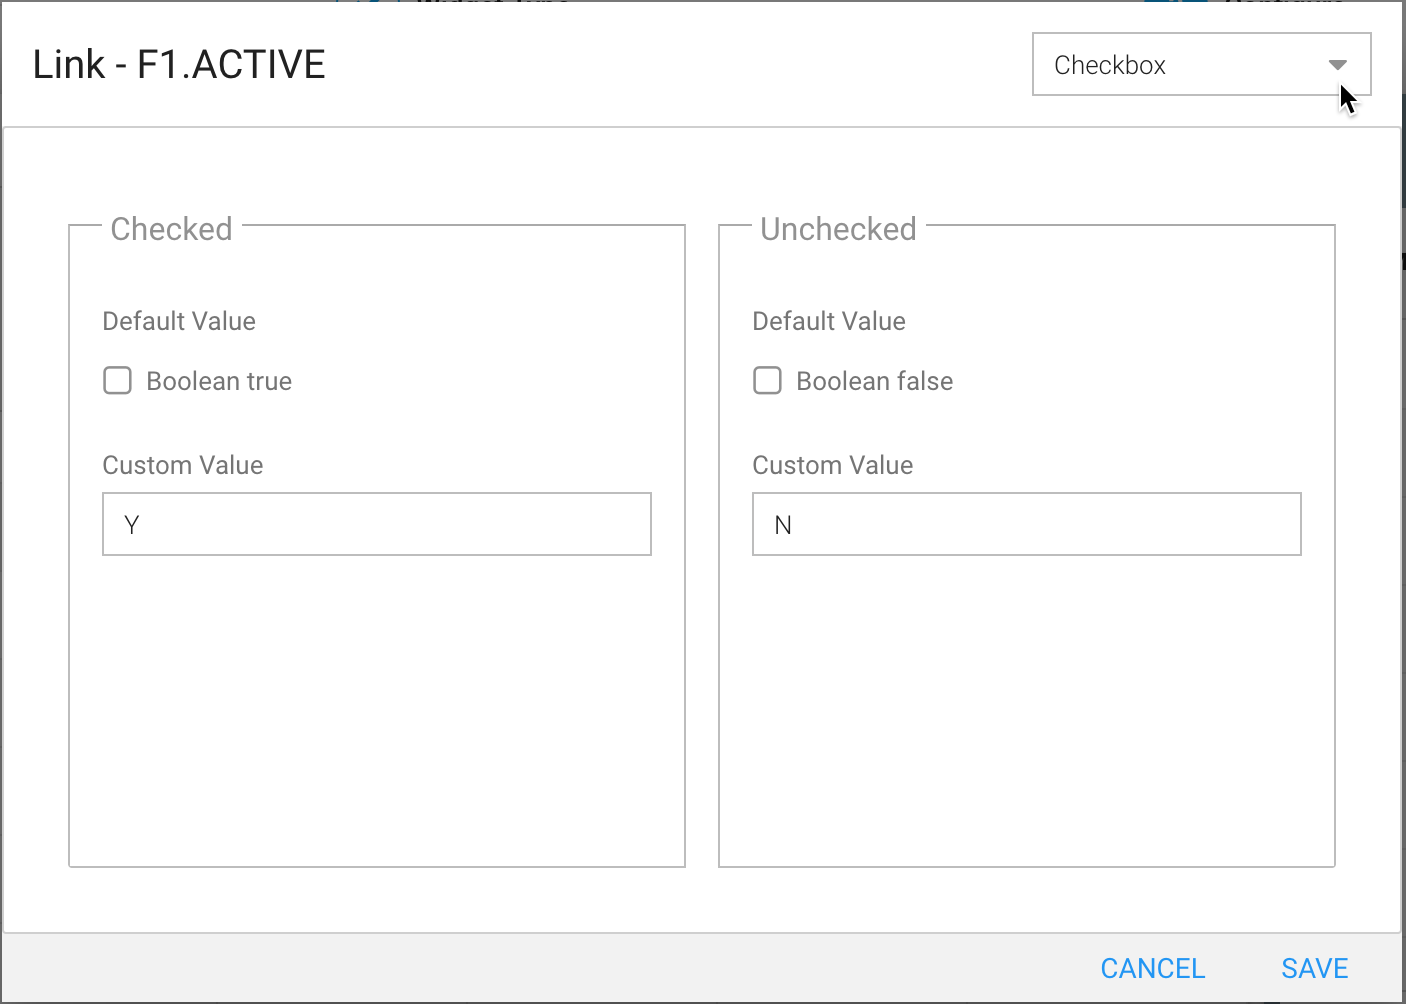
One last thing to consider with checkmarks and checkboxes is how they can be put to use in the edit window of an Edit Grid application. When you want to give your users a simple way to change the boolean status of a field in one of your physical files using a checkbox, all you need to do is tell Nitro Query what character values correspond to the checked and unchecked values. Let’s say you have an inventory file with an “Active” flag, and you’d like a checked value for this field to be stored in the physical file as a “Y” and an unchecked to be an “N”. On the Edit tab of the Edit Grid widget, you would configure this scenario by first hovering your mouse in the right-most column of the field in question (F1_ACTIVE in this case) and clicking on LINK:
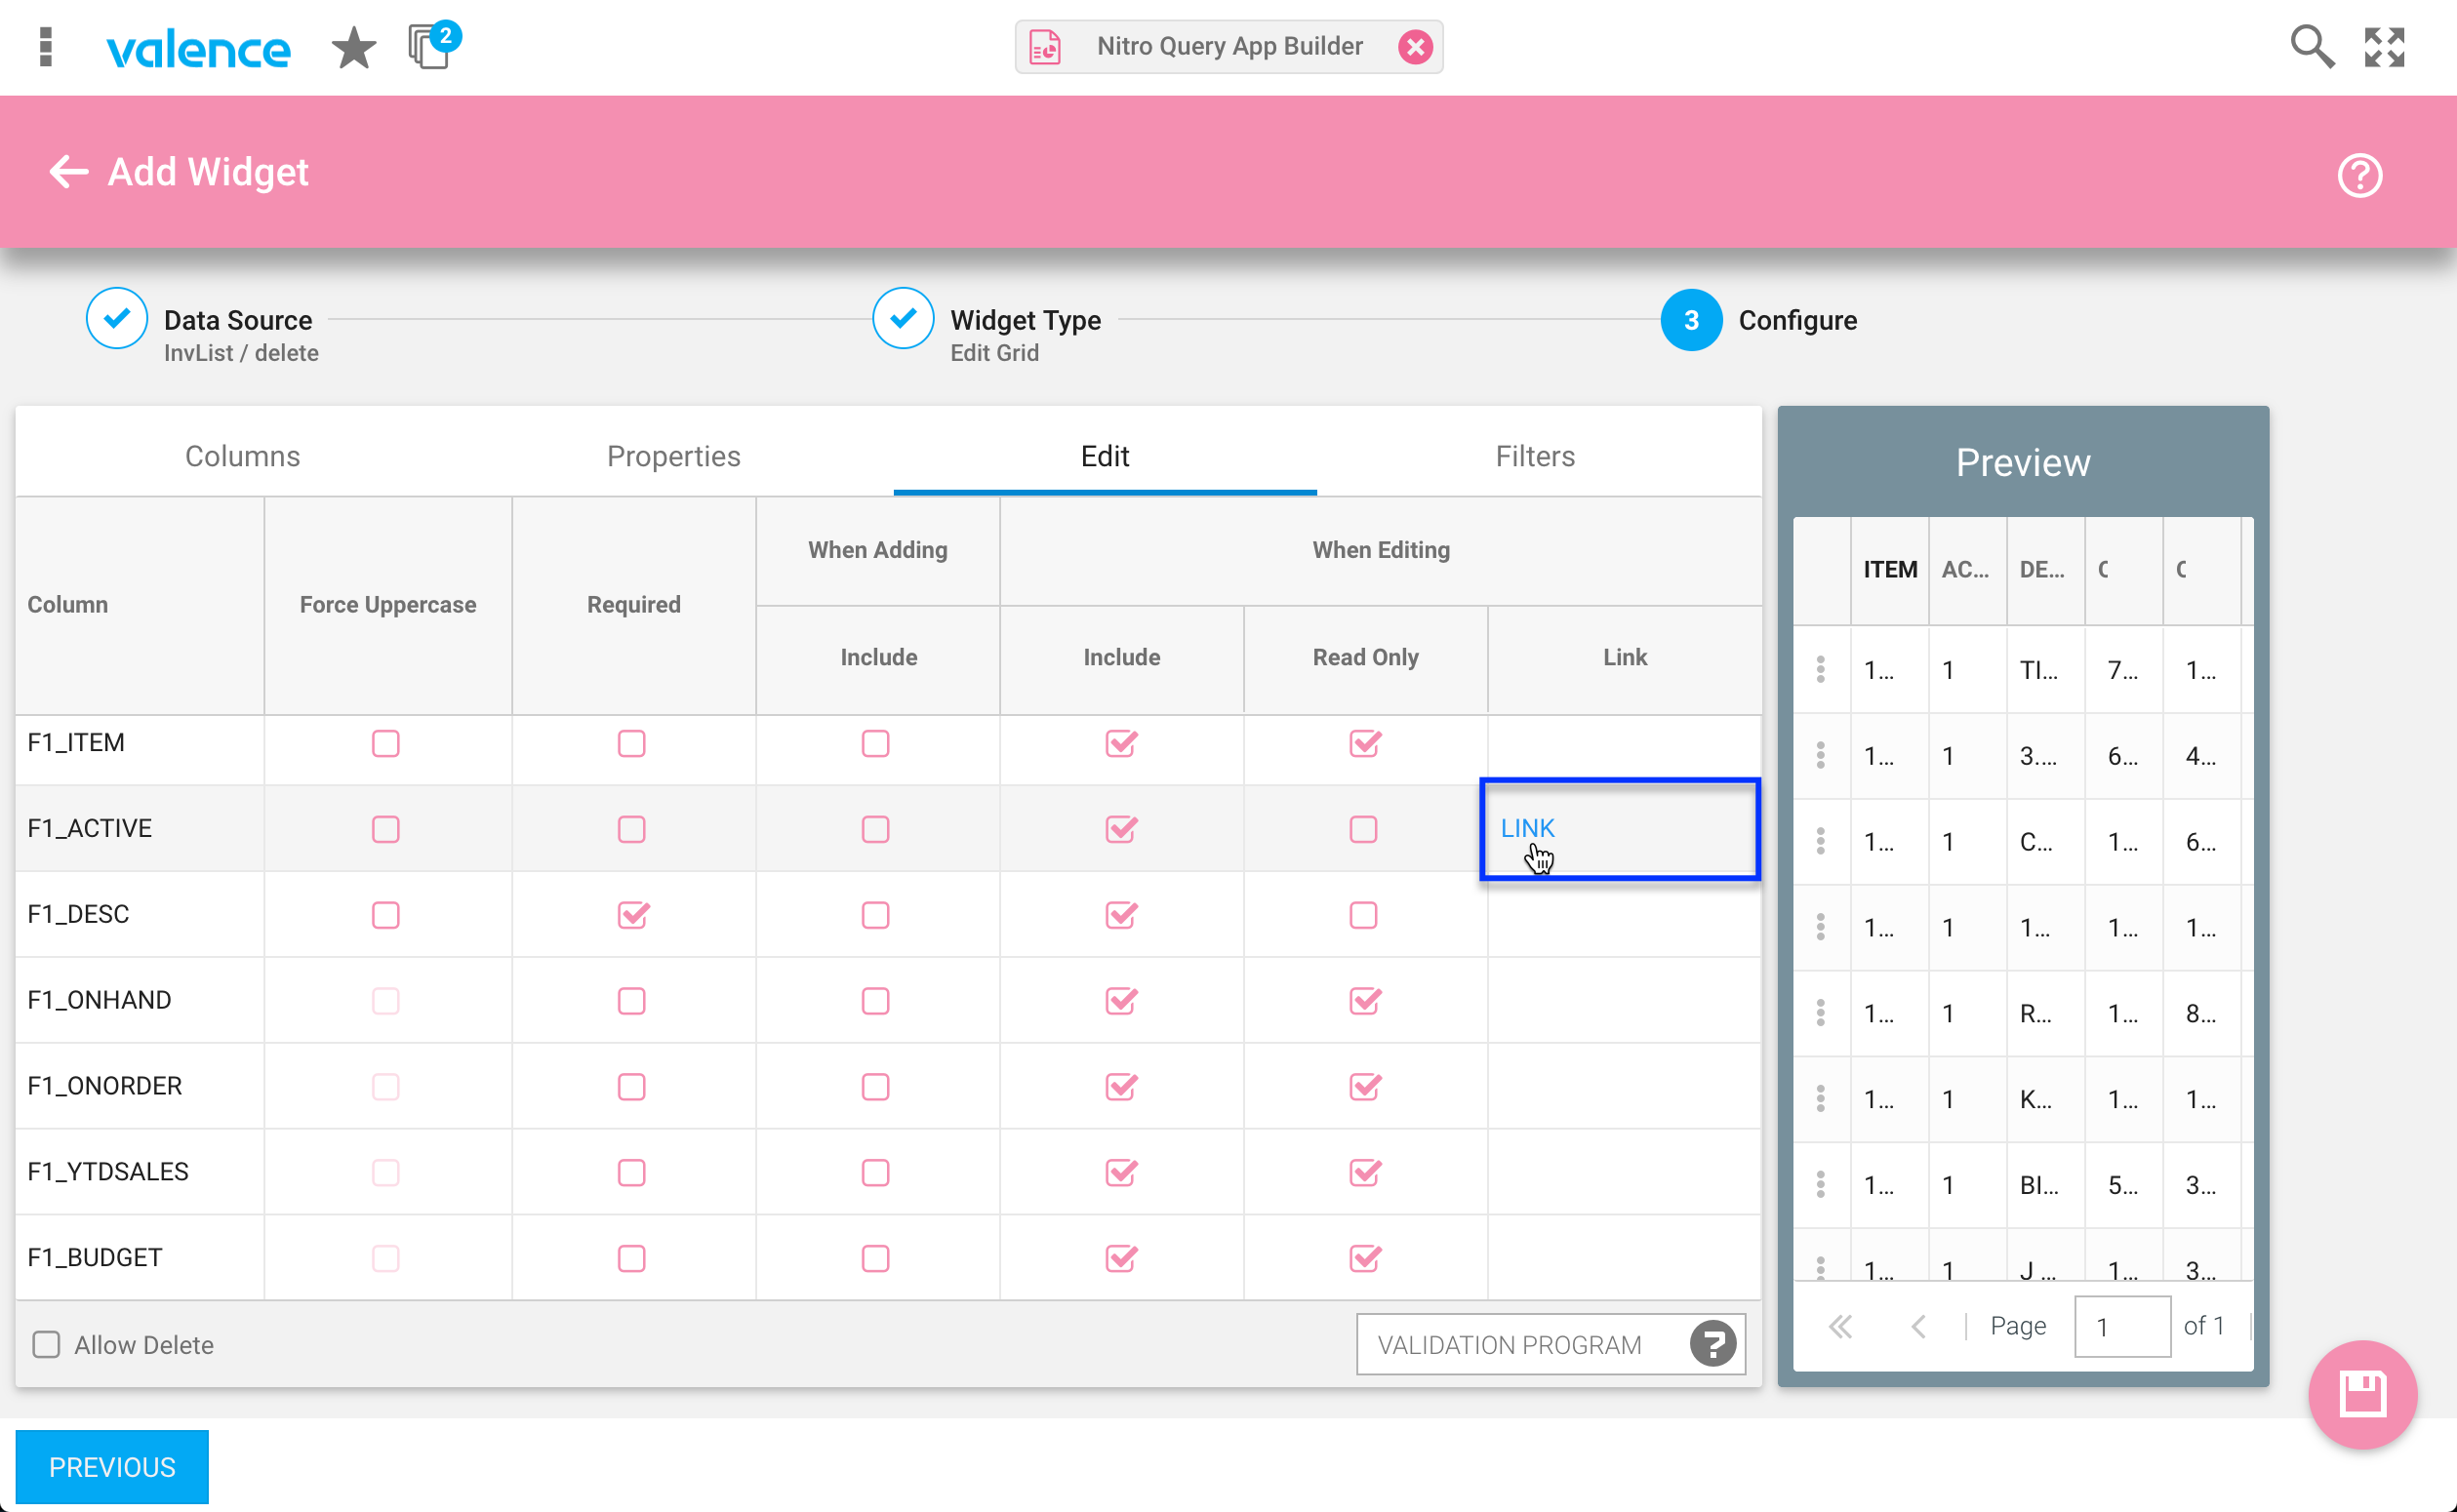
On the subsequent Link window, you’d first want to configure the field to be a checkbox via the combo box in the upper right, then override how a true (checked) and untrue (unchecked) value should be interpreted. In our case, we’ll uncheck the default “true” and “false” boolean strings, replacing them with custom values of “Y” and “N” respectively so it looks like this:overriding the checkbox values to correspond to “Y” or “N”
With that configuration in place and incorporated into an app, you will have created an edit grid interface with a bit more of an intuitive feel for the users — and with minimal development effort to boot!