With the advent of low-cost “Smart TV” units — flat screen monitors with integrated web browsing capability — it’s easier than ever (and cheaper) to adorn your company’s front lobby, cafeteria, shop floor or other high-traffic areas with automatically-updating displays that depict important business metrics in real time. Using these TVs, or even “dumb” monitors attached to low-end PCs, key stats like sales numbers, inventory levels, picking performance, etc. can be shown to employees and guests without the old-school hassle of printing and replacing paper displays.
Using Valence’s Nitro App Builder tool, it’s a quick and simple process to create a kiosk-style app that pulls data from your IBM i database and renders the pertinent numbers in easy-to-understand gauges, charts, graphs or simple numeric displays. To keep it interesting, you can use the auto-carousel feature to have the screens rotate through various widgets at a specified pace.
To begin the process, launch the Nitro App Builder tool and create the desired data sources and accompanying widgets to render your data. If you’re new to this process, there are many informative videos available to walk you through the steps. Generally speaking, when creating an app for a monitor that’s going to be mounted on a wall somewhere, it’s important to keep the display simple. So avoid the temptation to create an elaborate grid with multiple columns that will be difficult to read from afar. Instead, focus on charts, graphs and larger KPI display widgets that can be quickly grasped by your viewing audience.
When you’re ready to assemble your widgets into an app, keep the “less is more” principle in mind. That is, avoid overly busy displays by being careful not to stuff too many widgets into a single page. This is where the auto-carousel option can provide a handy way to rotate through widgets, with a short pause between each page. The “Valence Dashboard” sample app provides an example of an auto-carousel in action. You can see it by launching the app and waiting 10 seconds for the section to rotate.
To activate the carousel option on your app, create one section for each page of widget(s) you want to show (the first section is named “Main” for reference; subsequent sections you add can be renamed to whatever you want), then check the Enable box inside the Carousel Sections field set located directly below the list of sections:

Click the Configure cogwheel that appears when you check the box and you’ll see the following configuration options:
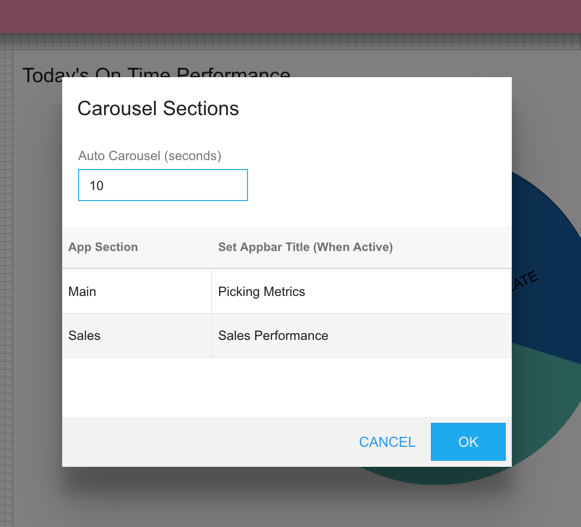
Here you set the number of seconds each section should be shown, along with an optional override to the app title at the top of the screen when the section is displayed.
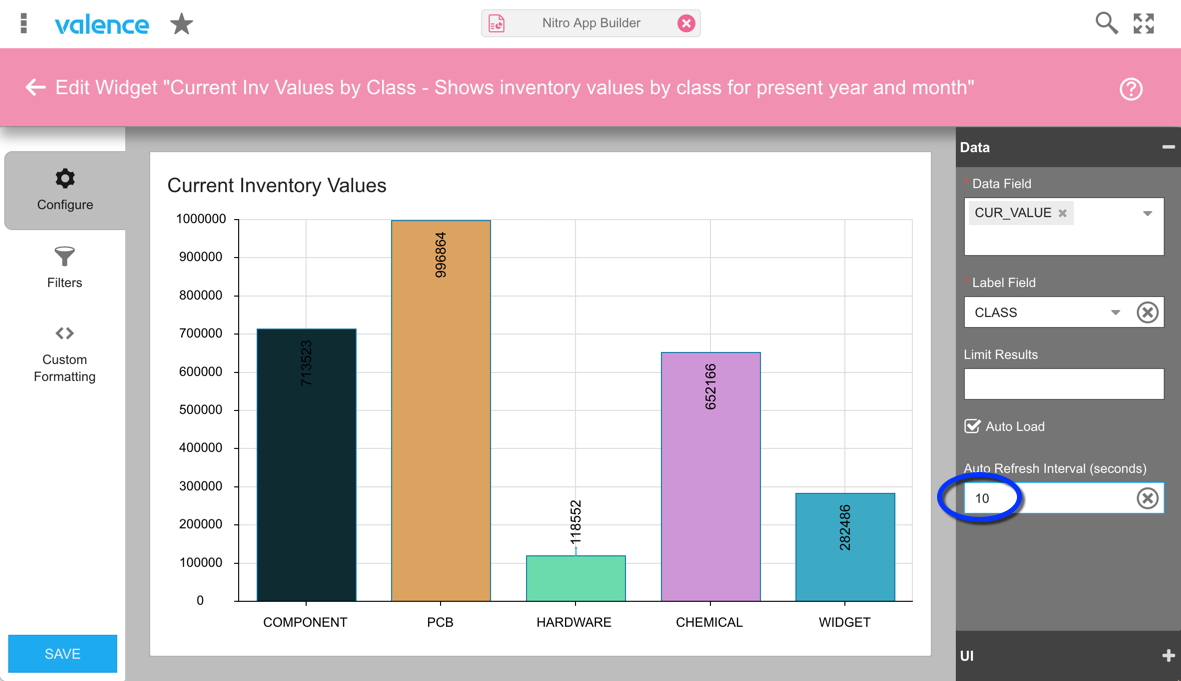
Keep in mind that there must be a regular call made to your IBM i server to refresh the data being displayed in your app, otherwise the portal session will eventually be automatically logged out, based on the timeout threshold specified in Portal Admin > Settings > Session Options > “Session kill timeout for desktop.” When you have two or more sections being carouseled, the widgets on each section are automatically refreshed whenever the section changes, thereby preventing the auto-logout from occurring. However in cases where your app consists of a single, non-carouseled section of widgets, you must set at least one of the widgets being displayed to have an auto refresh interval, as illustrated here:
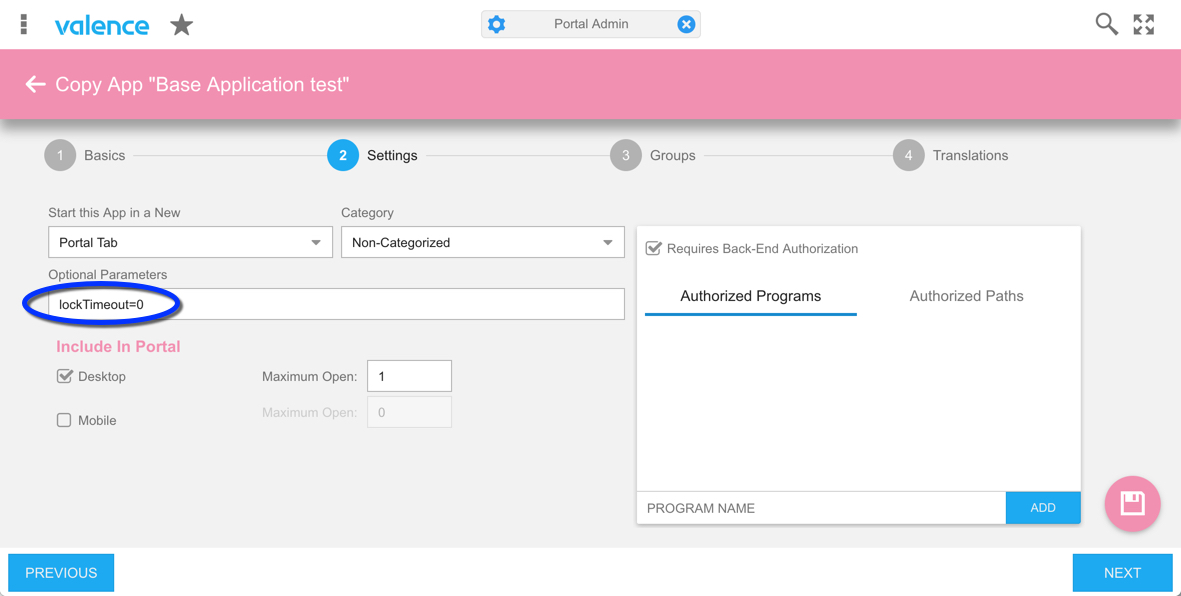
Another factor to consider is the session lock that occurs whenever a session has had no active user activity, like a mouse click, for the duration of time specified in Portal Admin > Settings > Session Options > “Session lock timeout for desktop.” To keep your kiosk app running in the portal session indefinitely without this session lock kicking in, you should override the session lock timeout on the app configuration. To do this, call up your app in Portal Admin > Apps and add “lockTimeout=0” to the Optional Parameters section on the Settings tab, as shown here:
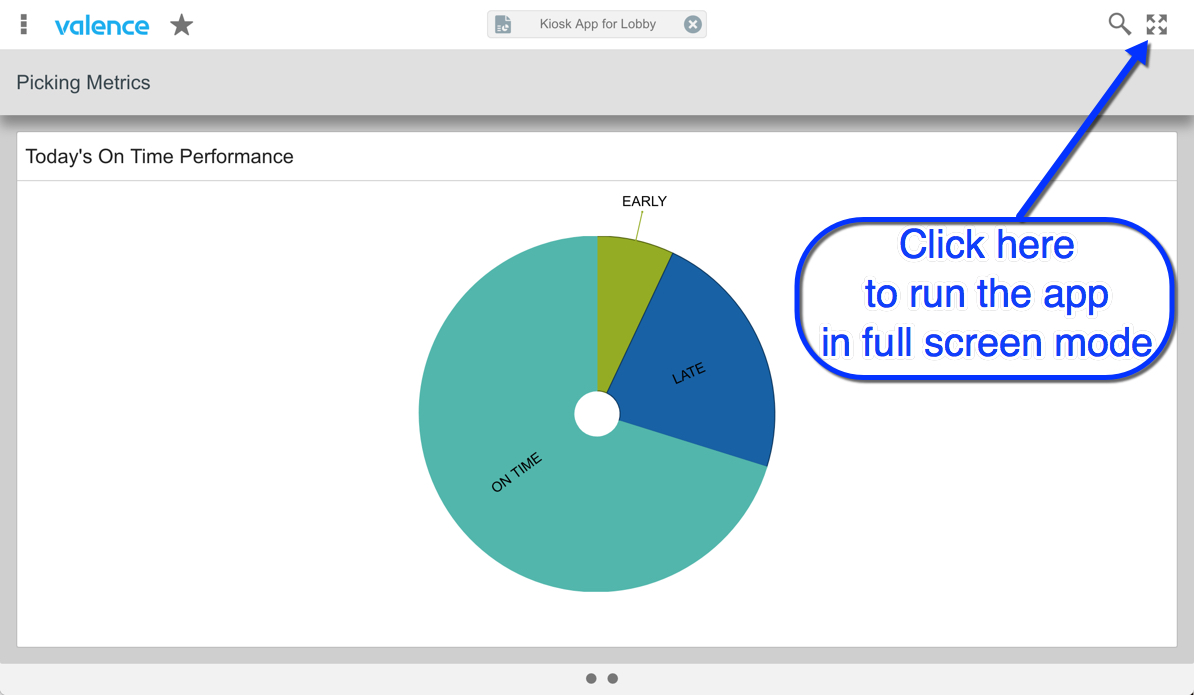
With all the above steps completed, you’re ready to log in, launch the app and walk away, confident that the app will stay on display indefinitely for your viewing audience. To hide the URL bar of the browser tab, be sure to click the full screen icon in the upper right of the portal after launching the app: