In most cases, grid applications developed with Nitro App Builder have static columns that never need to change. That is, a “Customer Number” column will always hold the customer number or customer ID; a “Product Number” column will always hold the item number or SKU, etc.
But in some cases you may have grid columns that, ideally, would have different column headings depending on the type of data being rendered.

For example, suppose your company has a file that holds sales numbers for recent periods or months. With static columns, your headings would have to be something generic like “Current Period”, “Current Period -1”, “Current Period -2”, etc.; This may not be intuitive enough for some users.
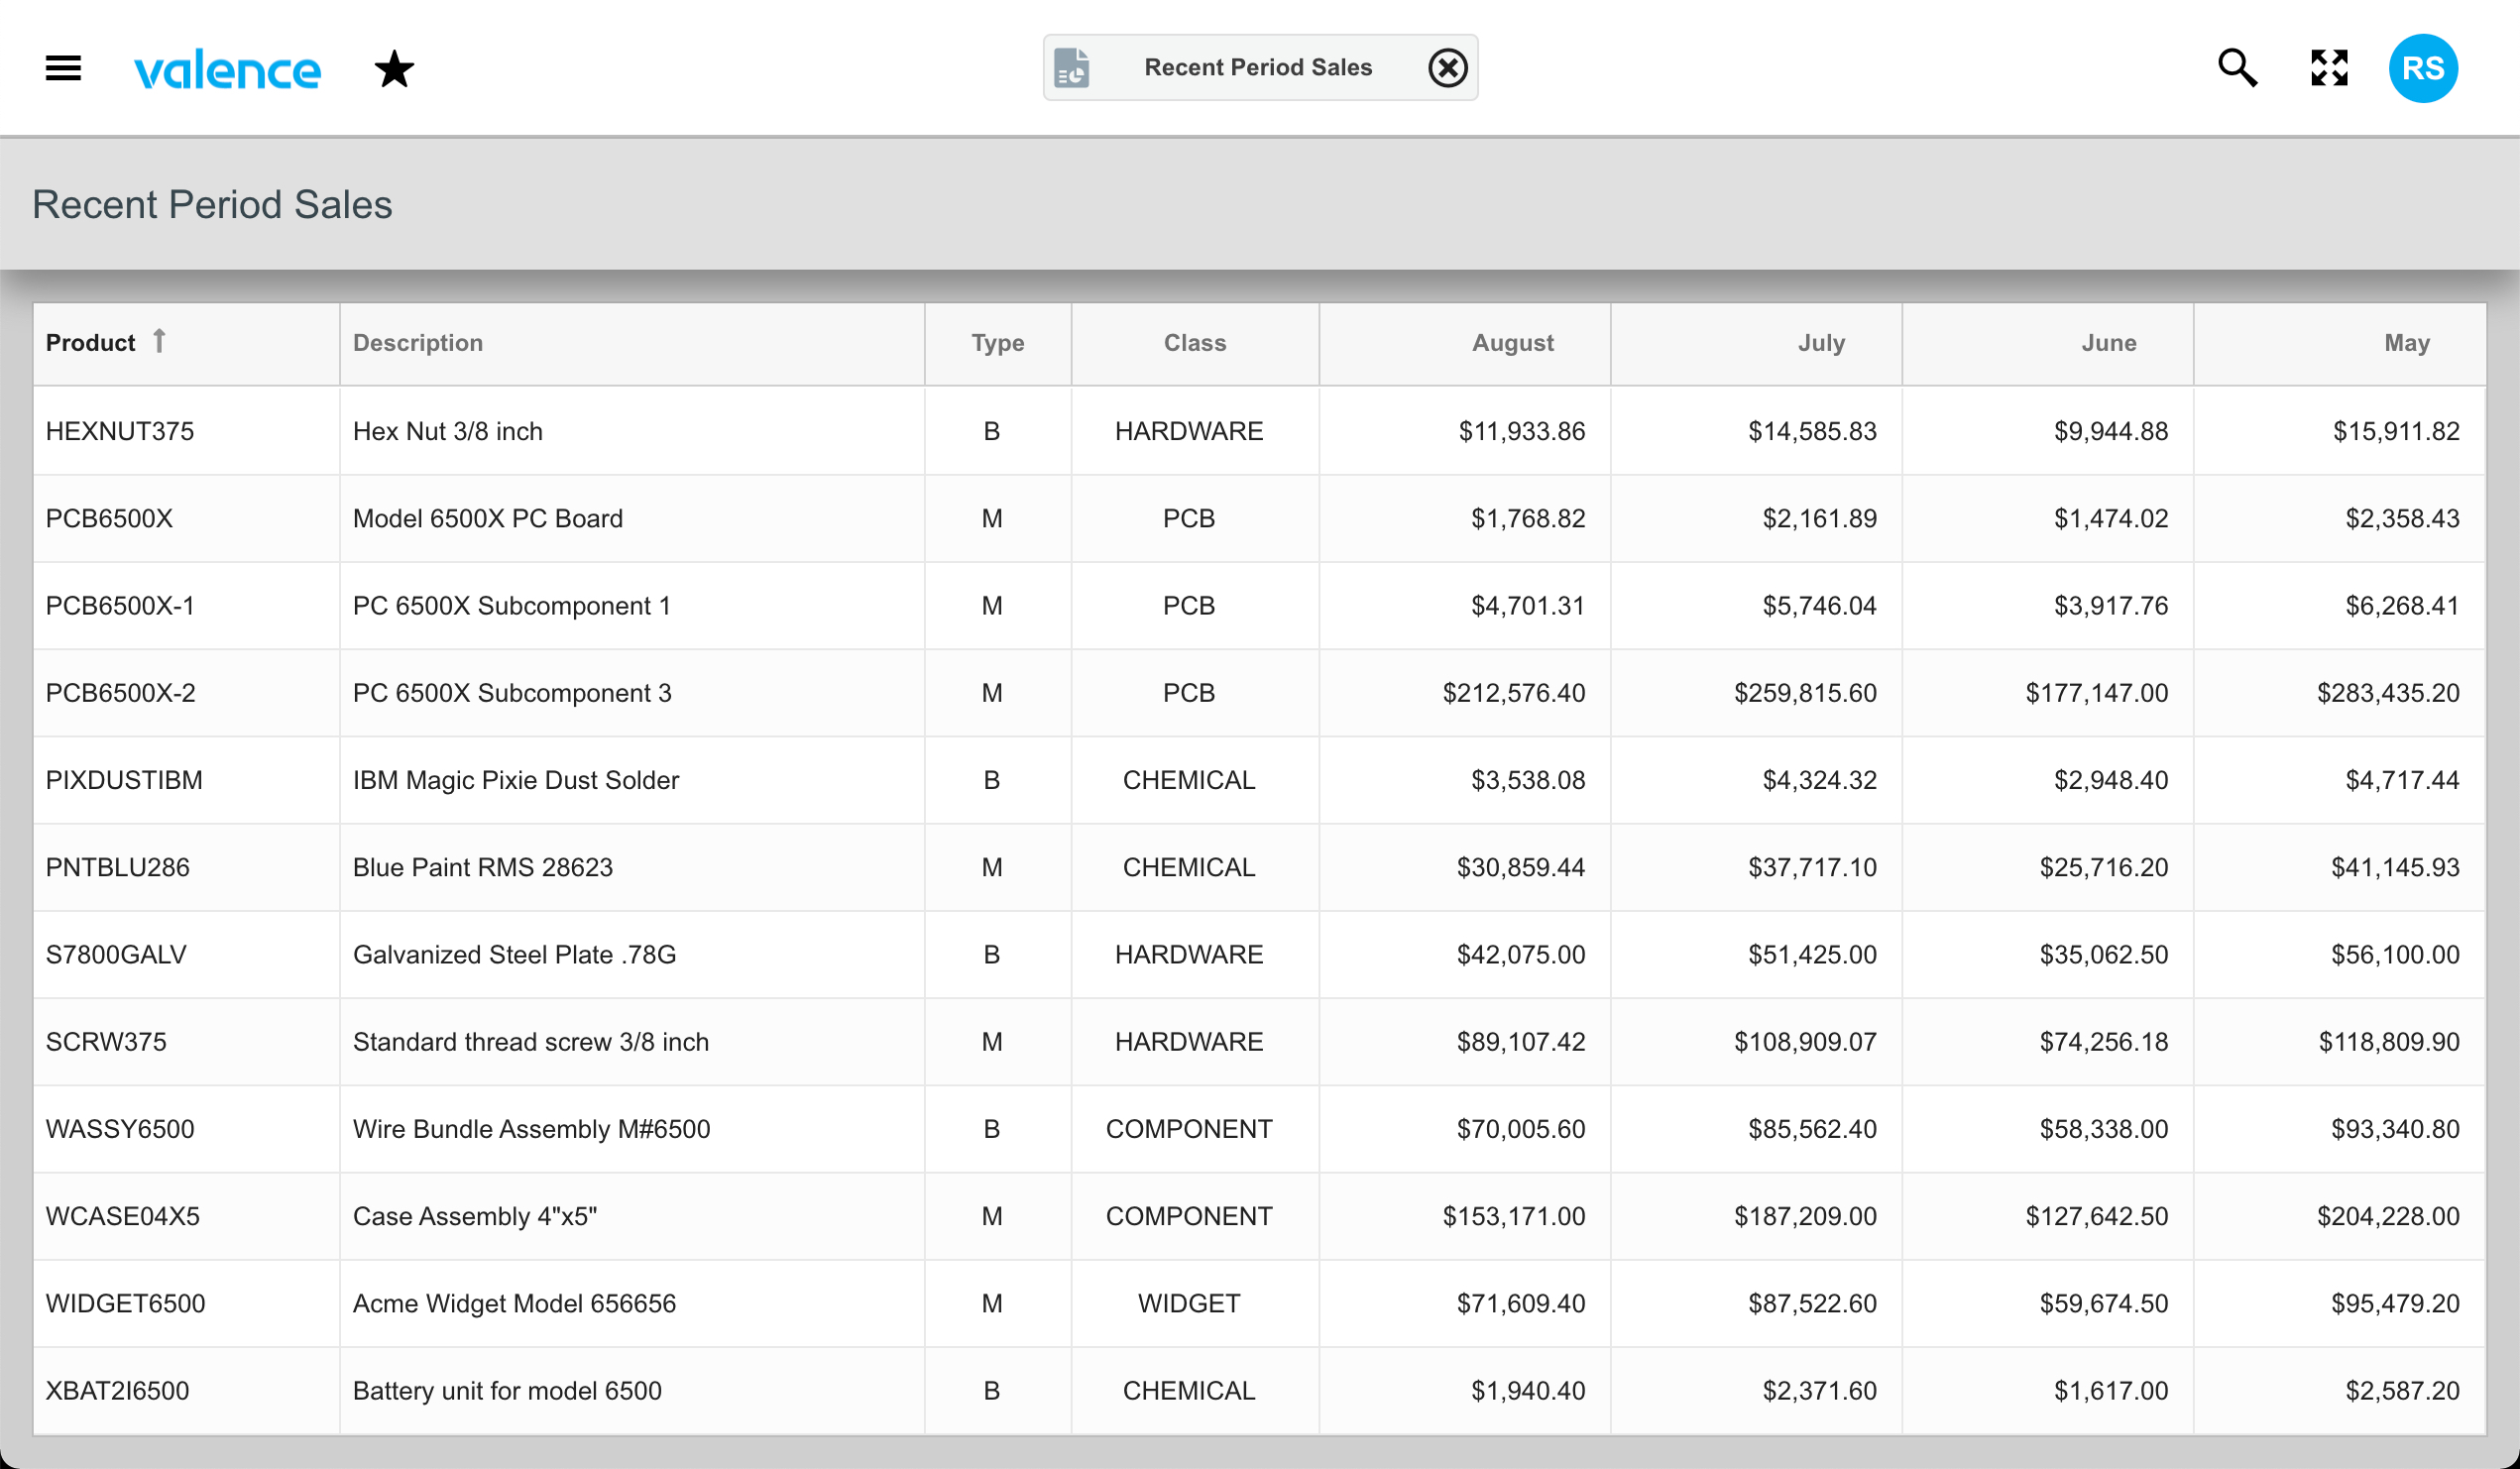
Fortunately, beginning with Valence build 6.0.20210818.1, you can now override column headings using App Variables. This makes it possible to replace static column headings with labels that more accurately describe the underlying data being displayed (i.e., “August”, “July”, “June”, etc.).
To illustrate by example using this “recent period sales grid” scenario, let’s create a simple table to hold some imaginary sales data for the past four months, beginning with the current month. First we’ll go into STRSQL and define the table:
create table qgpl/sales_data
             (product character(15),
              sales_p0 decimal(11,2),
              sales_p1 decimal(11,2),
              sales_p2 decimal(11,2),
              sales_p3 decimal(11,2))
Next we’ll plug in some random sales data, using the sample product master file DEMOPMAST to drive it:
insert into qgpl/sales_data
(select prdno, price*onhand*0.9,
               price*onhand*1.1,
               price*onhand*0.7,
               price*onhand*1.2
   from valence6/demopmast)
Resulting in a file or recent sales numbers by product/period that looks like this:

Now we’re ready to build our app. To start, we’ll create an SQL-based data source over our SALES_DATA file to pull in the four recent periods of sales for our products, along with some ancillary data from DEMOPMAST. The SQL statement will be fairly simple:
select product, descp, type, class,
       sales_p0, sales_p1, sales_p2, sales_p3,
  from qgpl/sales_data
       inner join demopmast on prdno=product
 order by product
Next, we’ll pop this data source into a simple grid widget, making some minor tweaks to the renderers, resulting in a list that looks something like this (note that the sales column headings retain their generic field names, for now):
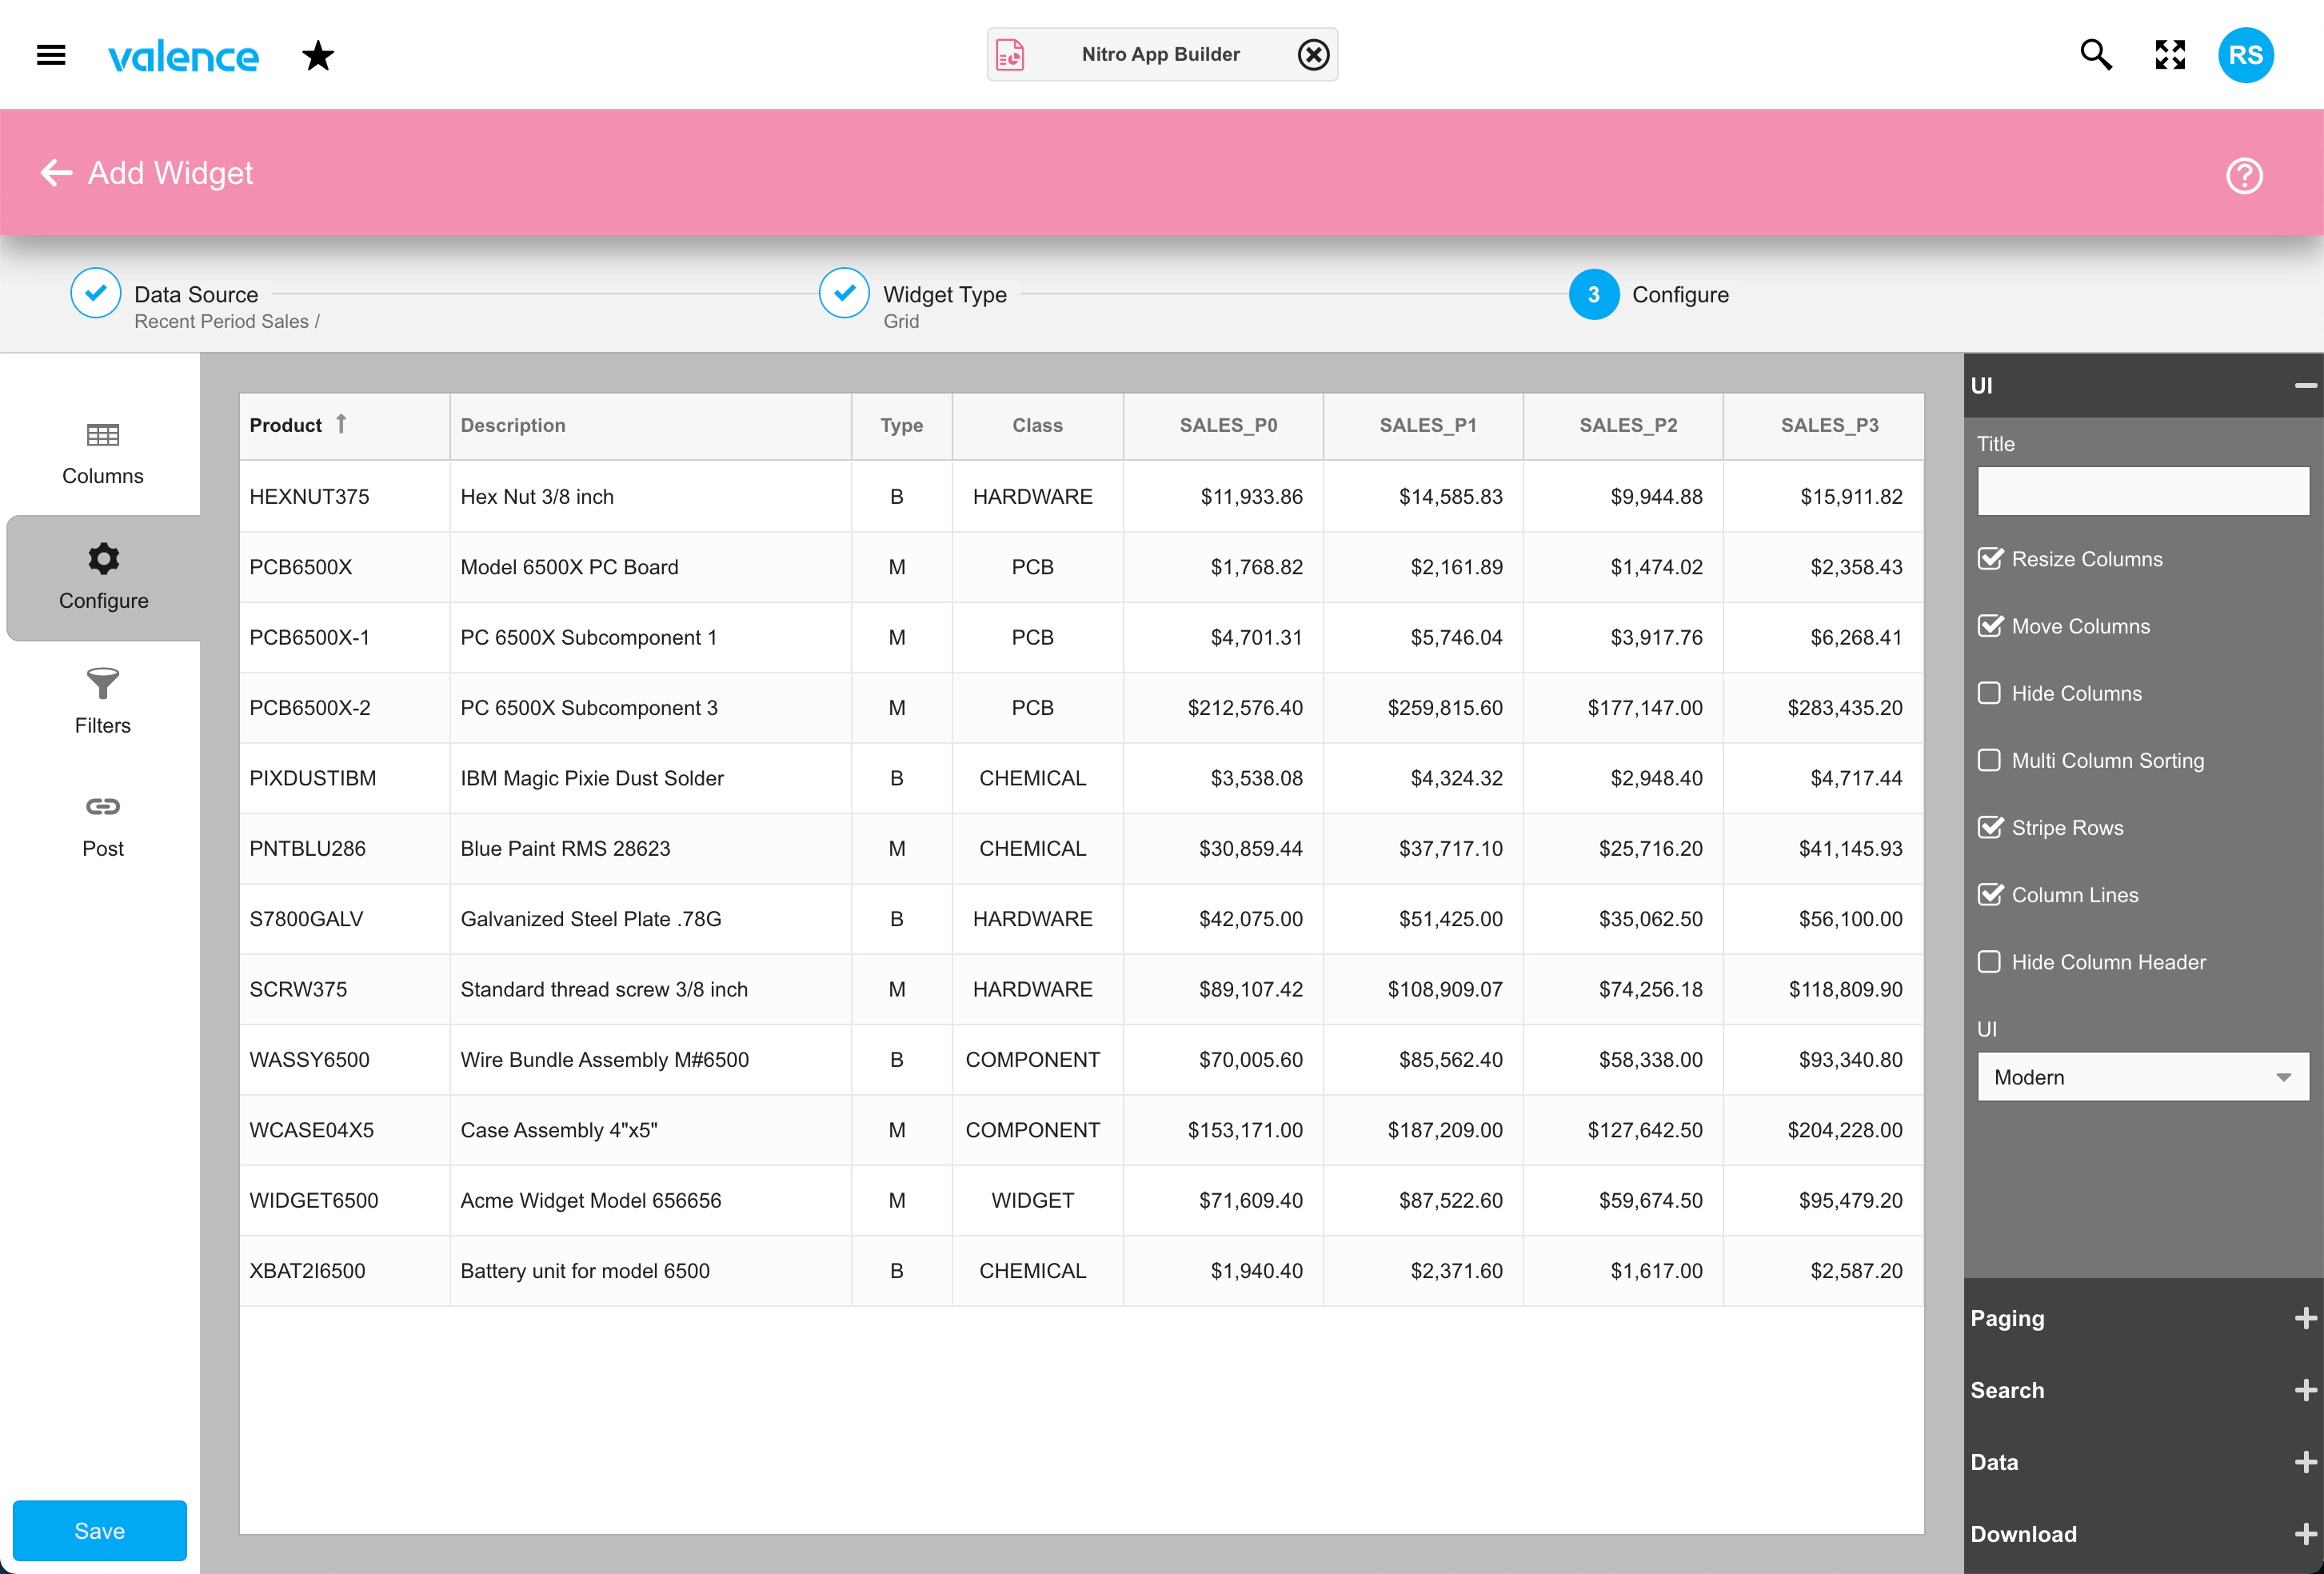
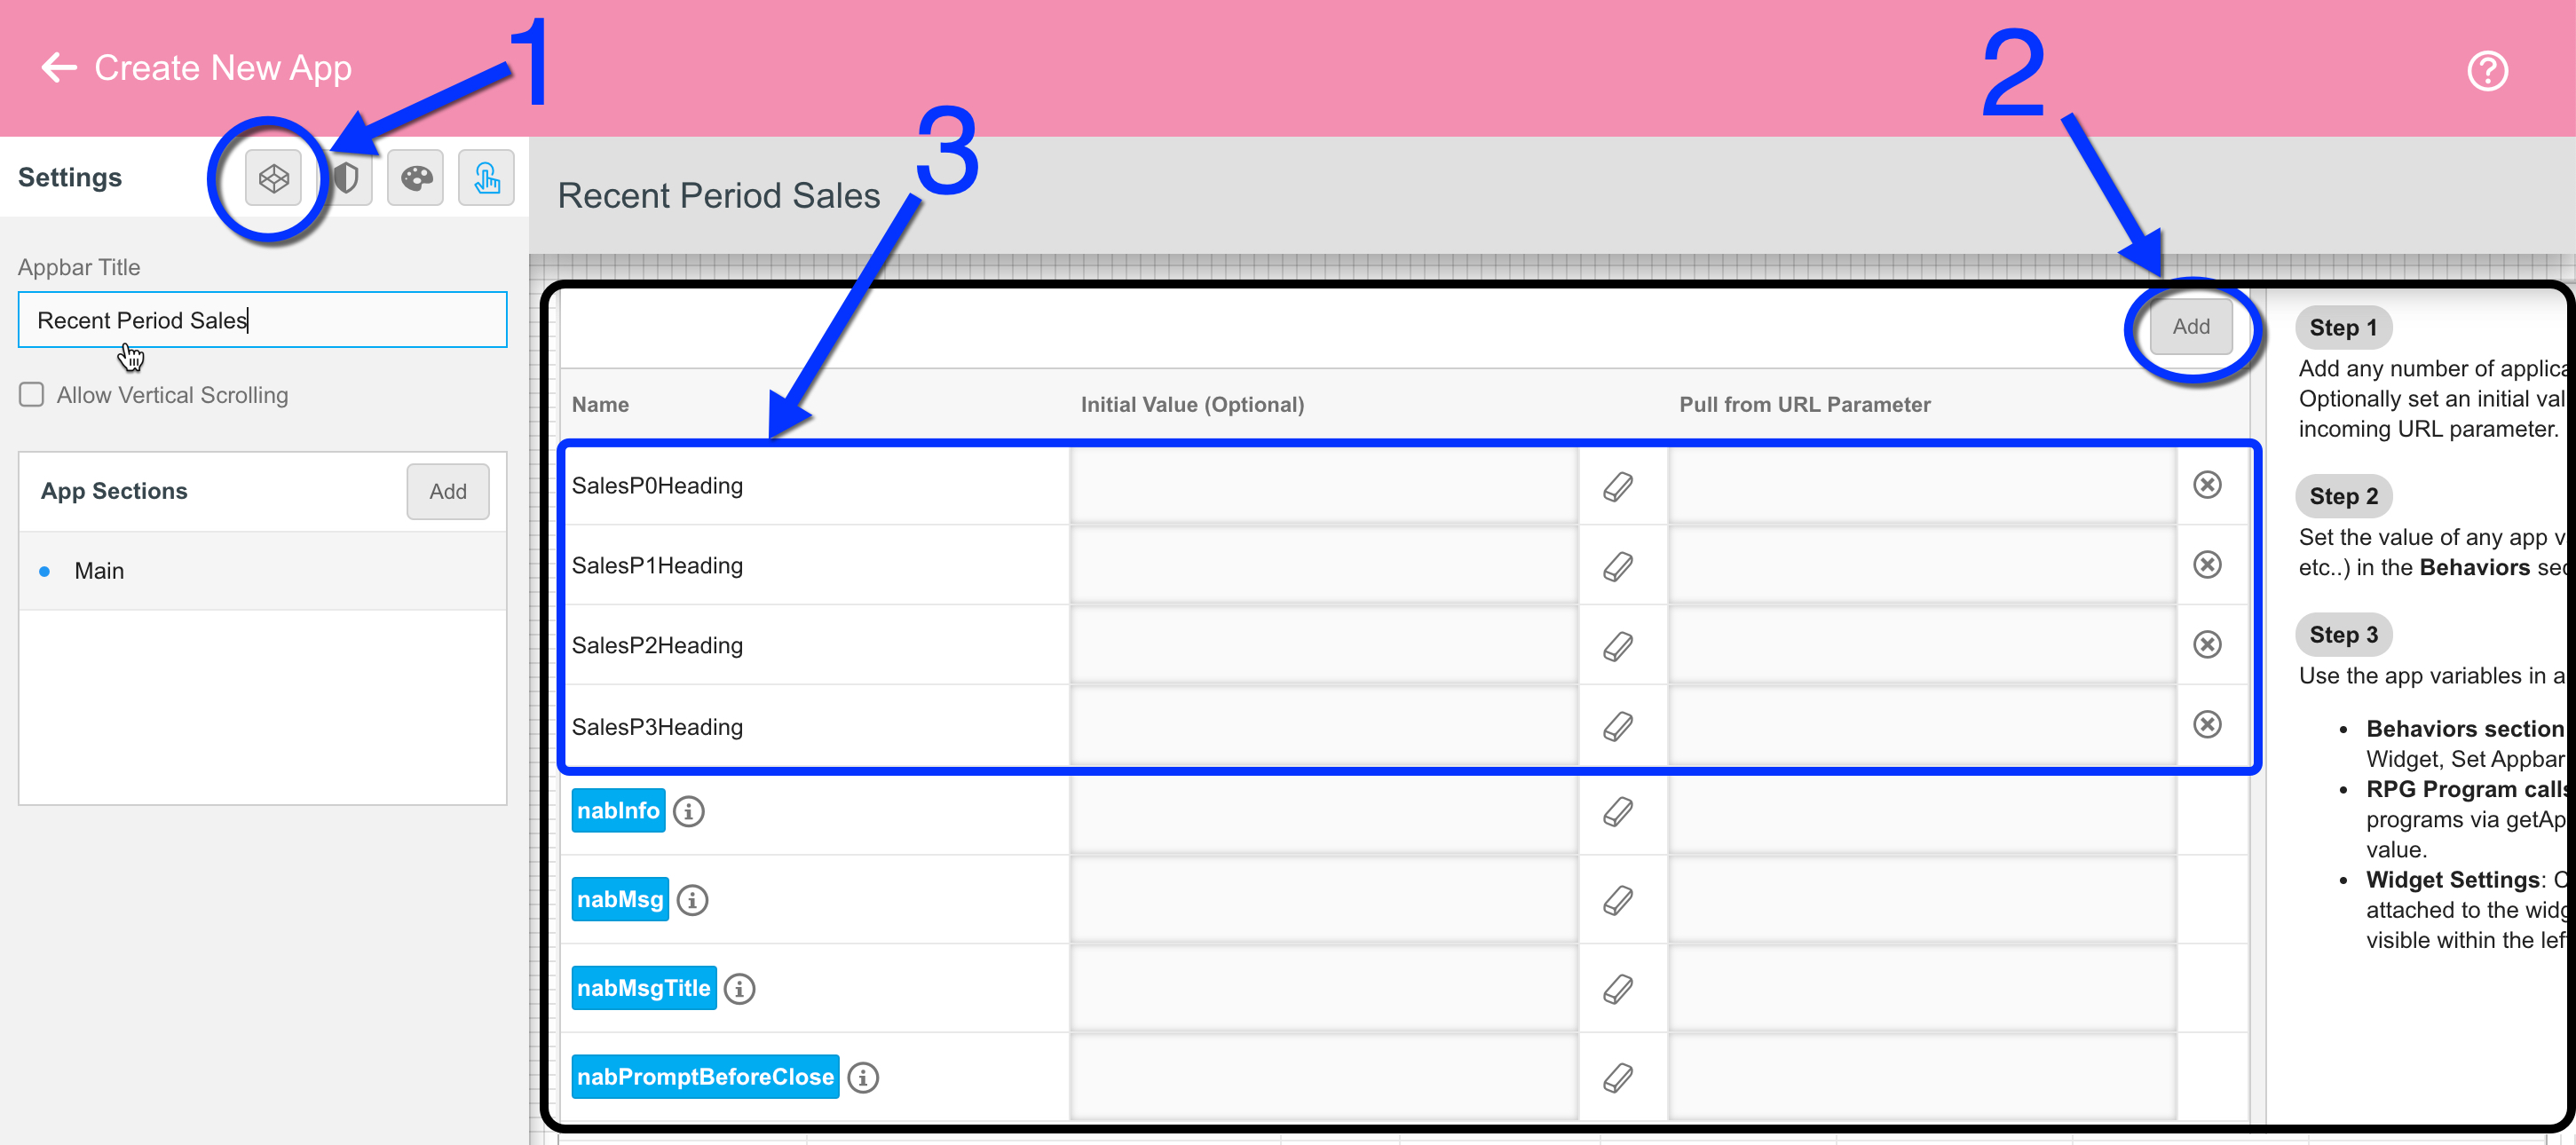
After saving the widget, we’ll move on to creating the app, which is where the column heading override logic will come into play. With our newly created widget added to the app, the first step is to create new App Variables for the column heading overrides. For clarity we’ll create variable names that are similar to the associated columns — SalesP0Heading, SalesP1Heading, SalesP2Heading, SalesP3Heading — as illustrated here:
Now we need to link these App Variables to the corresponding columns. So click on the cogwheel icon on the grid widget and then click on the “Link to App Variables” button, as illustrated here:
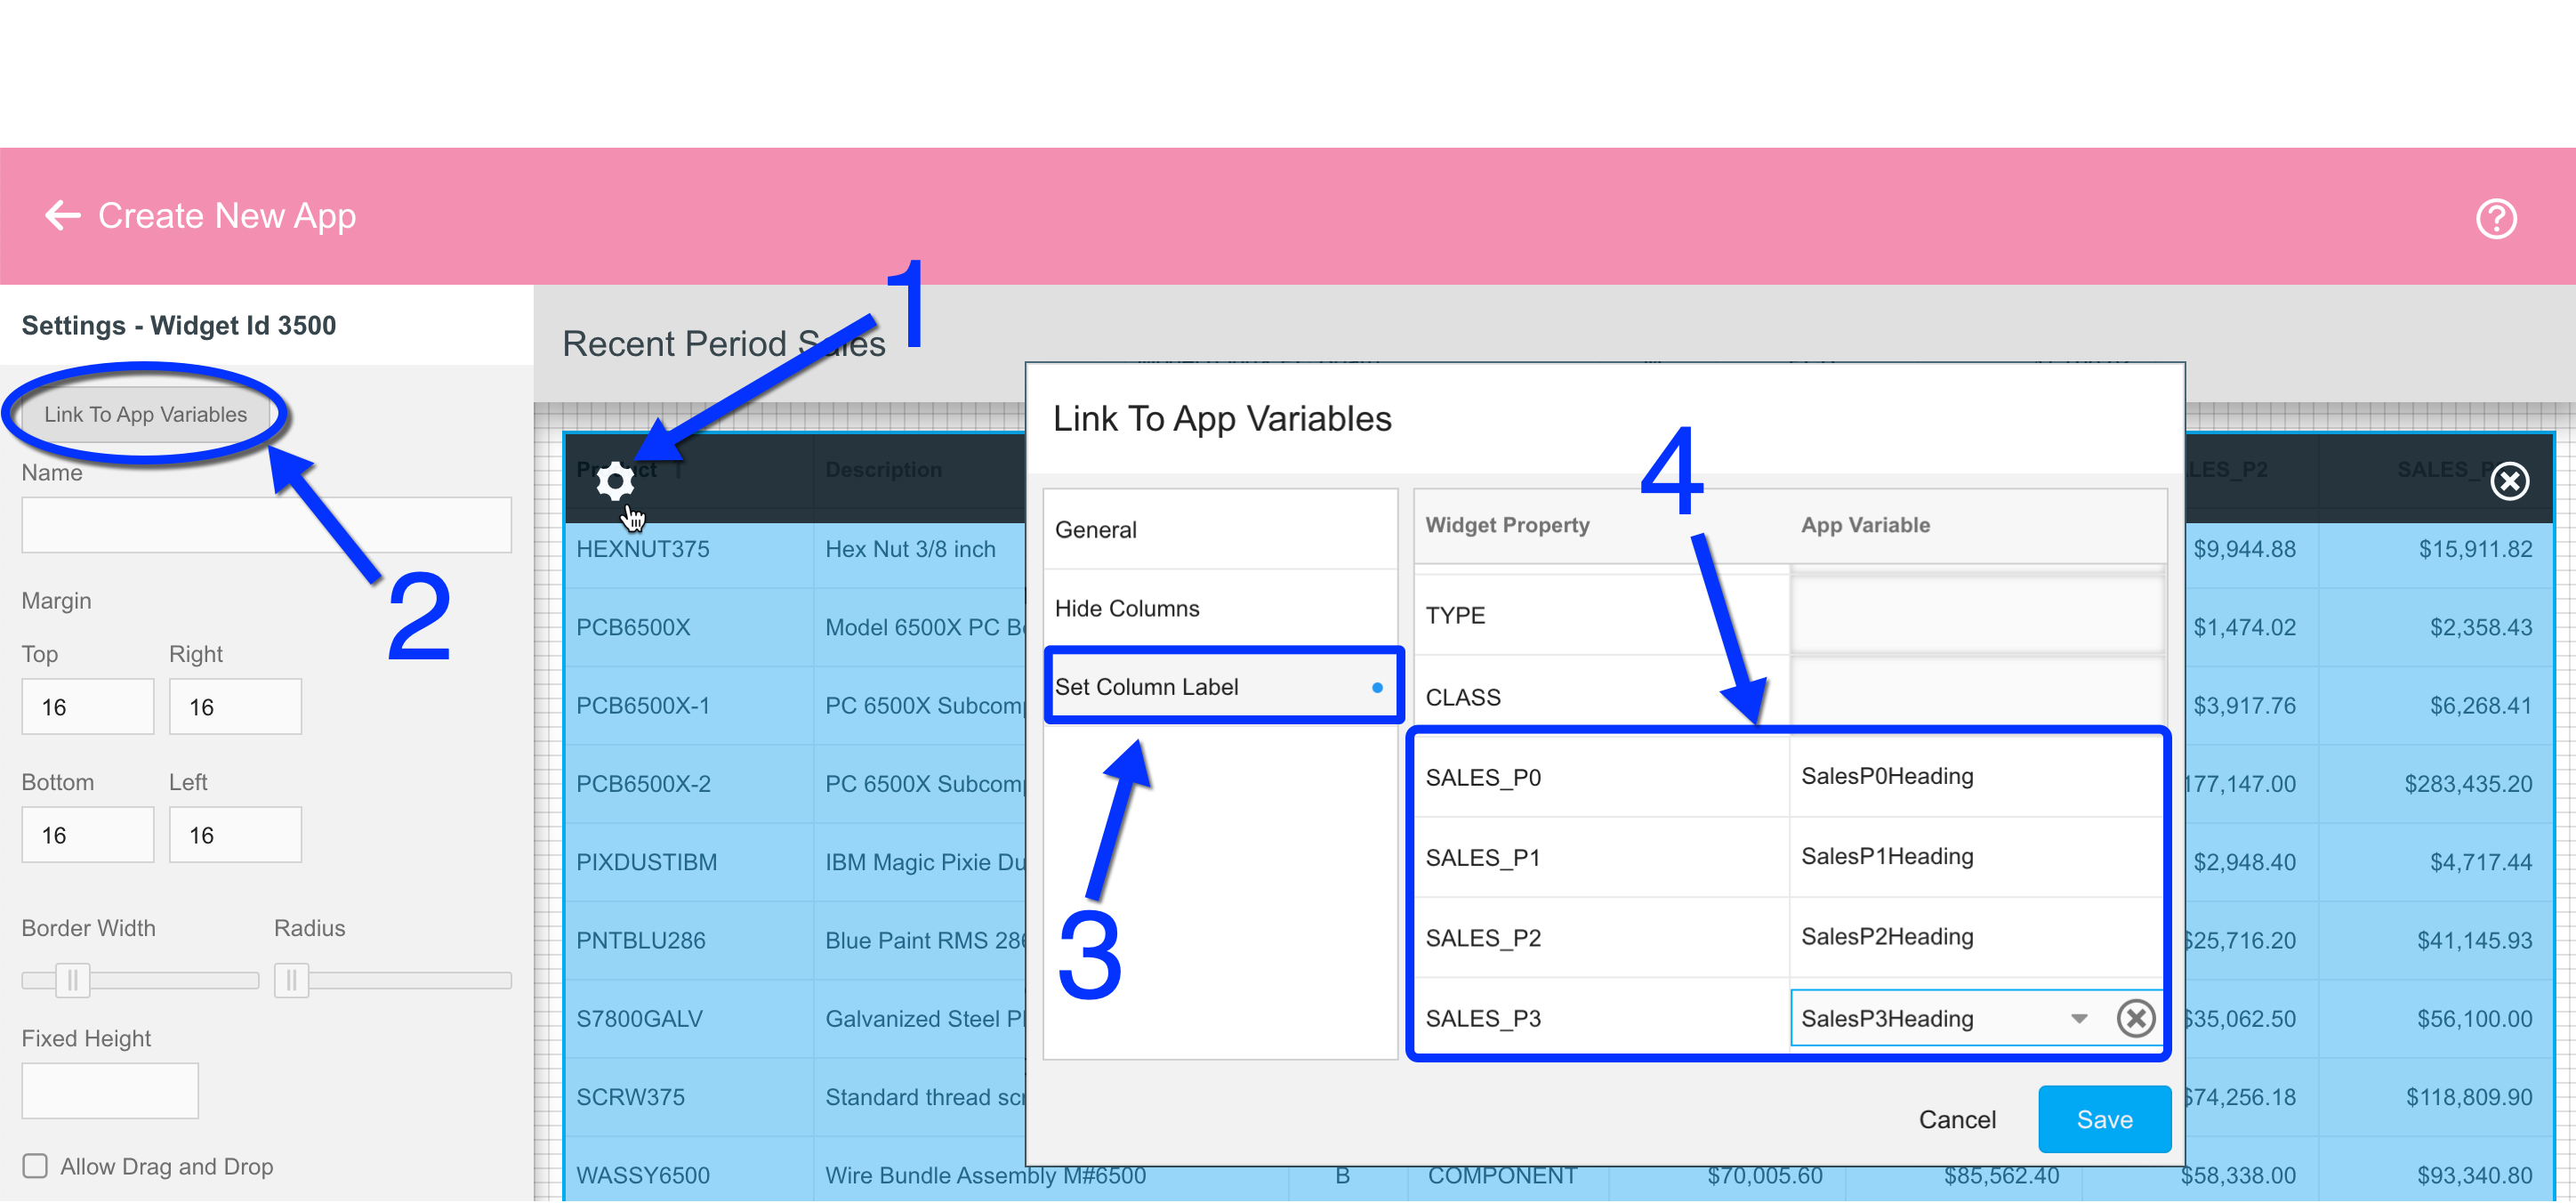
The final step is to create a simple RPG start-up program that will be called when the app is launched to override these column heading App Variables whenever the app is launched. We’ll use the EXNABSTART source code as our template. With sales_p0 reflecting the current period or month, sales_p1 being the prior month, sales_p2 being two months prior, etc, our RPG program uses some embedded SQL to set the column heading names accordingly:
** --------------------------------------------------------------
p Process         b
d                 pi
d P0heading       s             15a
d P1heading       s             15a
d P2heading       s             15a
d P3heading       s             15a

  exec sql set :P0heading = monthName(current_date),
               :P1heading = monthName(current_date - 1 month),
               :P2heading = monthName(current_date - 2 months),
               :P3heading = monthName(current_date - 3 months);
  setAppVar('SalesP0Heading':P0heading);
  setAppVar('SalesP1Heading':P1heading);
  setAppVar('SalesP2Heading':P2heading);
  setAppVar('SalesP3Heading':P3heading);
p                 e
(Note that this is just illustrating one way to derive the month names; you could of course use other logic besides SQL).
After saving the source member with its own unique name and compiling, the last step is to tell NAB the name of the start-up program. This goes in the Security tab of the app (we’ve named it EXCOLHOVR here):
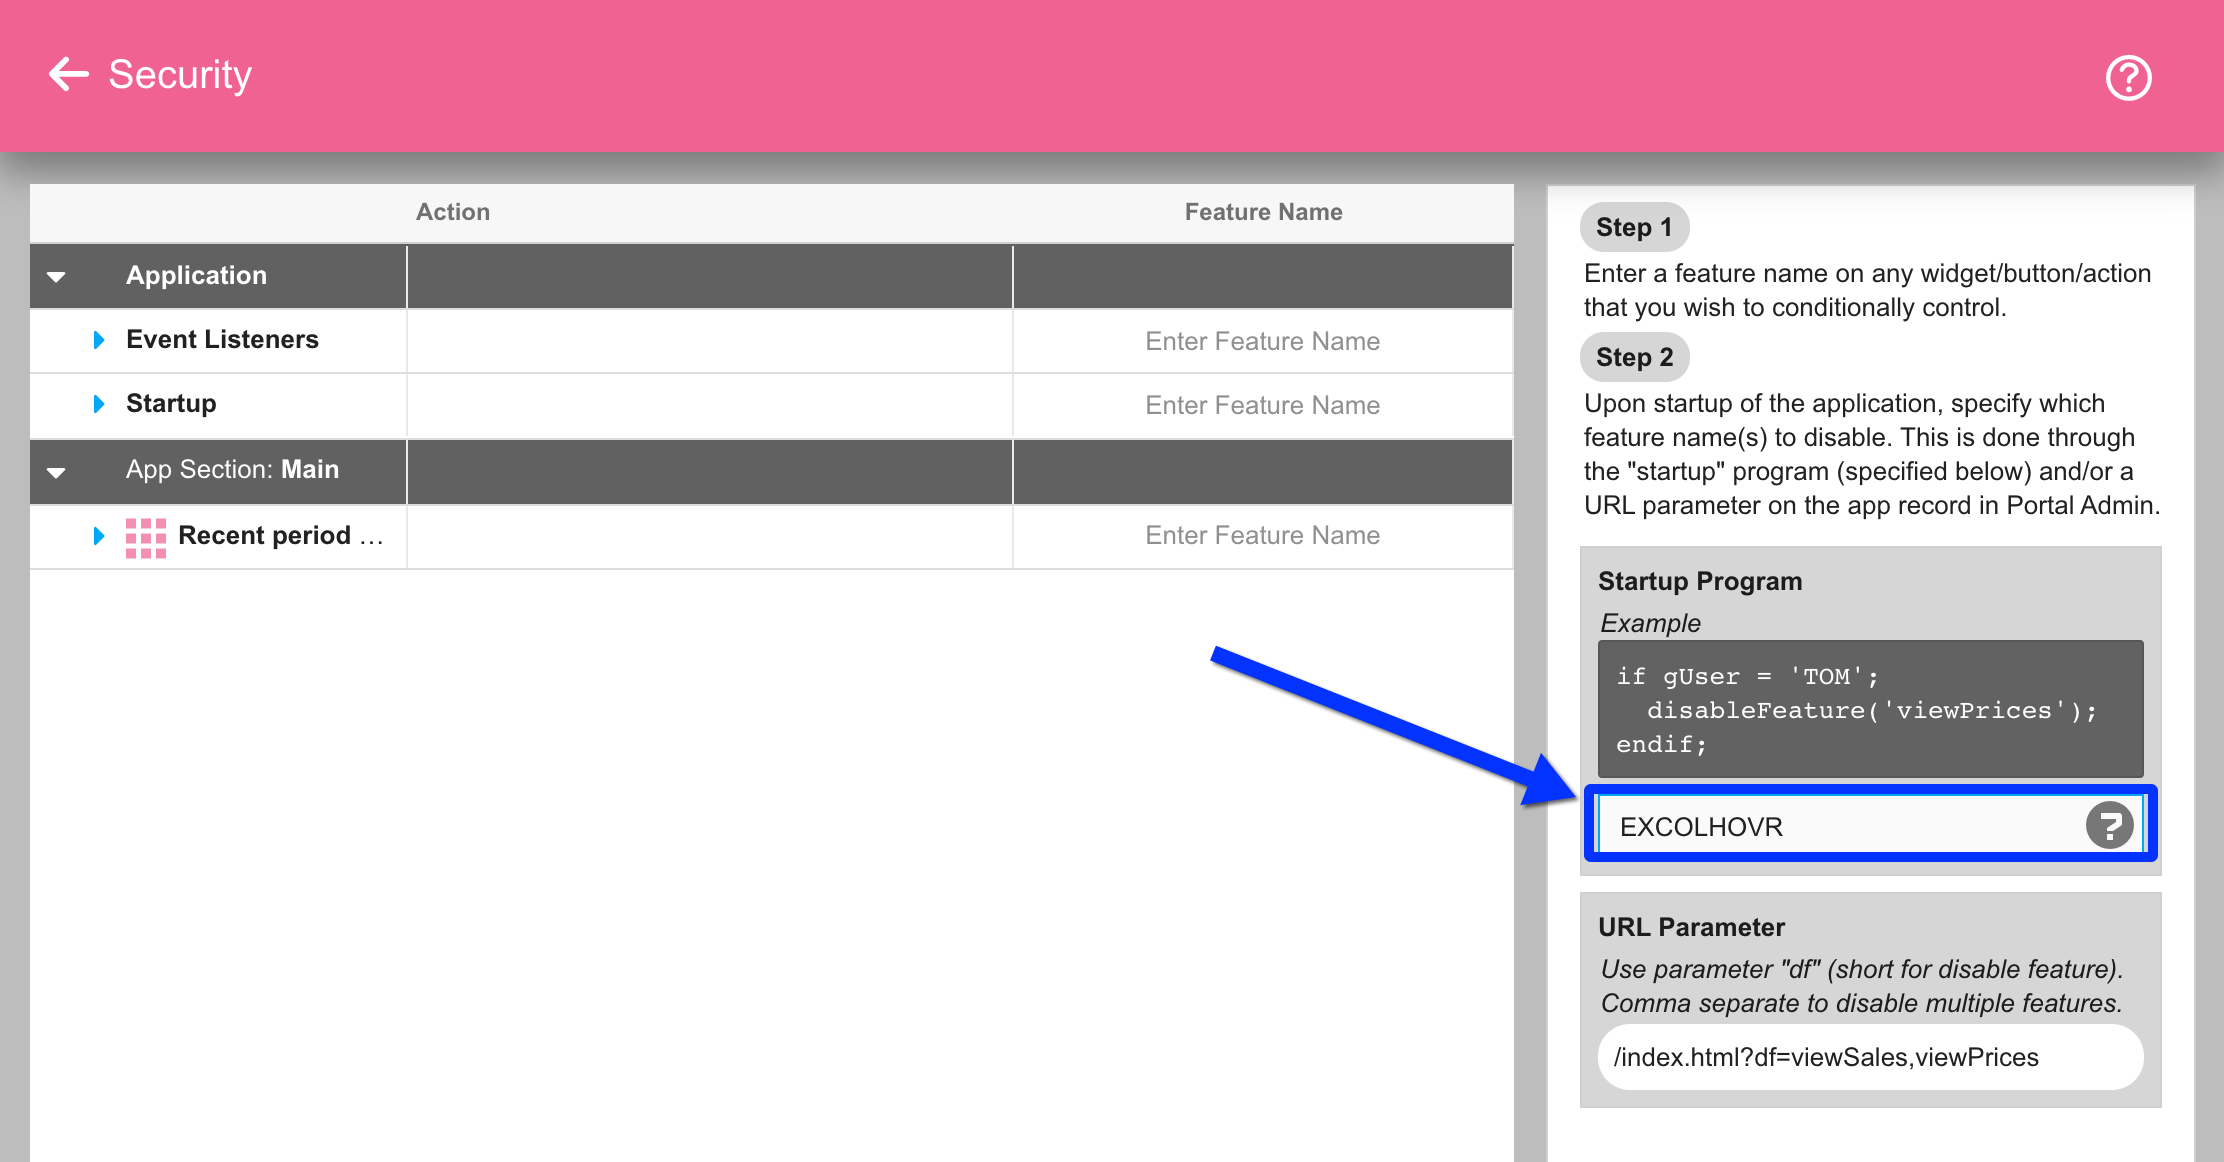
With the app saved, we can now launch it and see that the generic period column headings have been overridden with some easier-to-understand headings for our users.
You could apply this column heading override concept in other ways as well. For instance, you could add a button to your app that causes the grid to reload with some slightly different data, calling a program (modeled after EXNABBTN) to override the App Variables as needed.
![CNX_logo [Converted]](https://0pkef6.p3cdn1.secureserver.net/wp-content/uploads/2023/05/CNX_logo-Converted-2.png?time=1722004789)
![CNX_logo [Converted]](https://0pkef6.p3cdn1.secureserver.net/wp-content/uploads/2023/05/CNX_logo-Converted.png?time=1722004789)