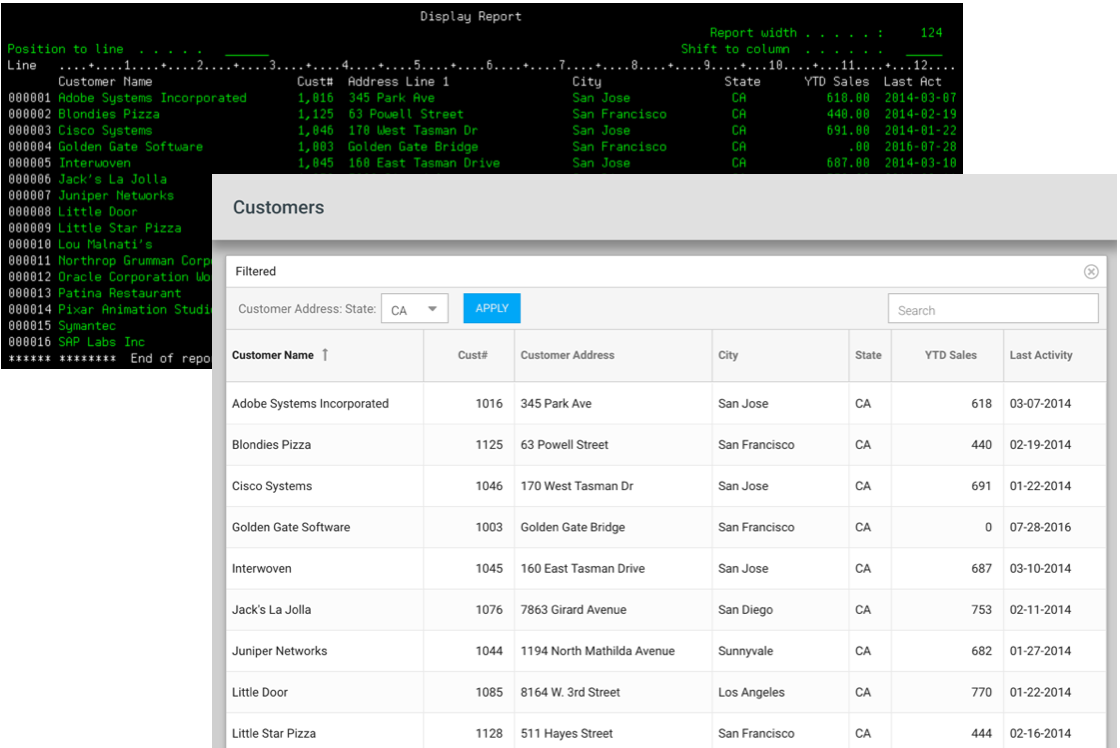
The tried and true IBM i Query Utility (as accessed via STRQRY or WRKQRY) is mainstay in many IBM i shops.

But it goes without saying that the user interface associated with the configuration and the output of an IBM i Query leaves a bit to be desired. This is particularly true when users must navigate through the query’s definition to change selection or sort criteria. So wouldn’t it be convenient if you could easily take any IBM i Query definition from the green screen world and instantly convert it into a Nitro Query Data Source, thereby making it possible to build intuitive grid apps with download-to-Excel functionality? Well with Valence 5.1, this is now possible!

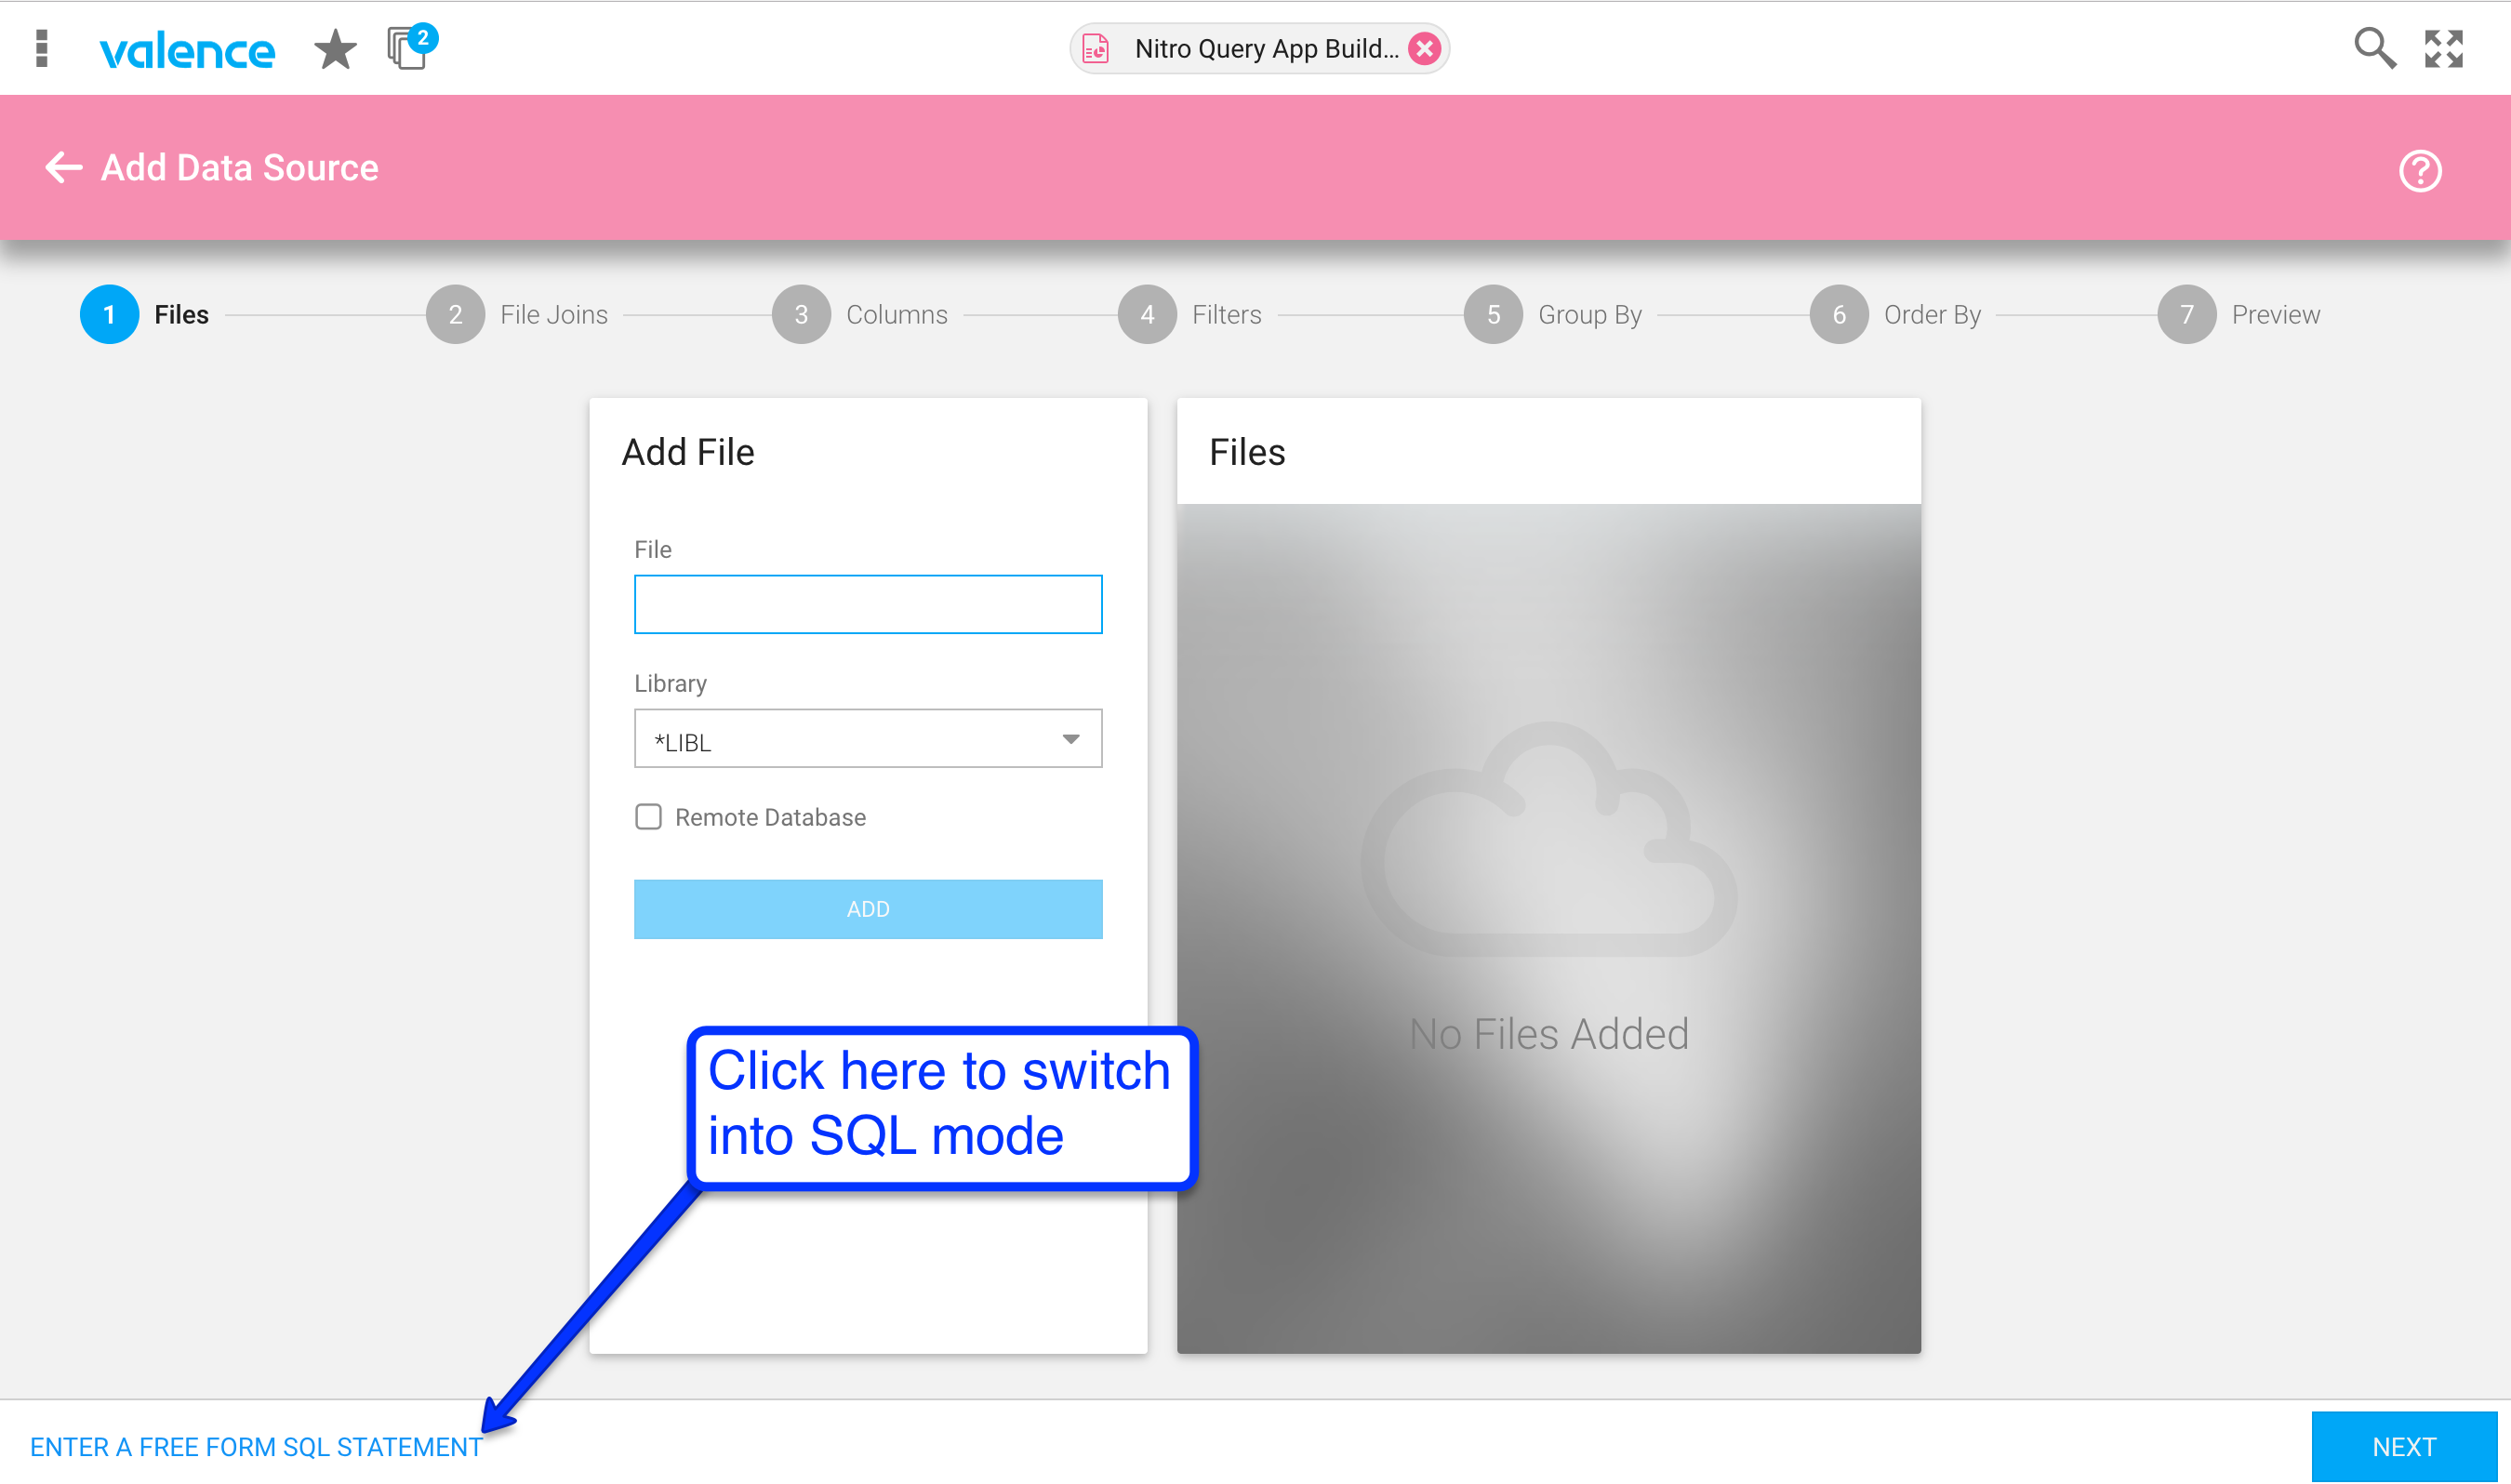
The process is actually quite simple. When you launch Nitro Query App Builder in Valence 5.1 and go to create a new data source, you can now switch into “SQL Mode” by clicking on the “ENTER A FREE FORM SQL STATEMENT” link in the lower left.

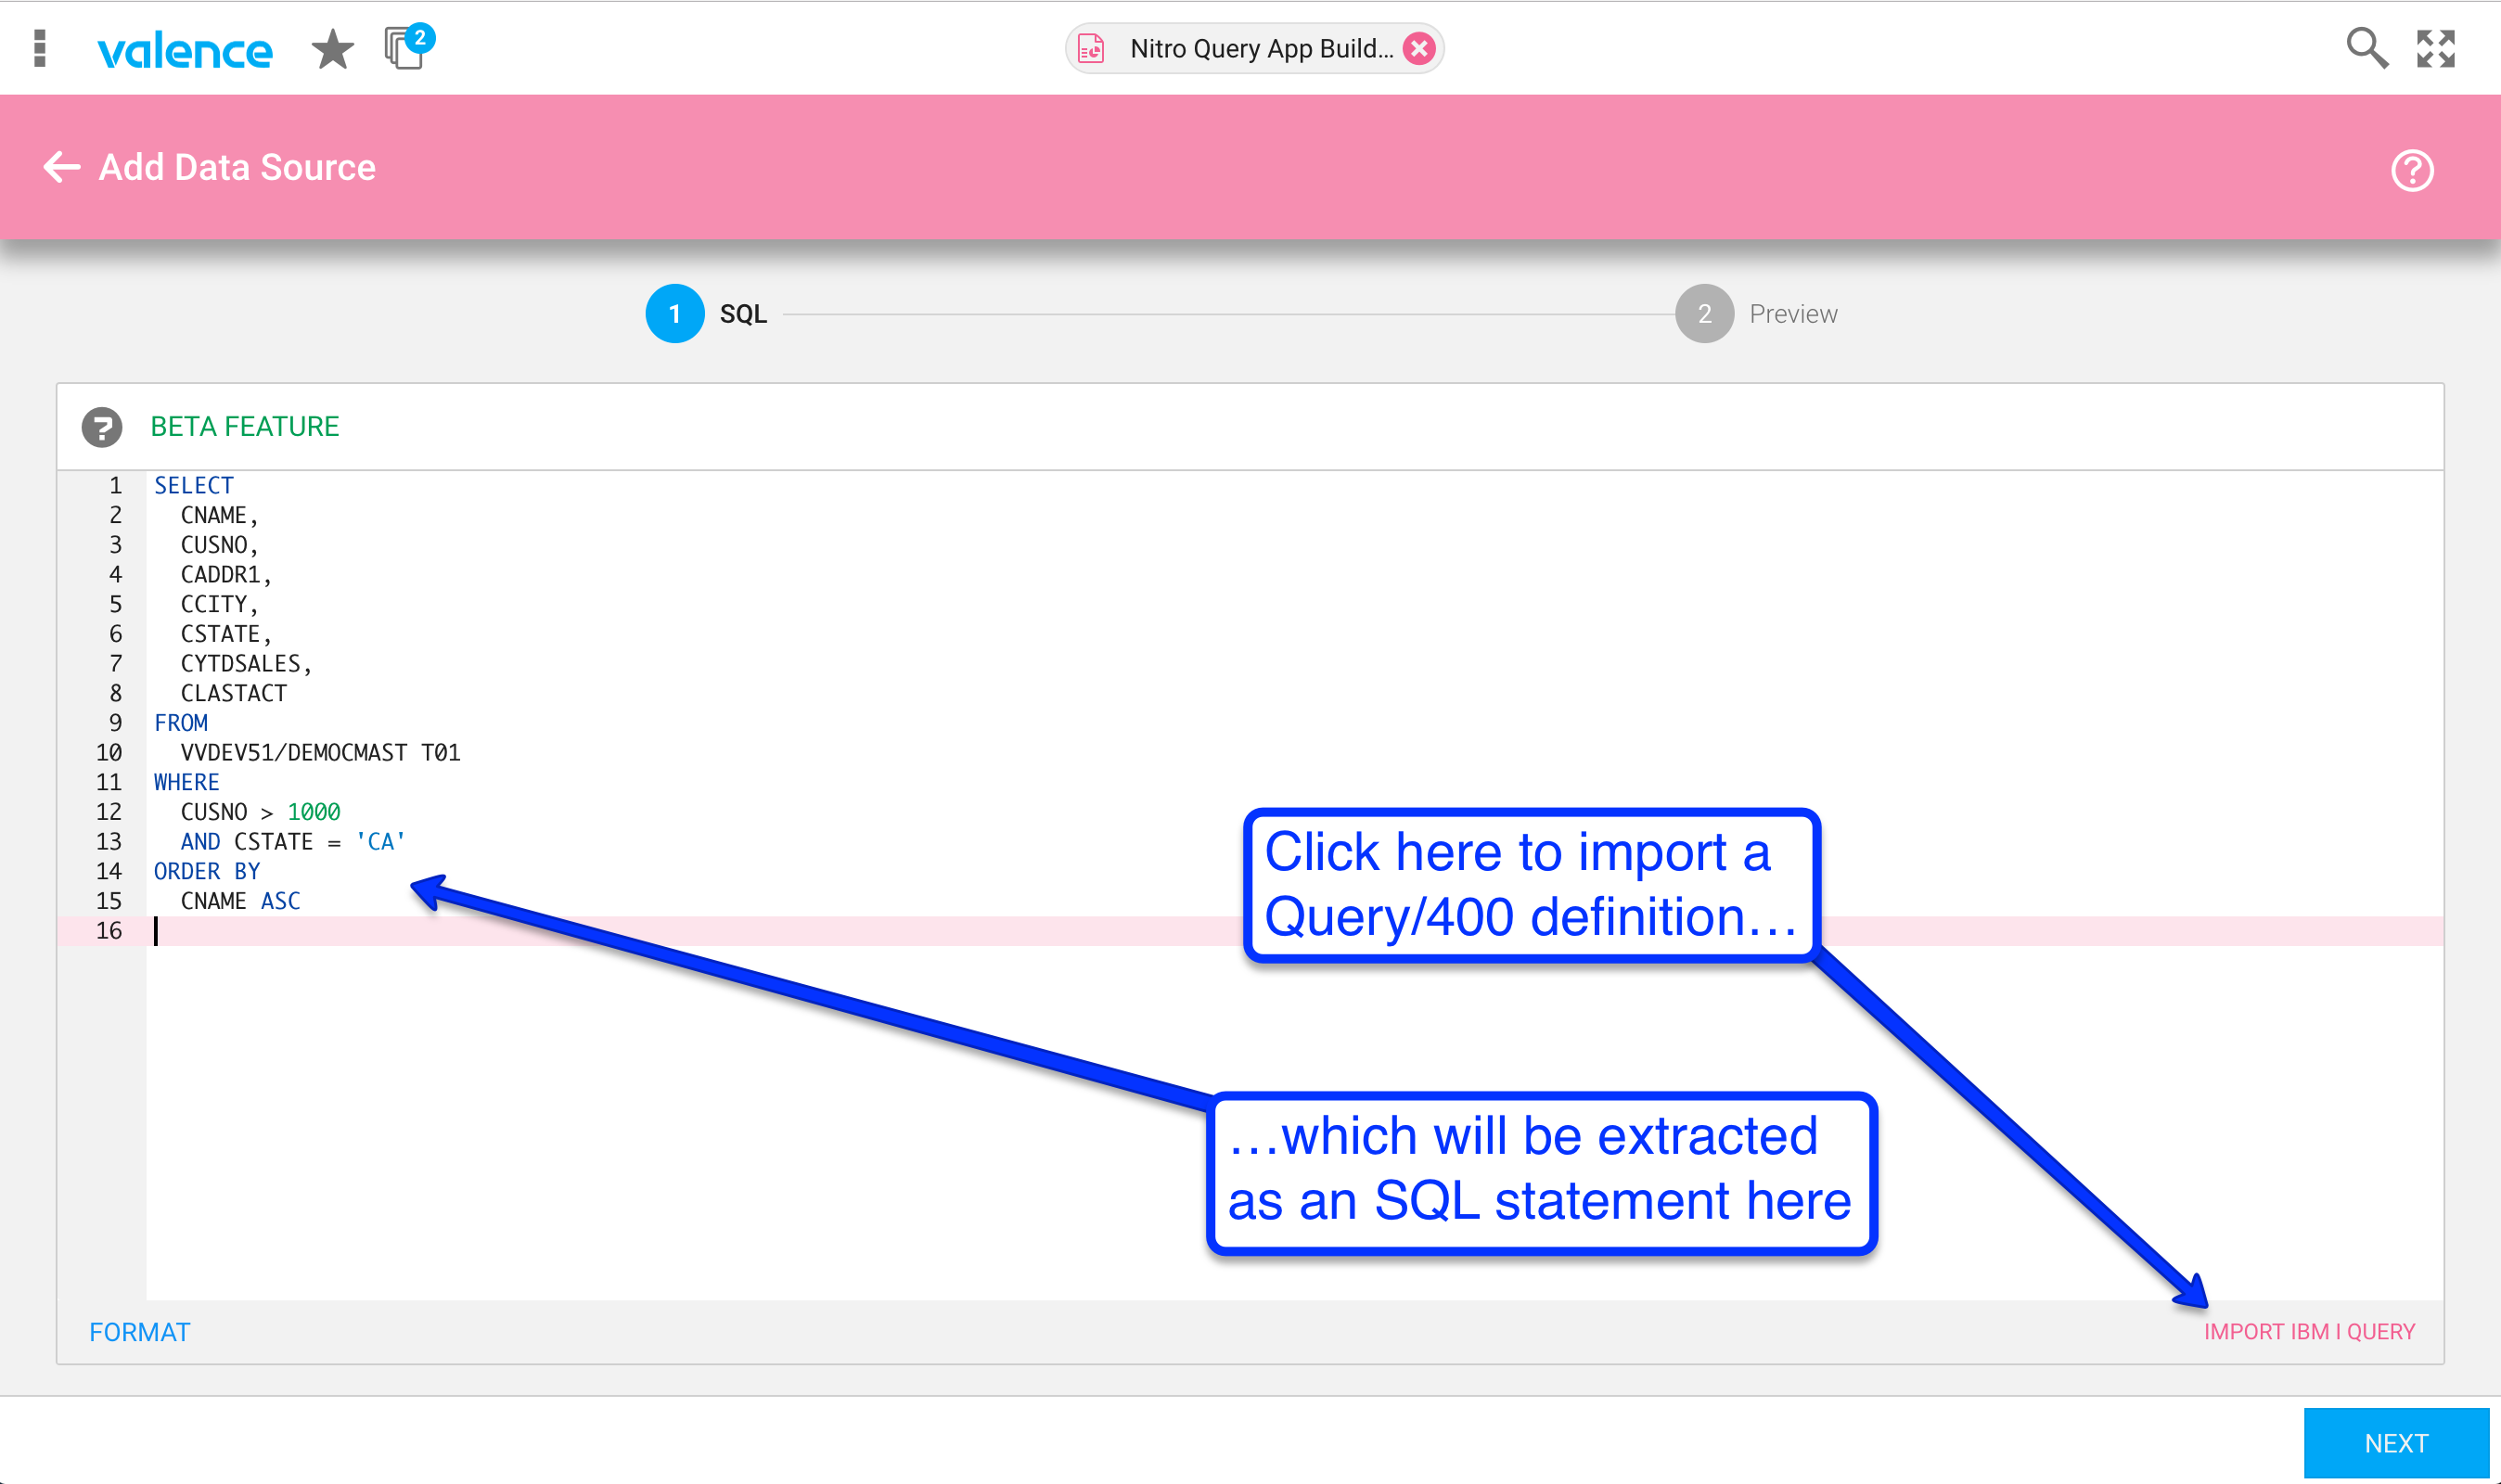
When in SQL Mode, you may import a green screen query definition by clicking on the “IMPORT IBM I QUERY” link in the lower right. This will extract the Query definition in the form of an SQL statement, as shown here:

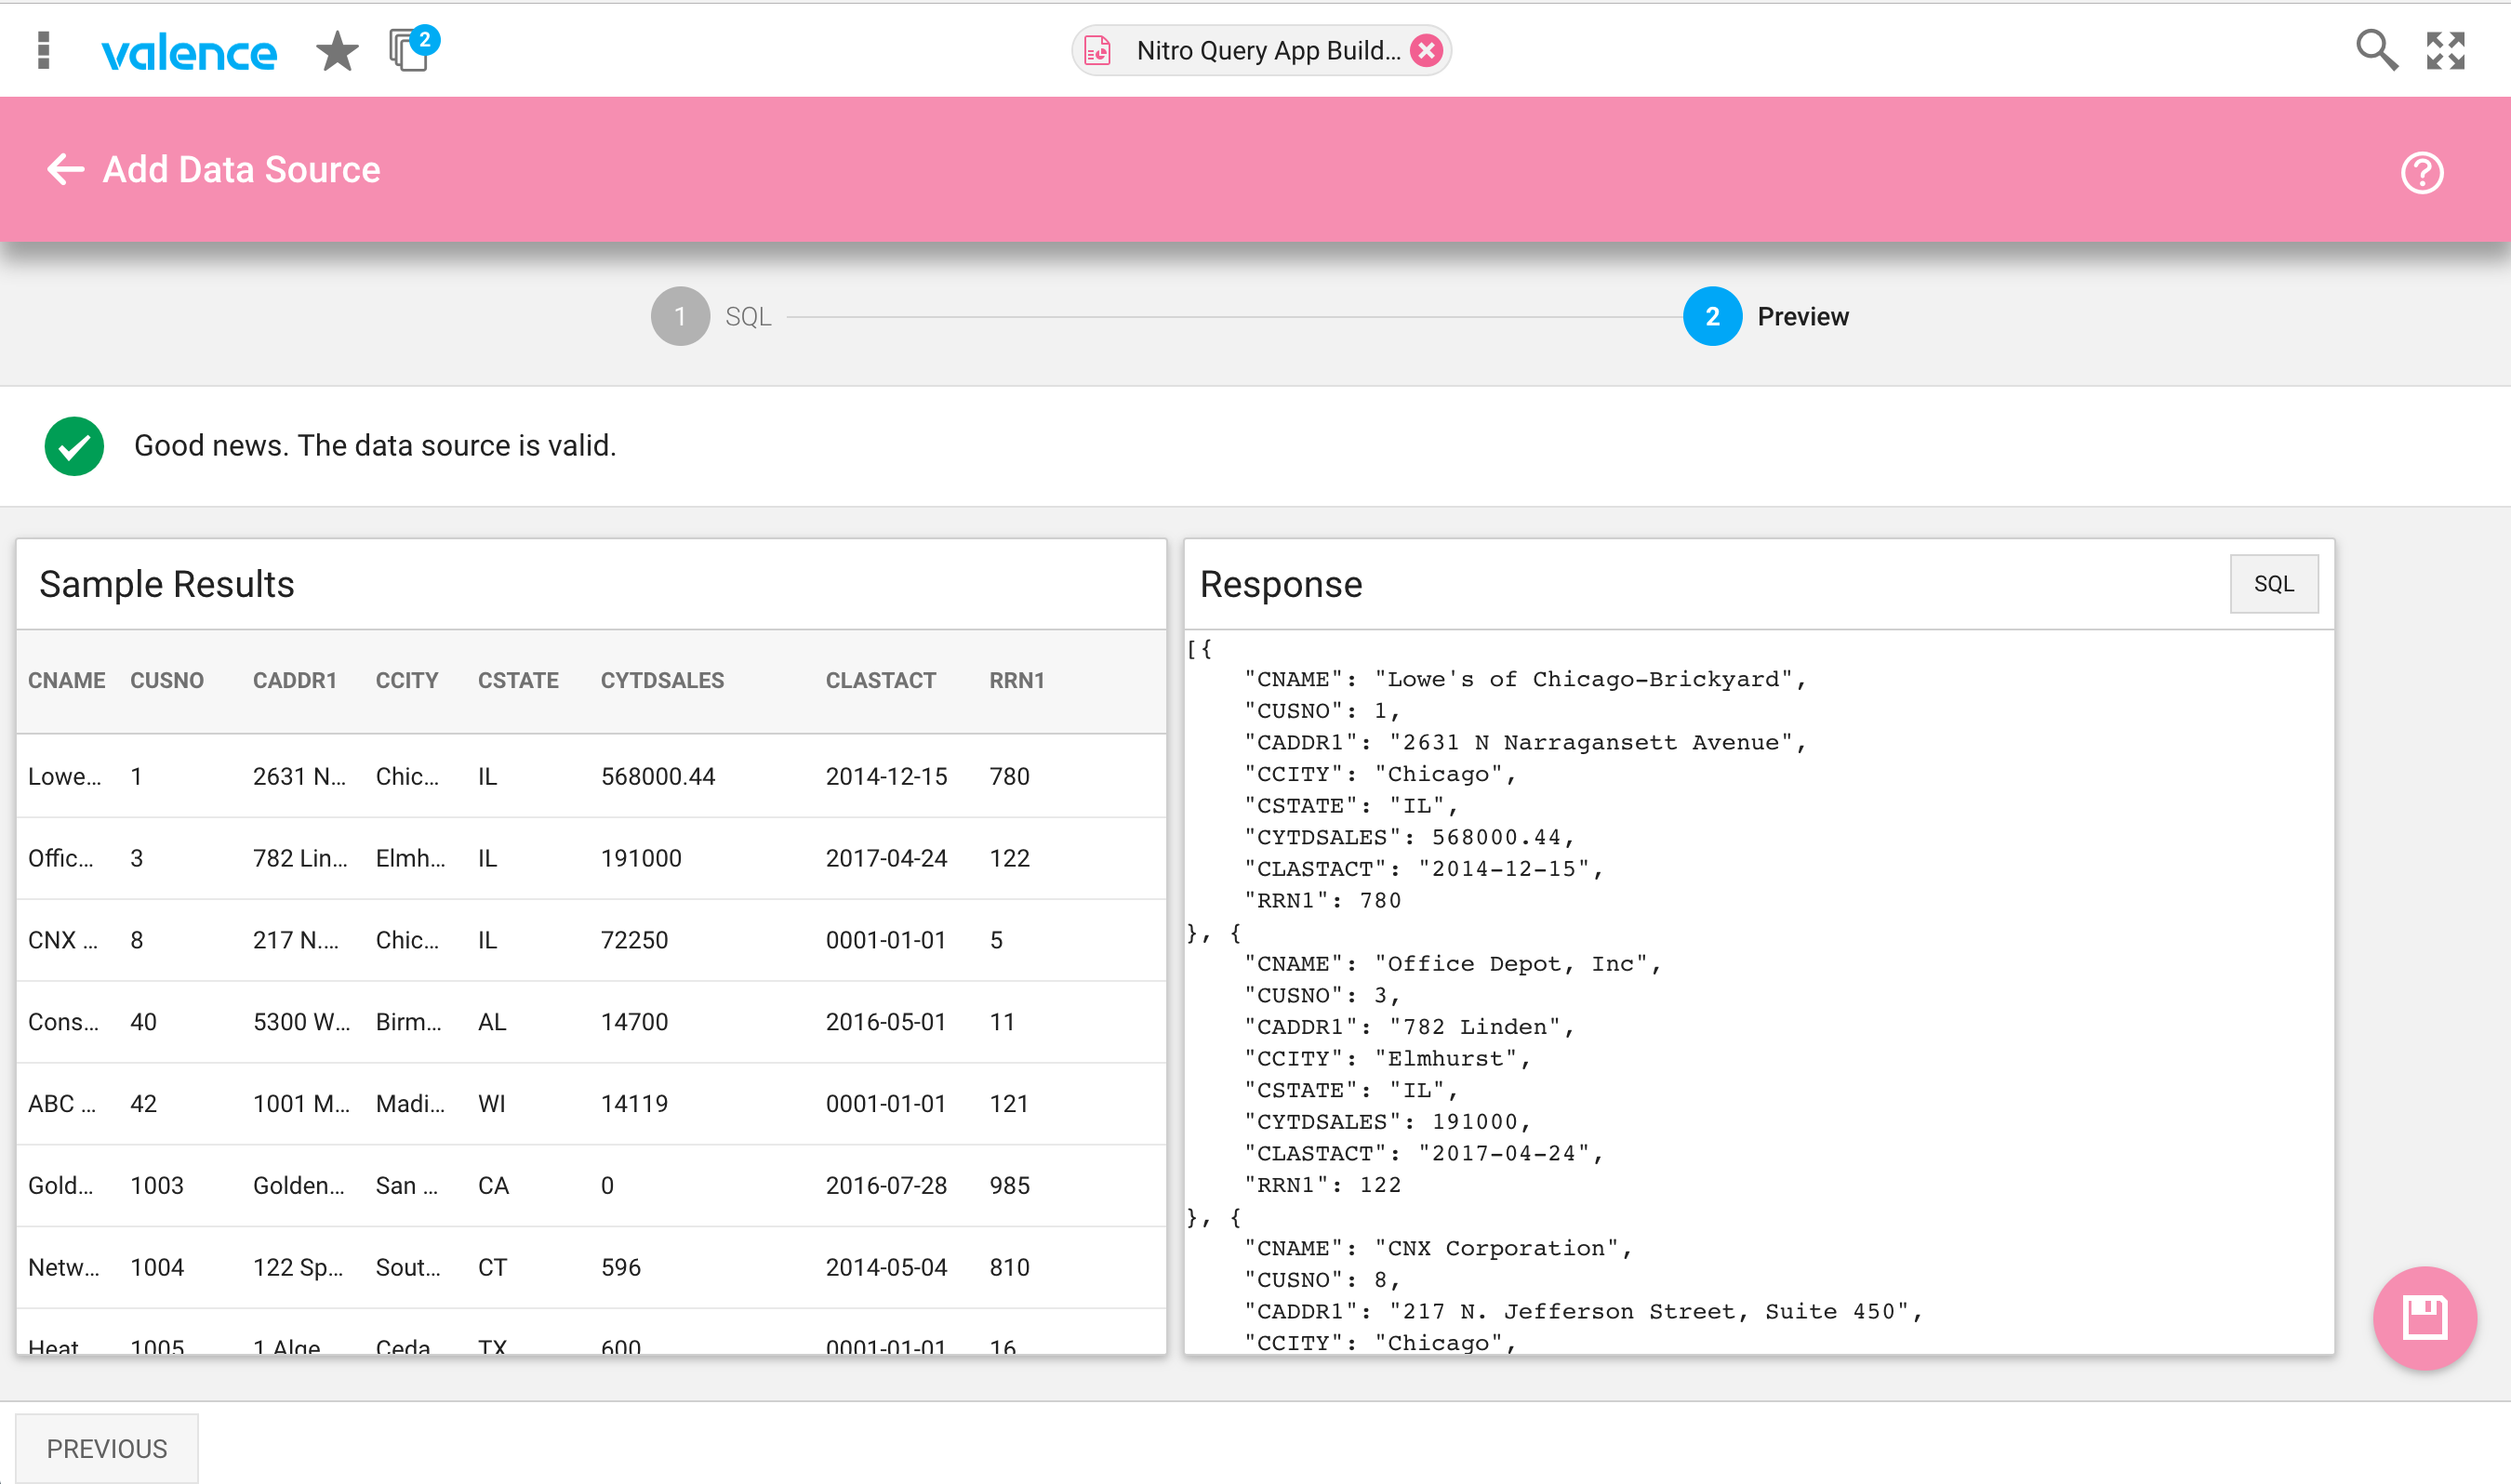
Note that you may want to remove the WHERE and ORDER BY clauses from the SQL statement here if you want the users to be able to specify constraints and ordering information themselves (this configuration will be done in the properties of the Grid Widget that you will shortly be associating with this Data Source). Click NEXT to move on to the preview/confirmation page for the Data Source, where you will be presented with a basic rendering of the data:

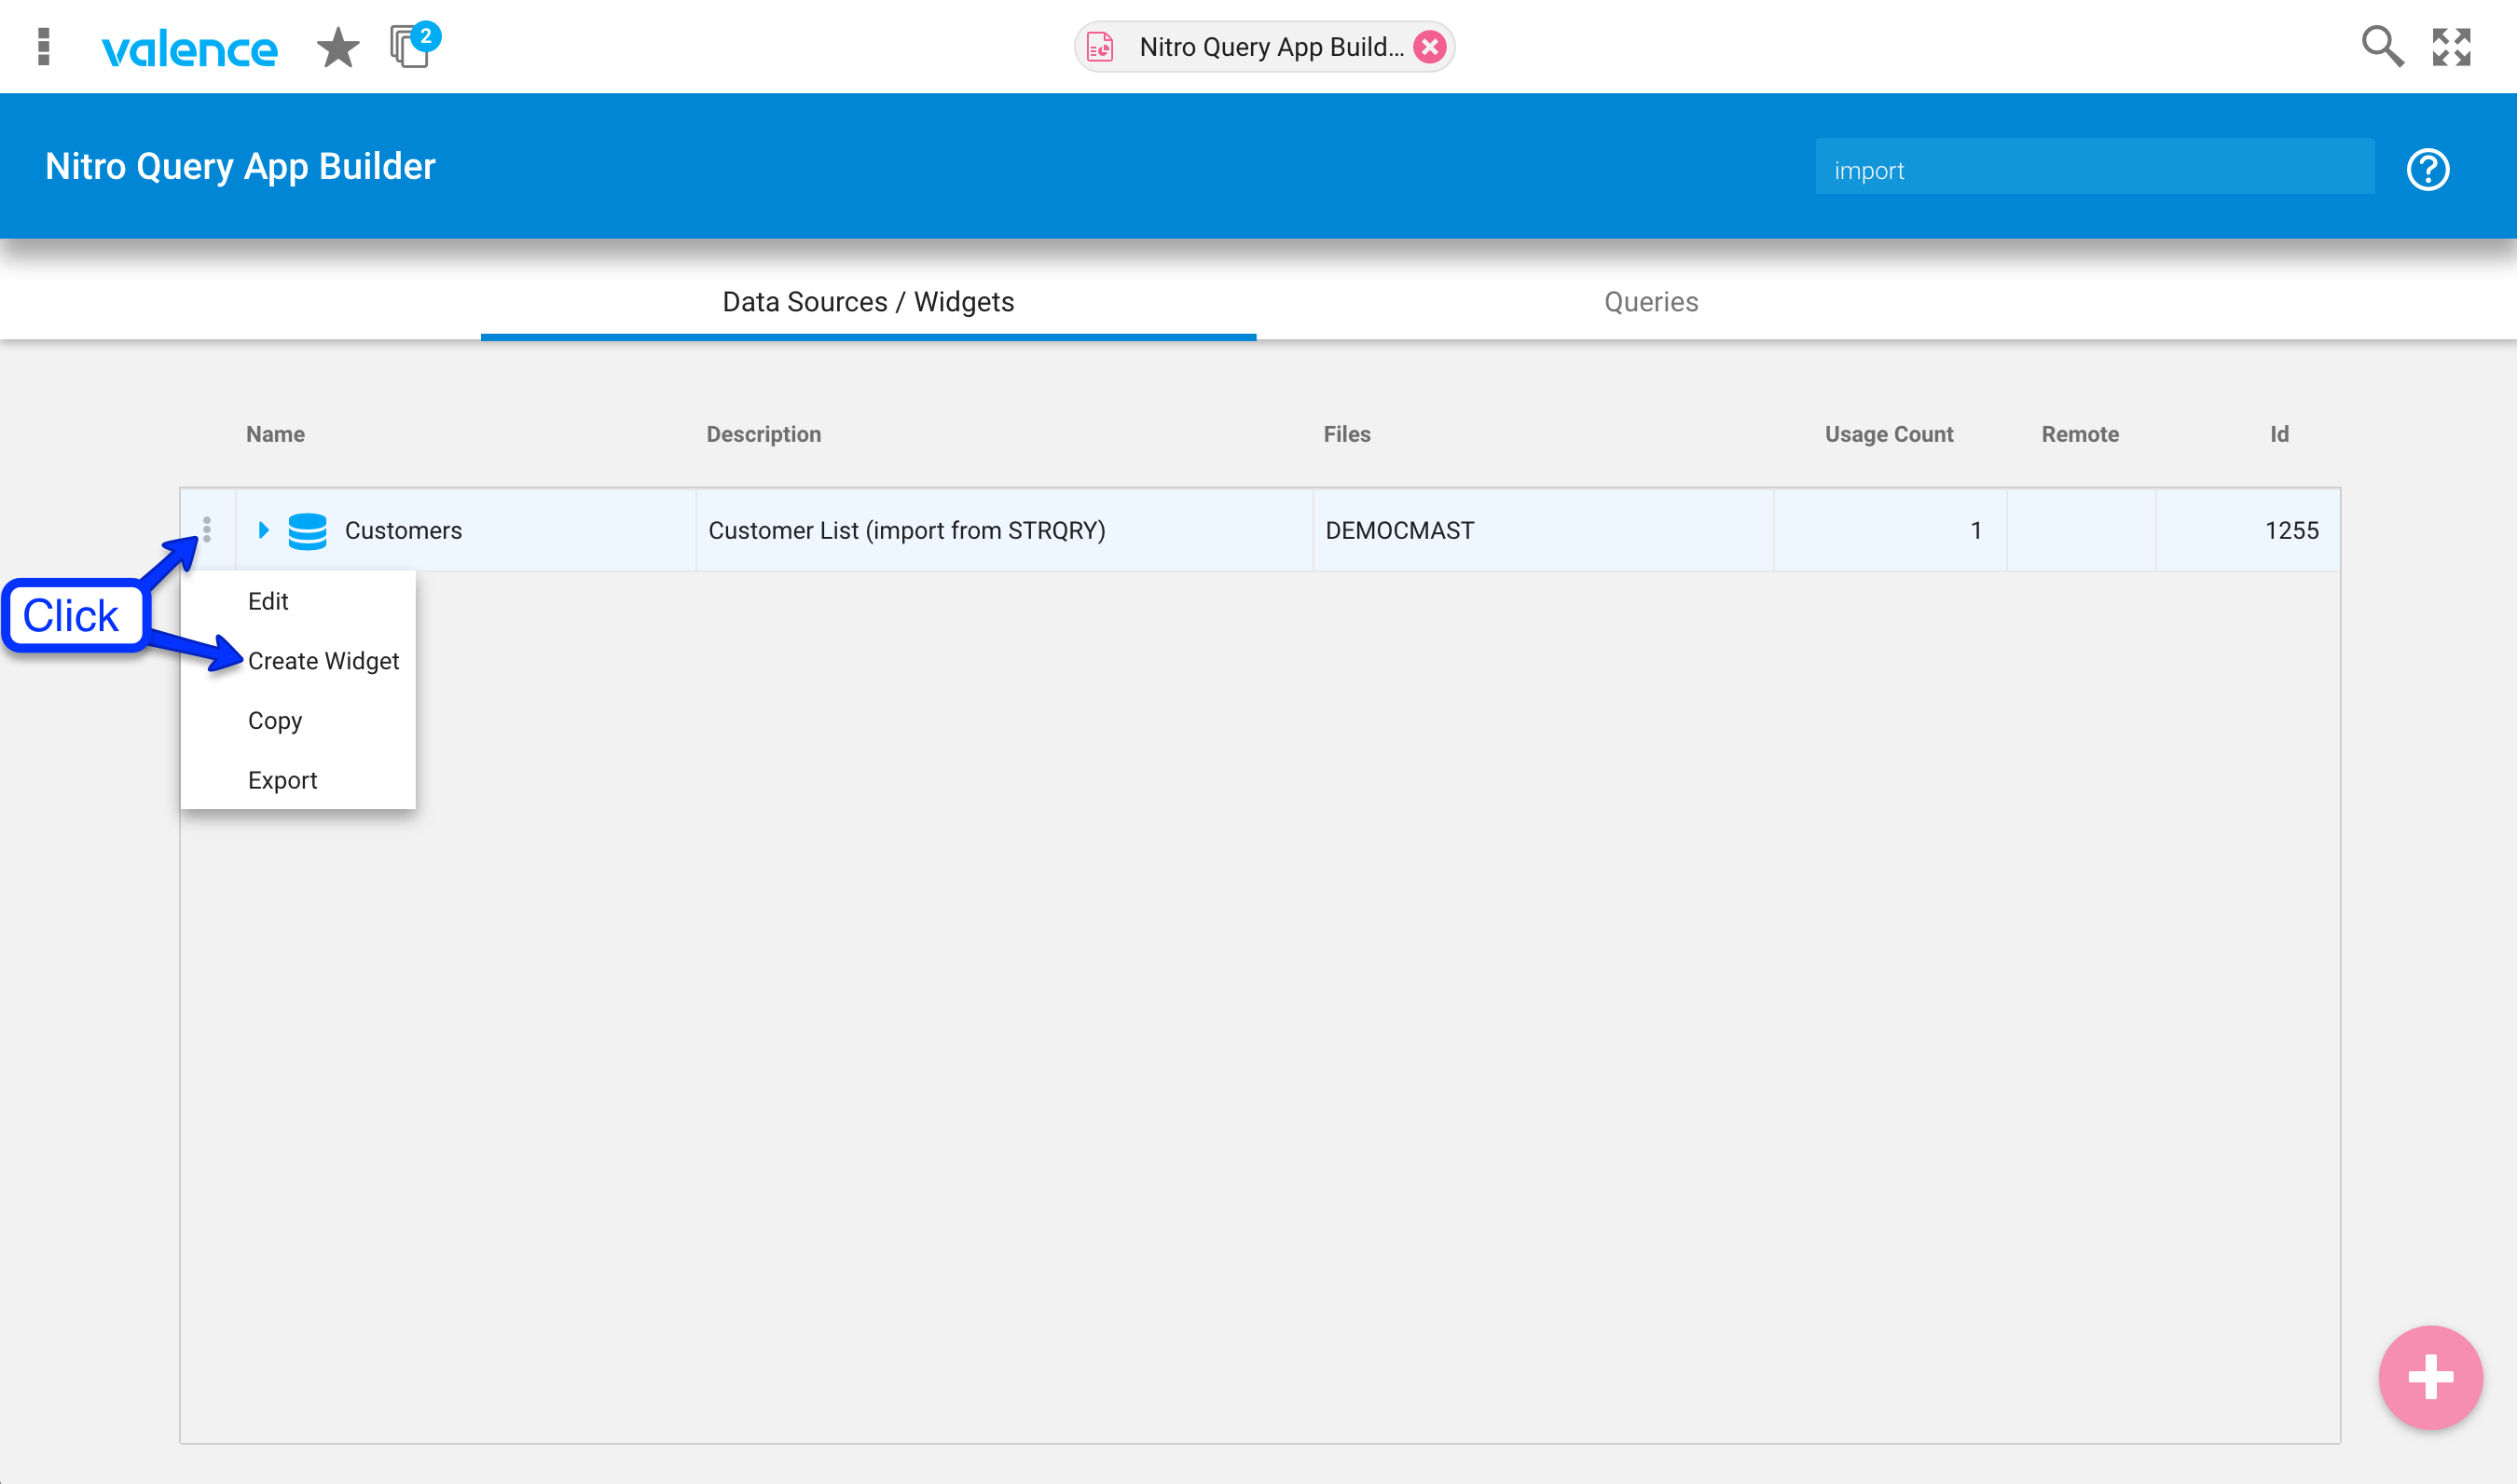
Don’t worry about the formatting here – this screen just shows you the raw data. If the data looks good, click the Save icon in the lower right, give your Data Source a name and description, then click SAVE. Now you’re ready to connect your Data Source to a Grid. Do this by clicking the row selector next to your newly created Data Source, and then Create Widget:

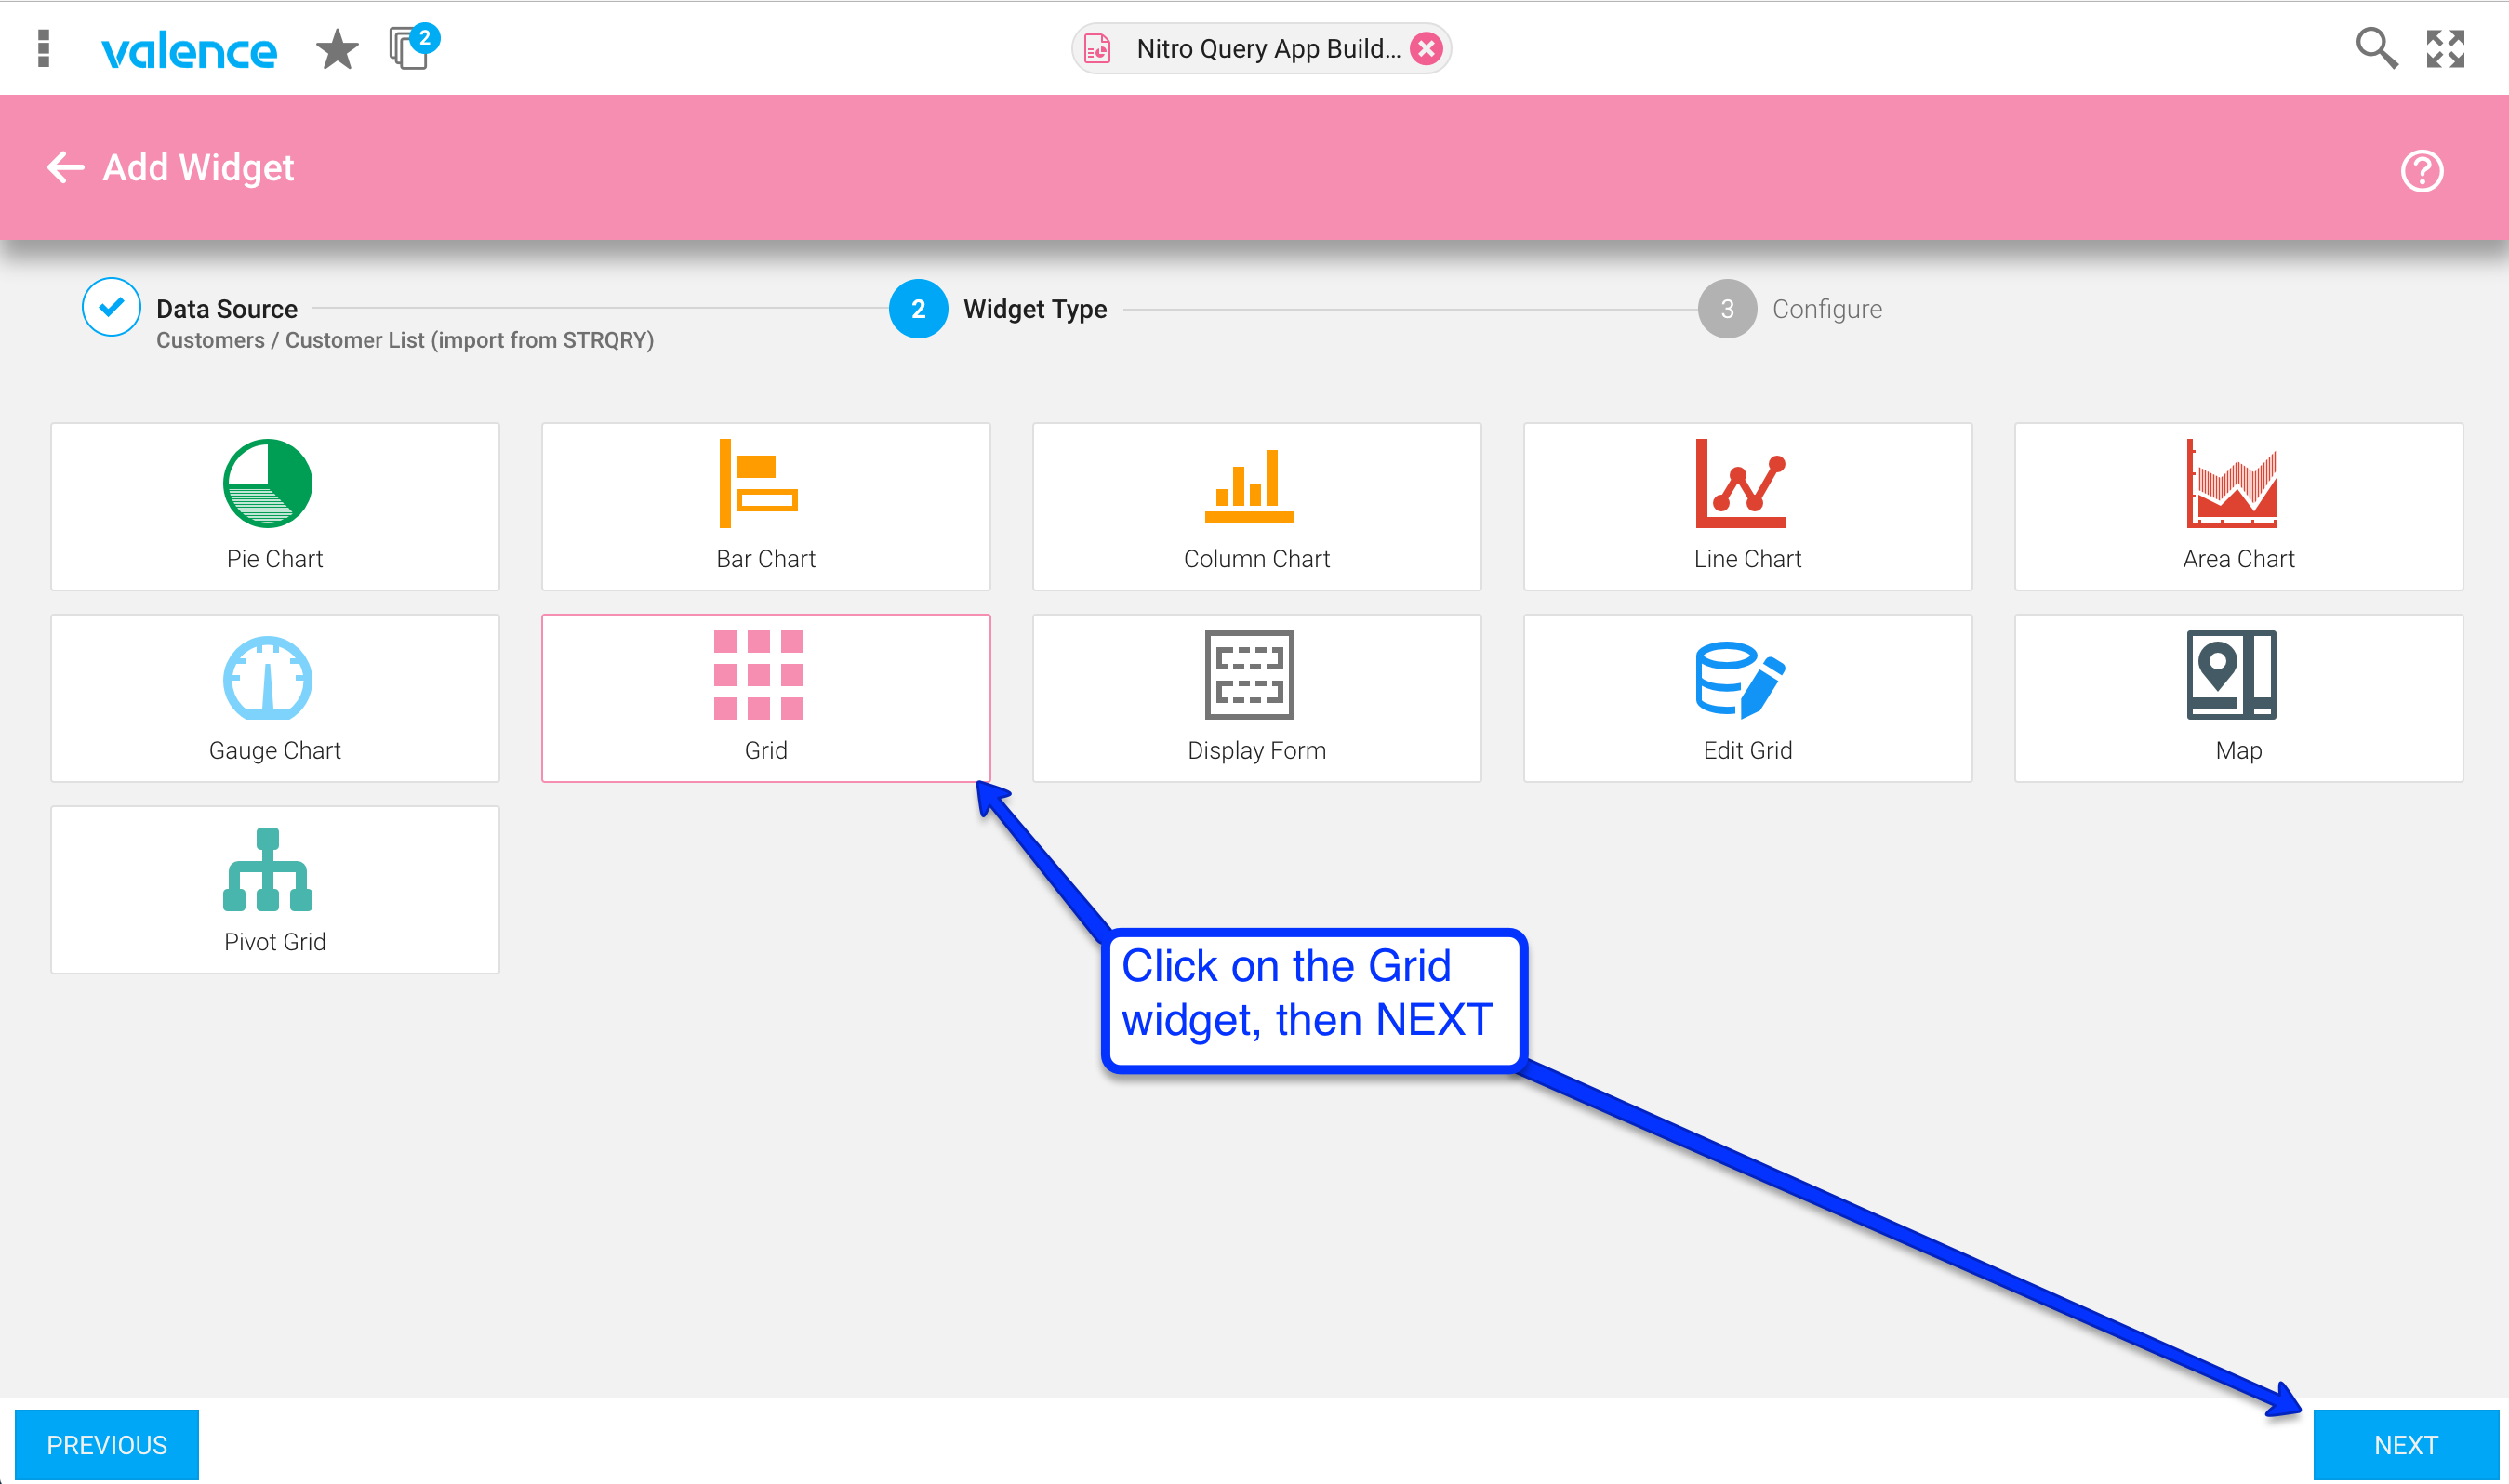
You are then presented with a list of widgets to pick from. For a standard inquiry-only query replacement, you will want to select the Grid widget. Click that, then select Next:

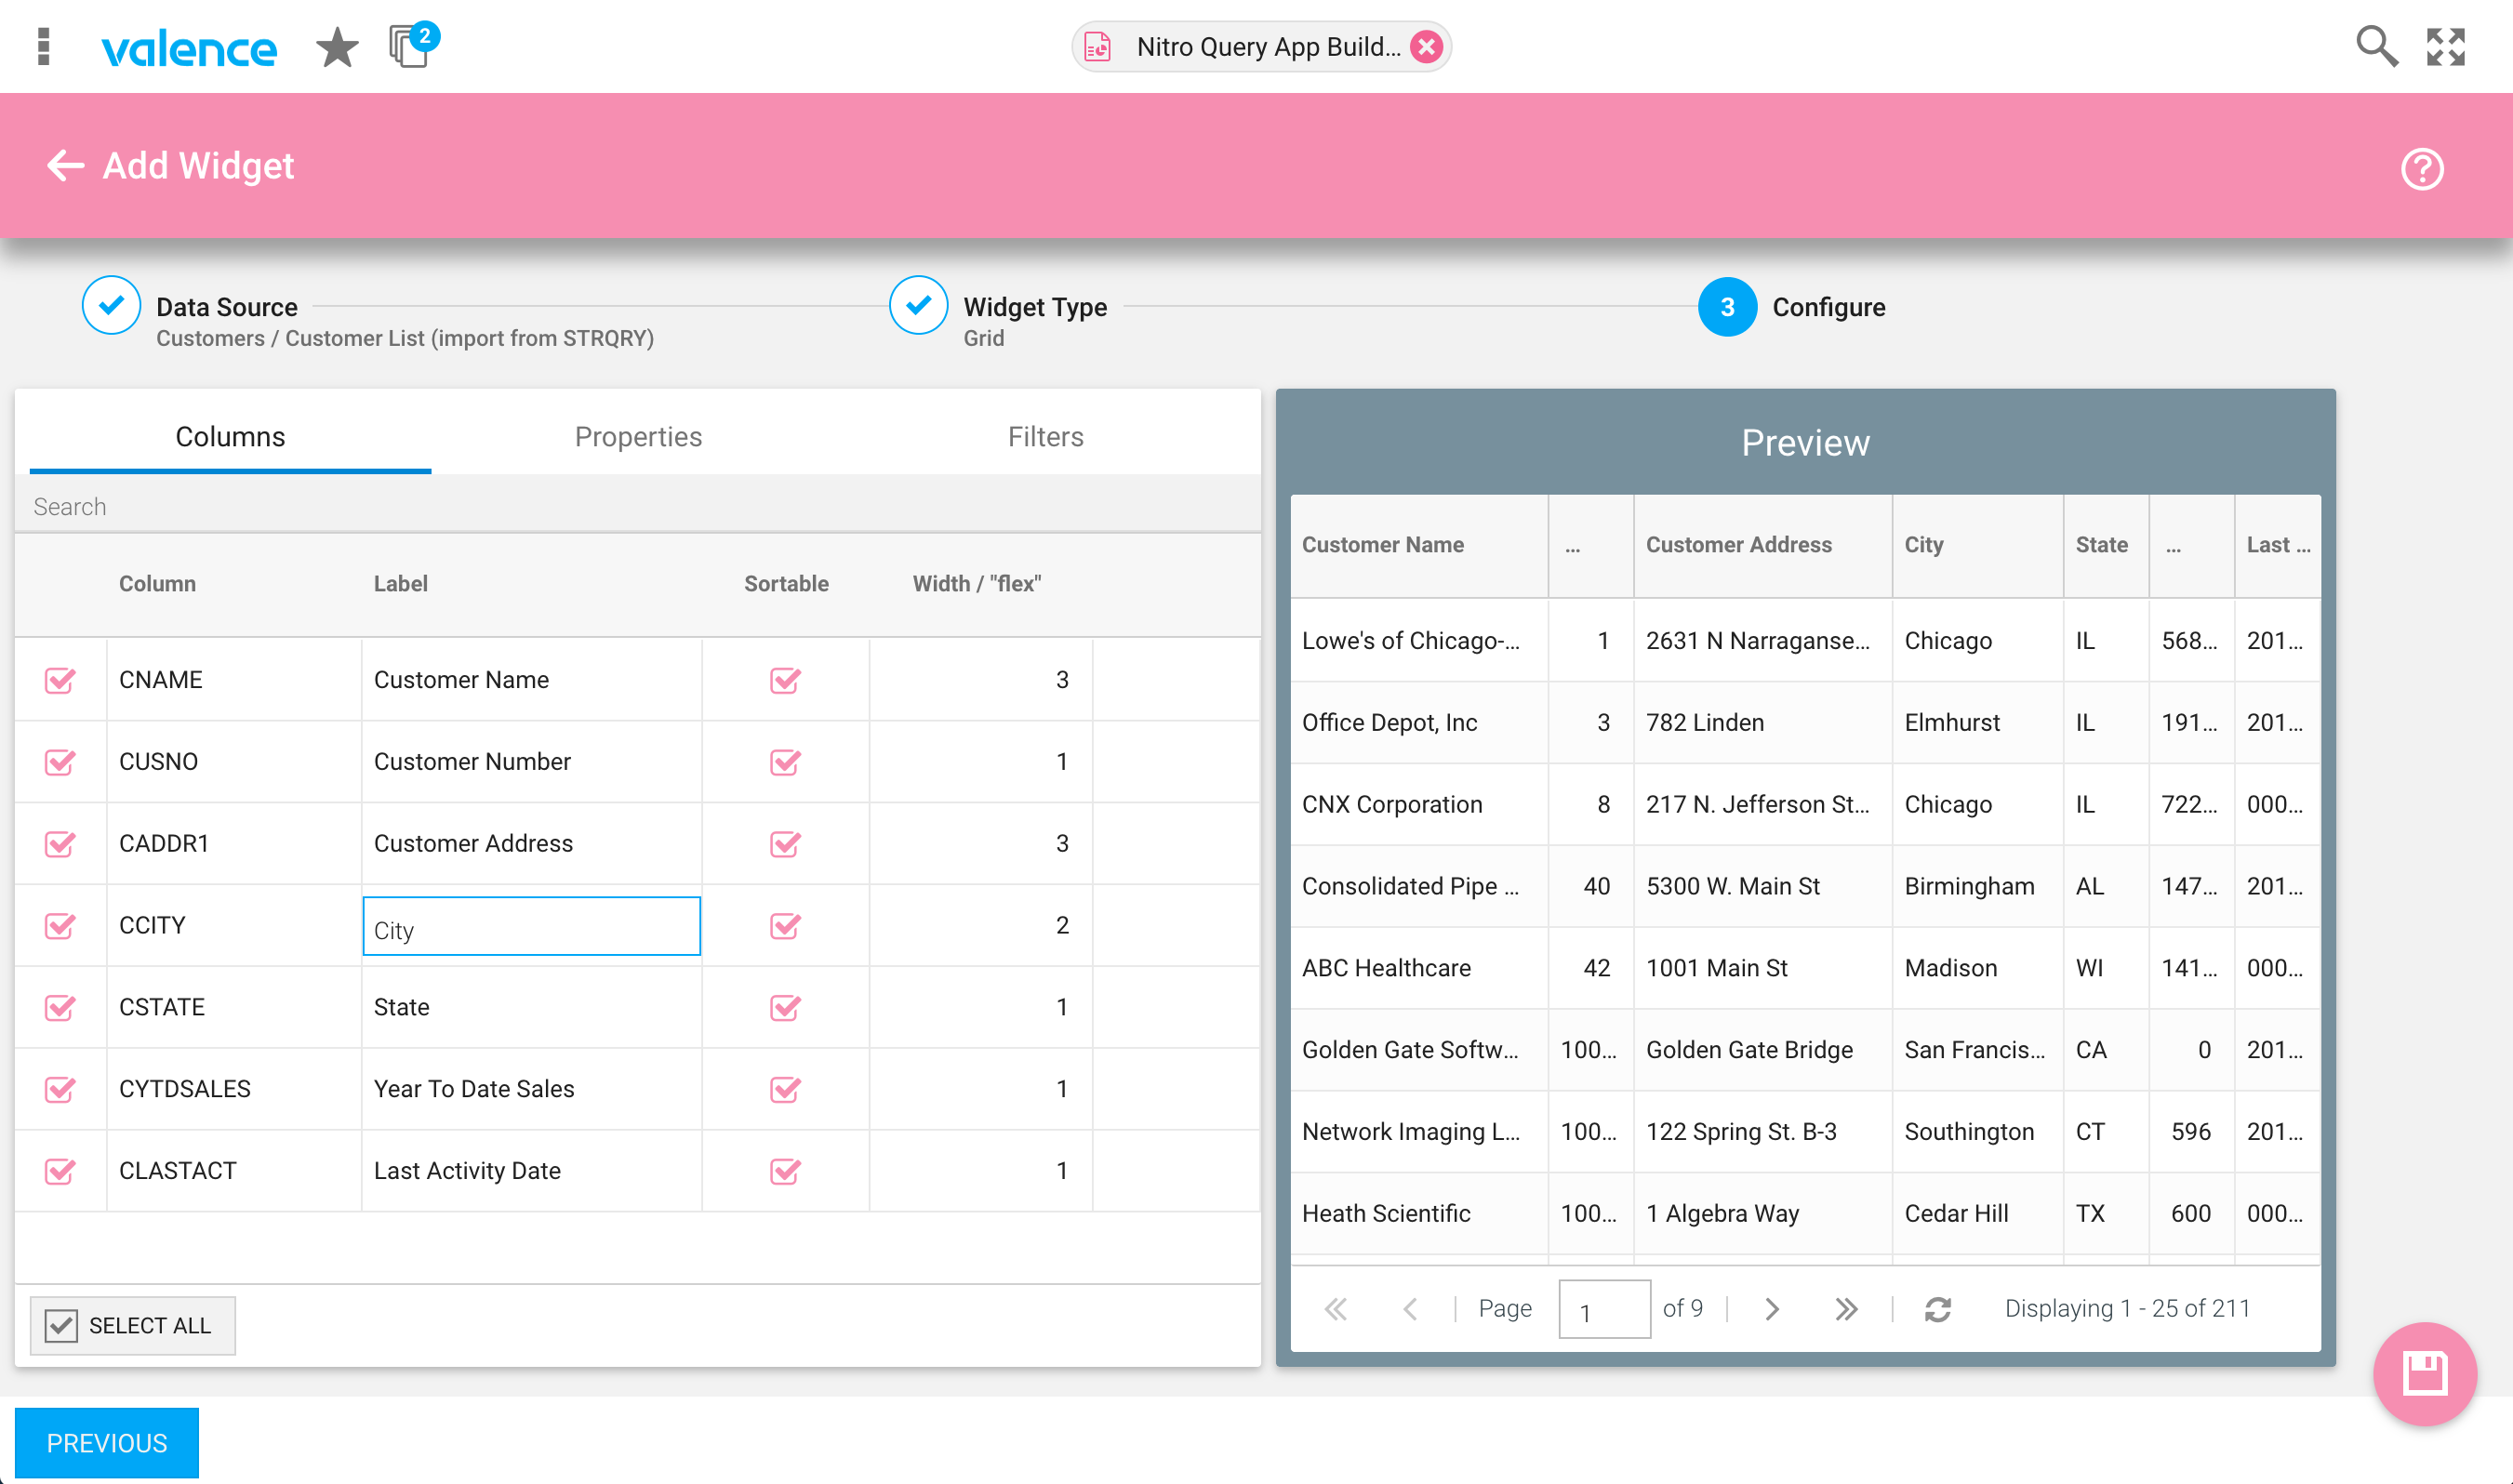
The Configure page is where you can customize the look and feel of the grid for your users. Configurations options include changing column headings, setting column widths, adjusting the column alignment, adding options for searching and downloading to Excel, etc. For added effect you can also add colors to your grid cells as well as summary functions and column renderers. Additional details may be found in the Widgets Section of the Nitro Query Guide.

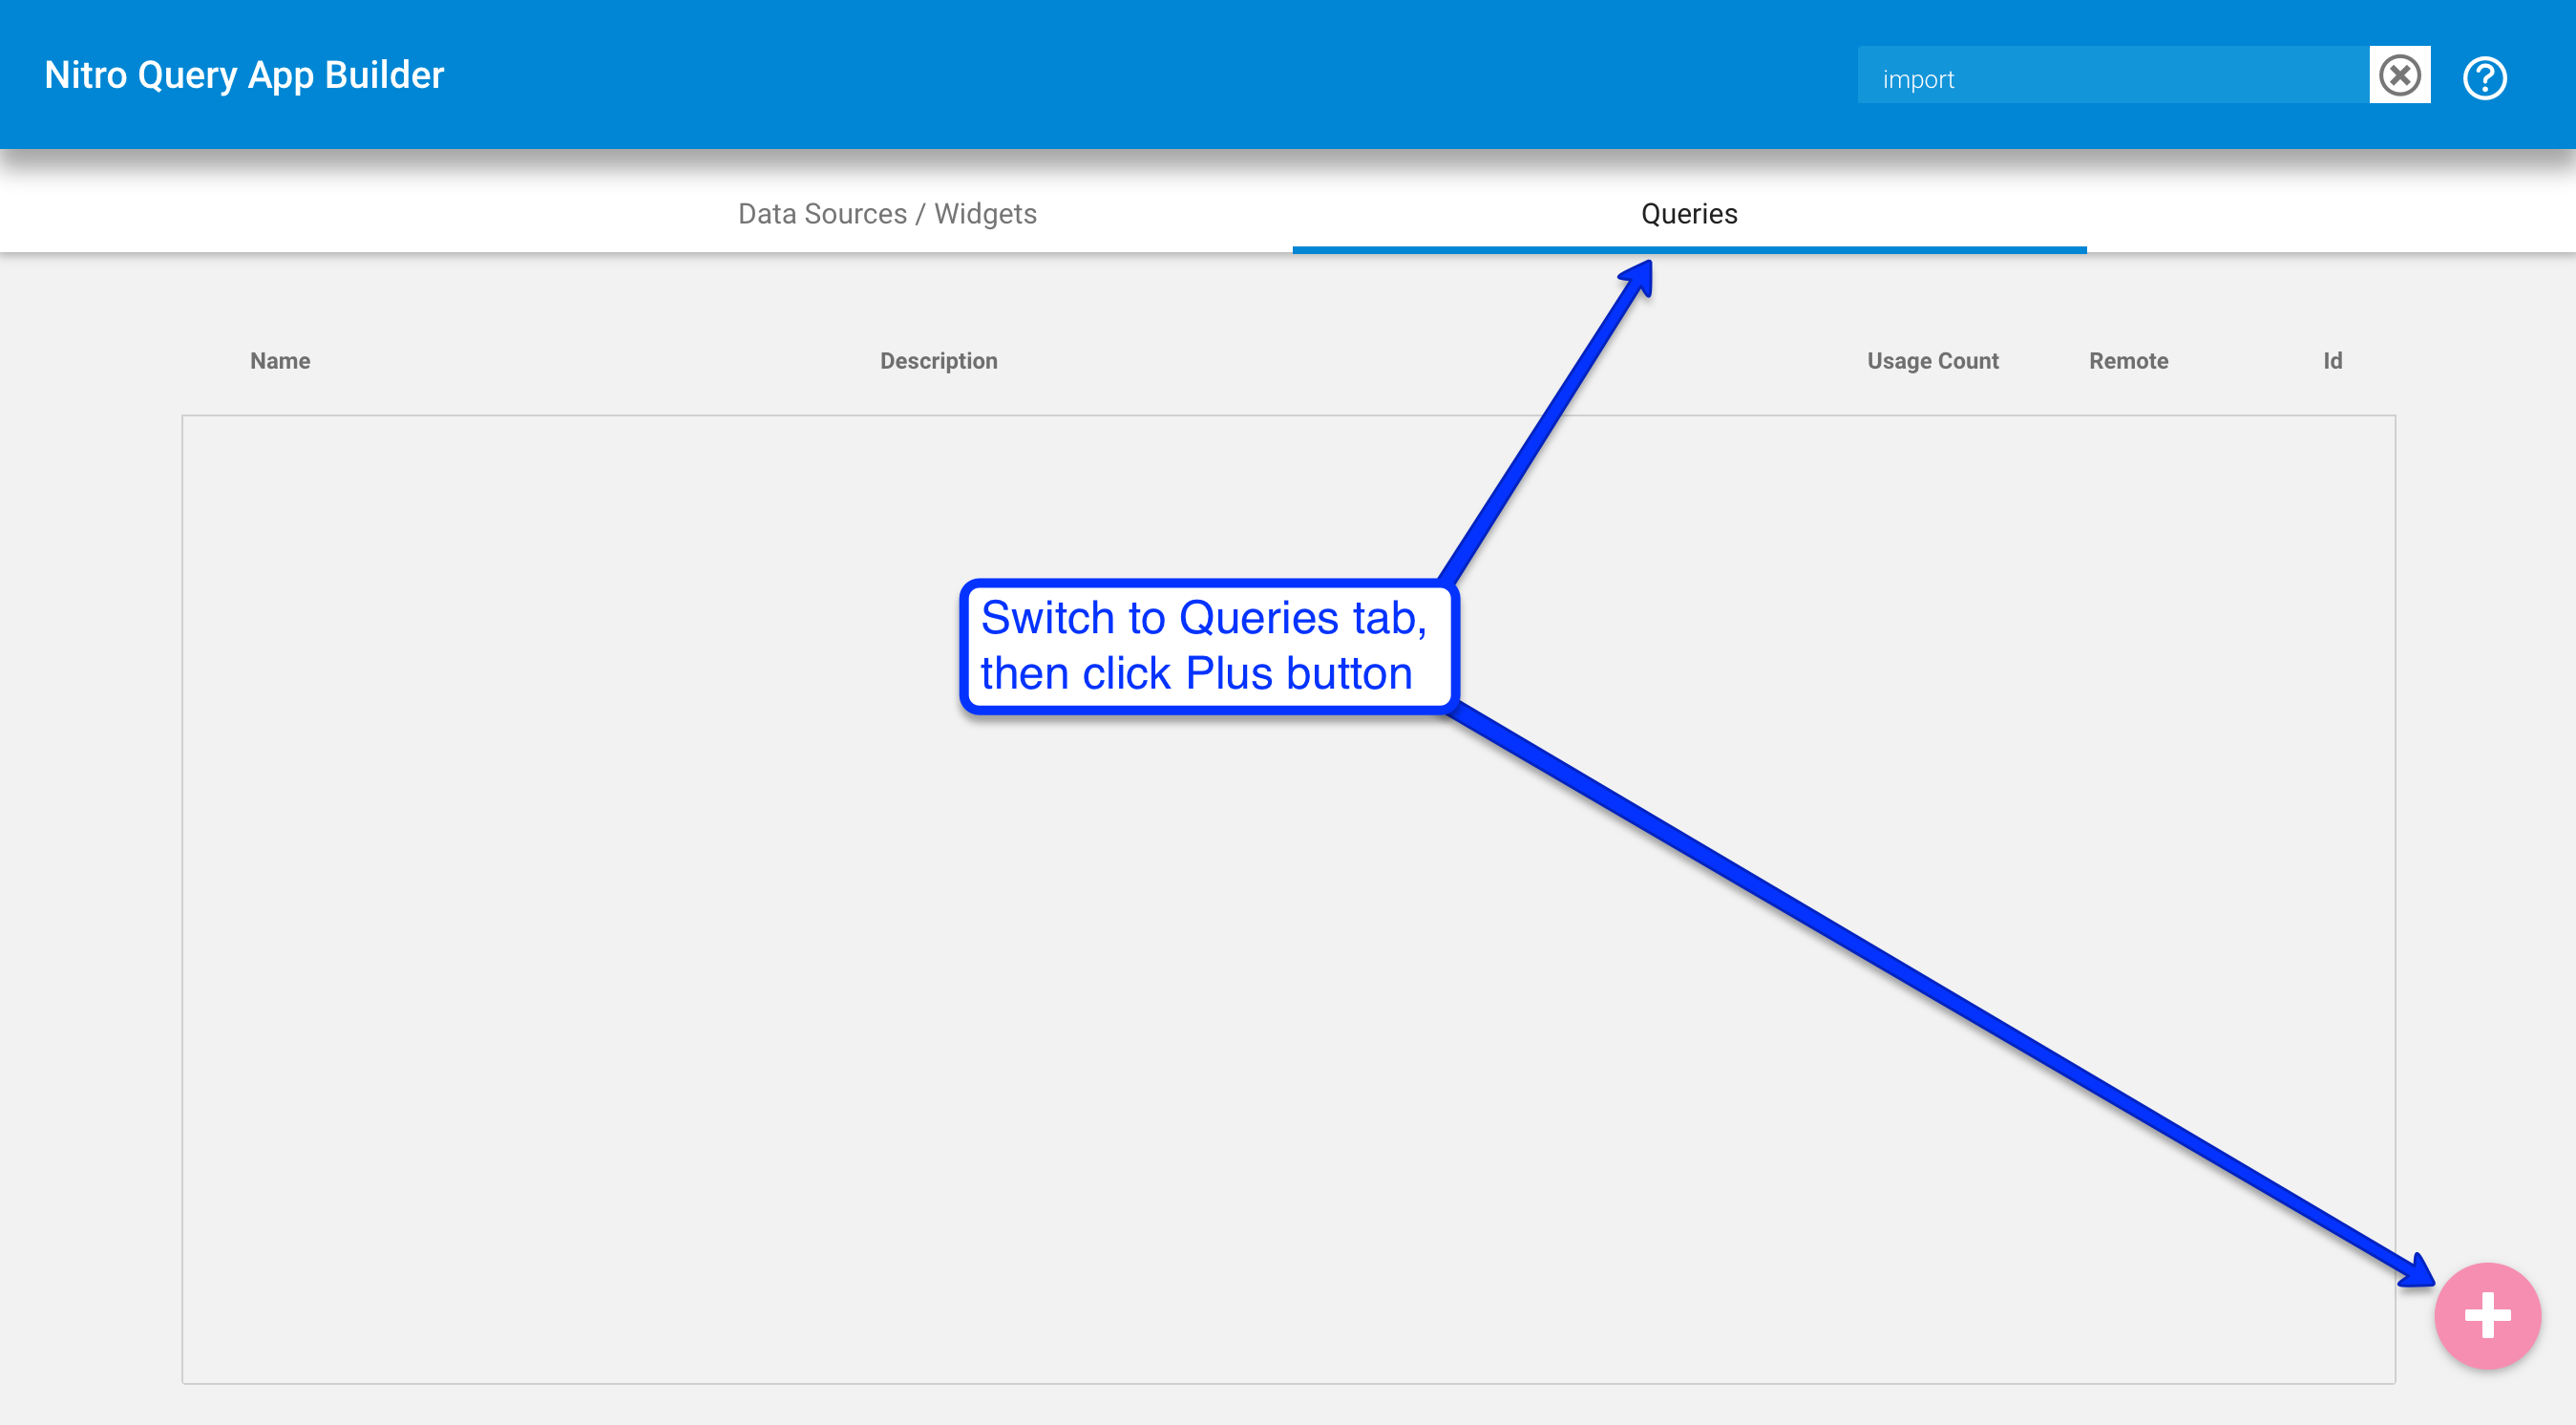
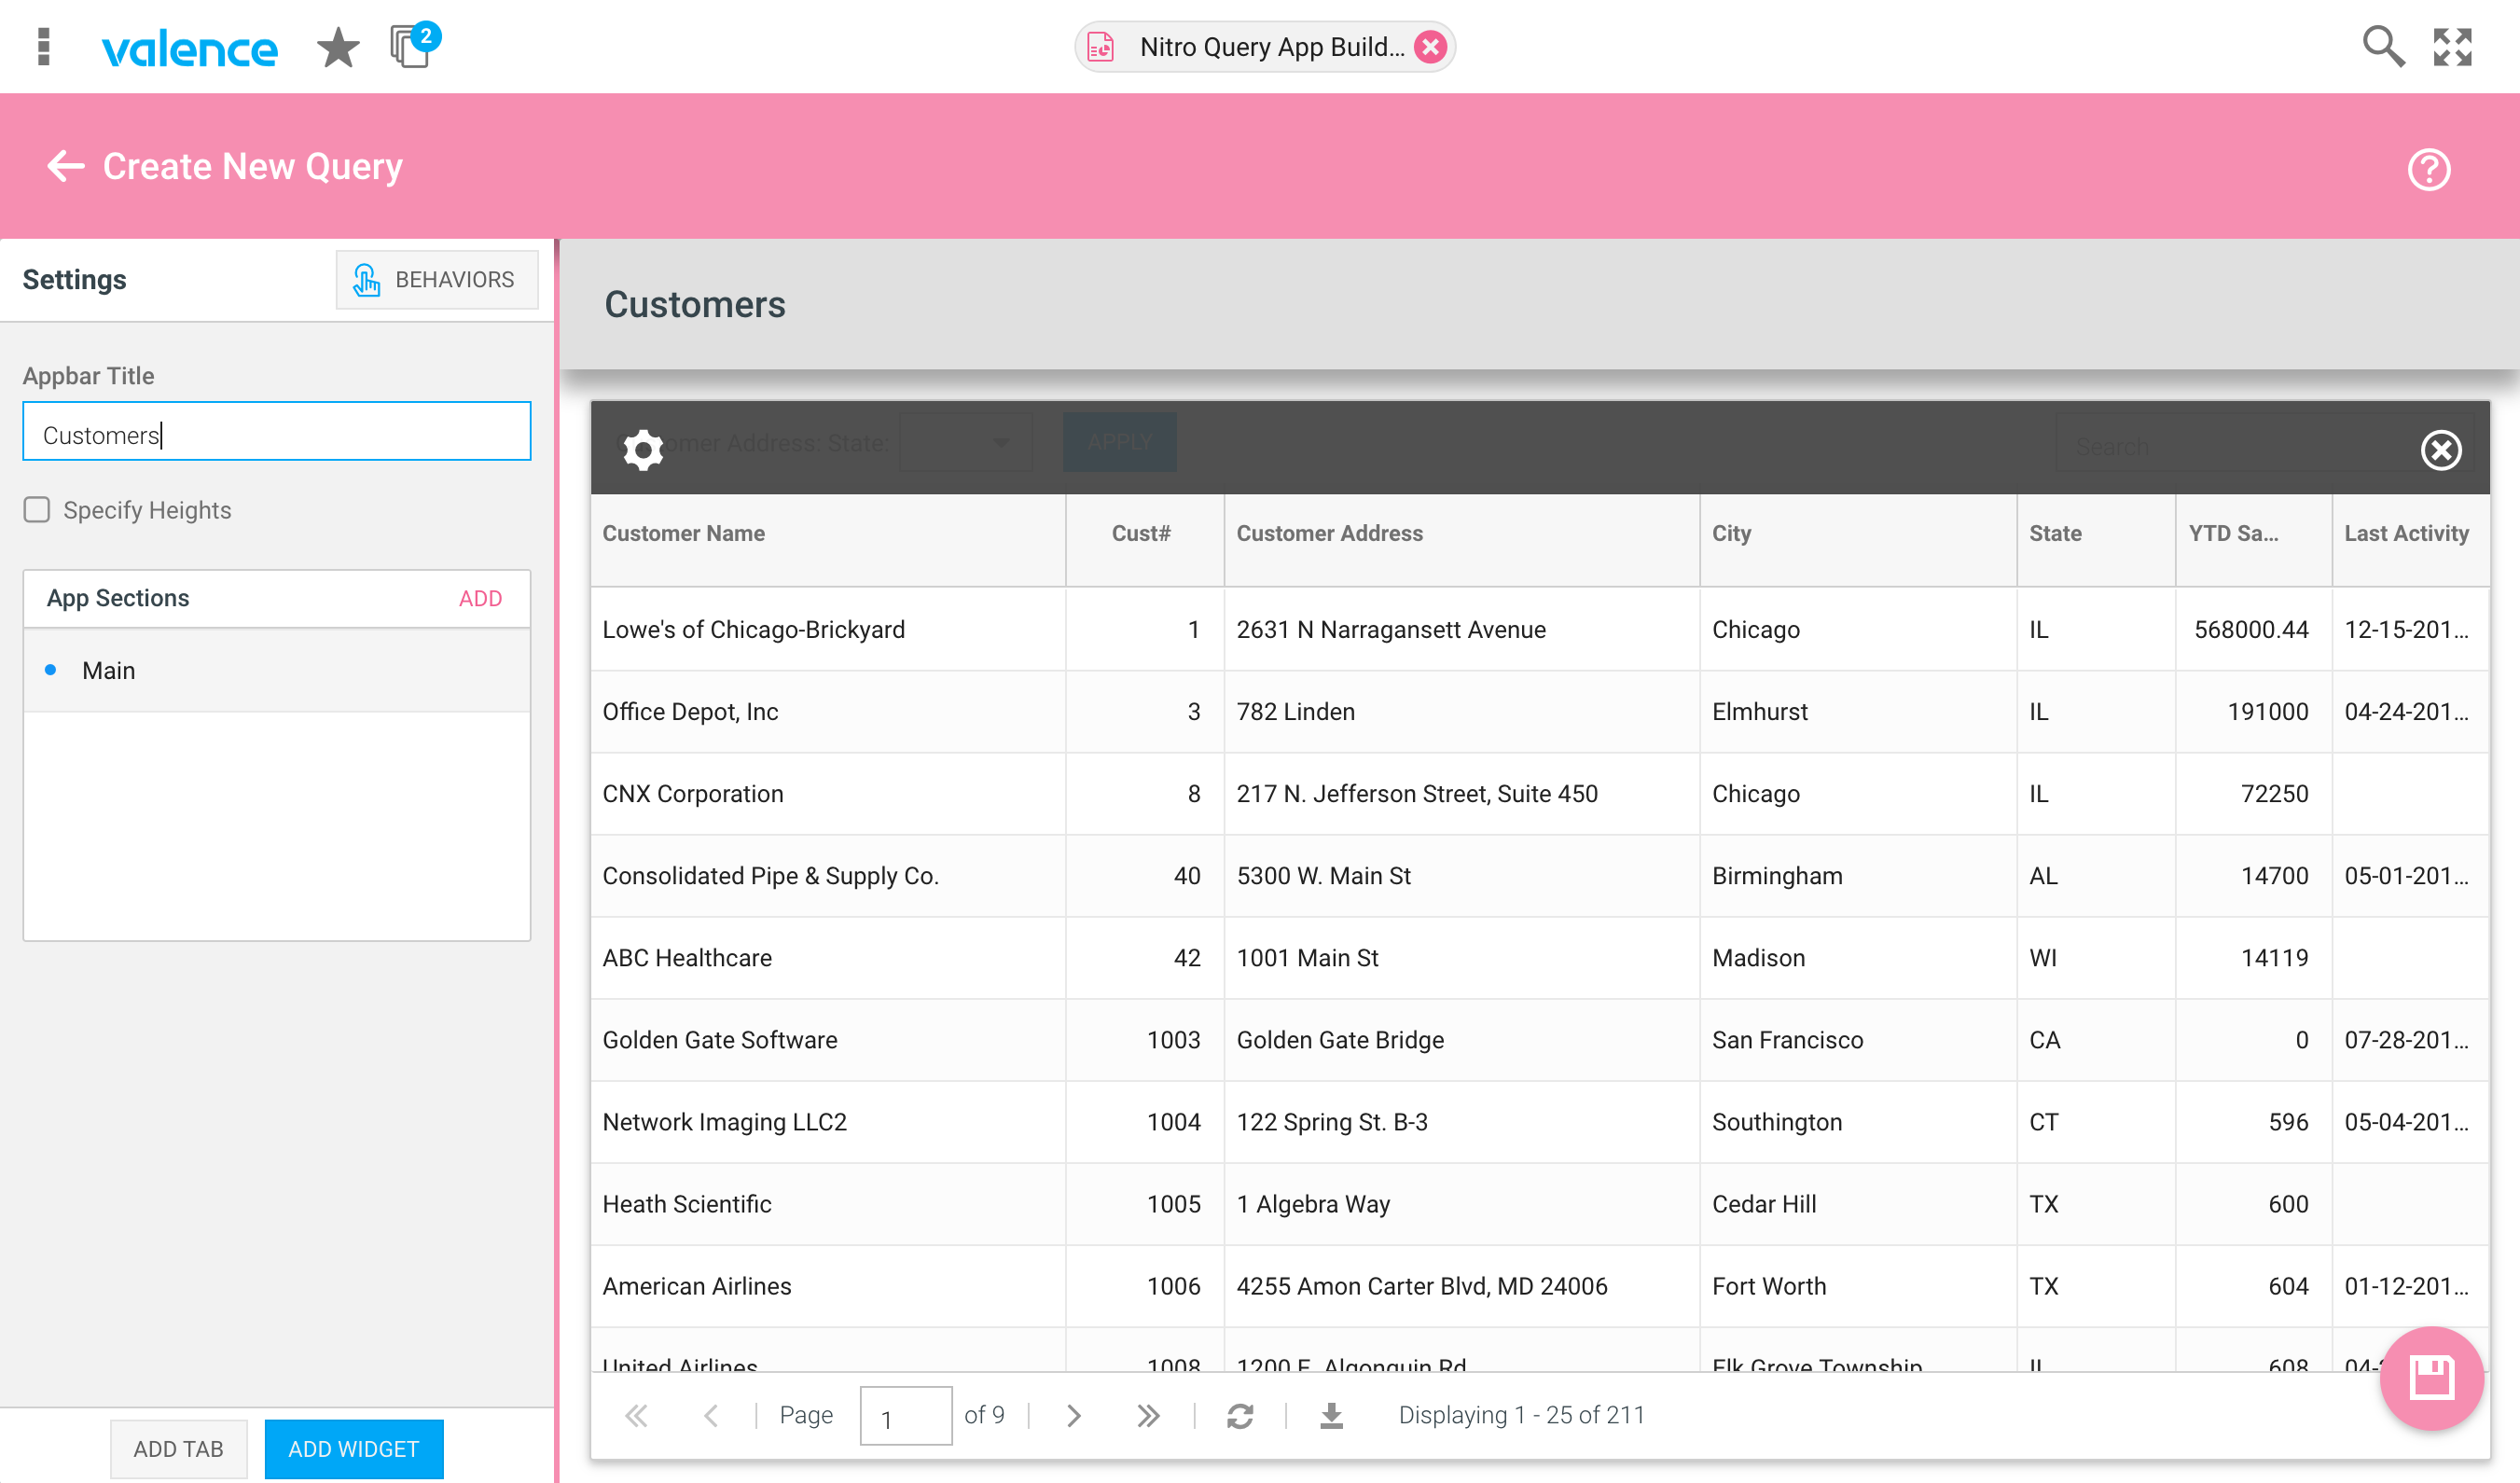
Once you’ve completed the grid configuration, click the Save icon in the lower right. You’re now ready for the final step, which is to add your Grid Widget to a Query that users can run. Click on the Queries tab in the upper right to switch to Query mode, then click the Plus icon in the lower right.

Now you will add the Grid Widget you just configured. Click on the Add Widget link and select the widget you previously saved. This will import the grid into your Query canvas.

There are many more things you could do to enhance the Query App at this point, including adding click events (“BEHAVIORS”) to trigger other grids or charts to appear, or even trigger calls to RPG programs, thereby creating a true dashboard-like app. But these are topics for future blog posts… For now we’re focused on simply converting our green screen query into a Valence App, so just click the Save icon in the lower right, give your Query a name and it will then appear on the Valence Portal launch pad, ready for users to run it.
For added ease of execution, you can give your users a URL link to launch the app directly. Or you can even have your query app pop up via a function key on a green screen. No matter which way they access it, your users are sure to appreciate the fresh UI over their trusty green-on-black queries.