One of the more popular features of Nitro App Builder is the ability for IBM i developers to quickly roll out a file maintenance app in the form of an edit grid. A developer simply creates a data source over the desired file(s), maps it to an edit grid widget, and voilà! In virtually no time they’ve created a fully functional maintenance app.

While this quick and easy process works wonderfully for files in which all the fields that need to be maintained are visible to the user, there are often cases where files contain “behind the scenes” fields that you wouldn’t want users to set or change. For example, the file may include a “last edited by user” character field and a “last edited on” timestamp field. For obvious reasons, you wouldn’t want users adjusting these types of fields.
Fortunately, a very simple RPG program — the same one you’d use to apply back-end validations — can be used to initialize or update these non-user editable fields, and it doesn’t matter if the fields are included in the grid itself. In fact, the fields don’t even need to be included in the data source.
To demonstrate by example, we’ll create a simple data source and edit grid app over the DEMOCMAST customer master file included with Valence. If you’re not already familiar with this process, please check out the how-to links included in this previous blog post. For demonstration purposes, we’ll intentionally leave off the last activity date field (CLASTACT) and the year-to-date sales field (CYTDSALES). The resulting edit grid widget should look something like this in the NAB Designer:

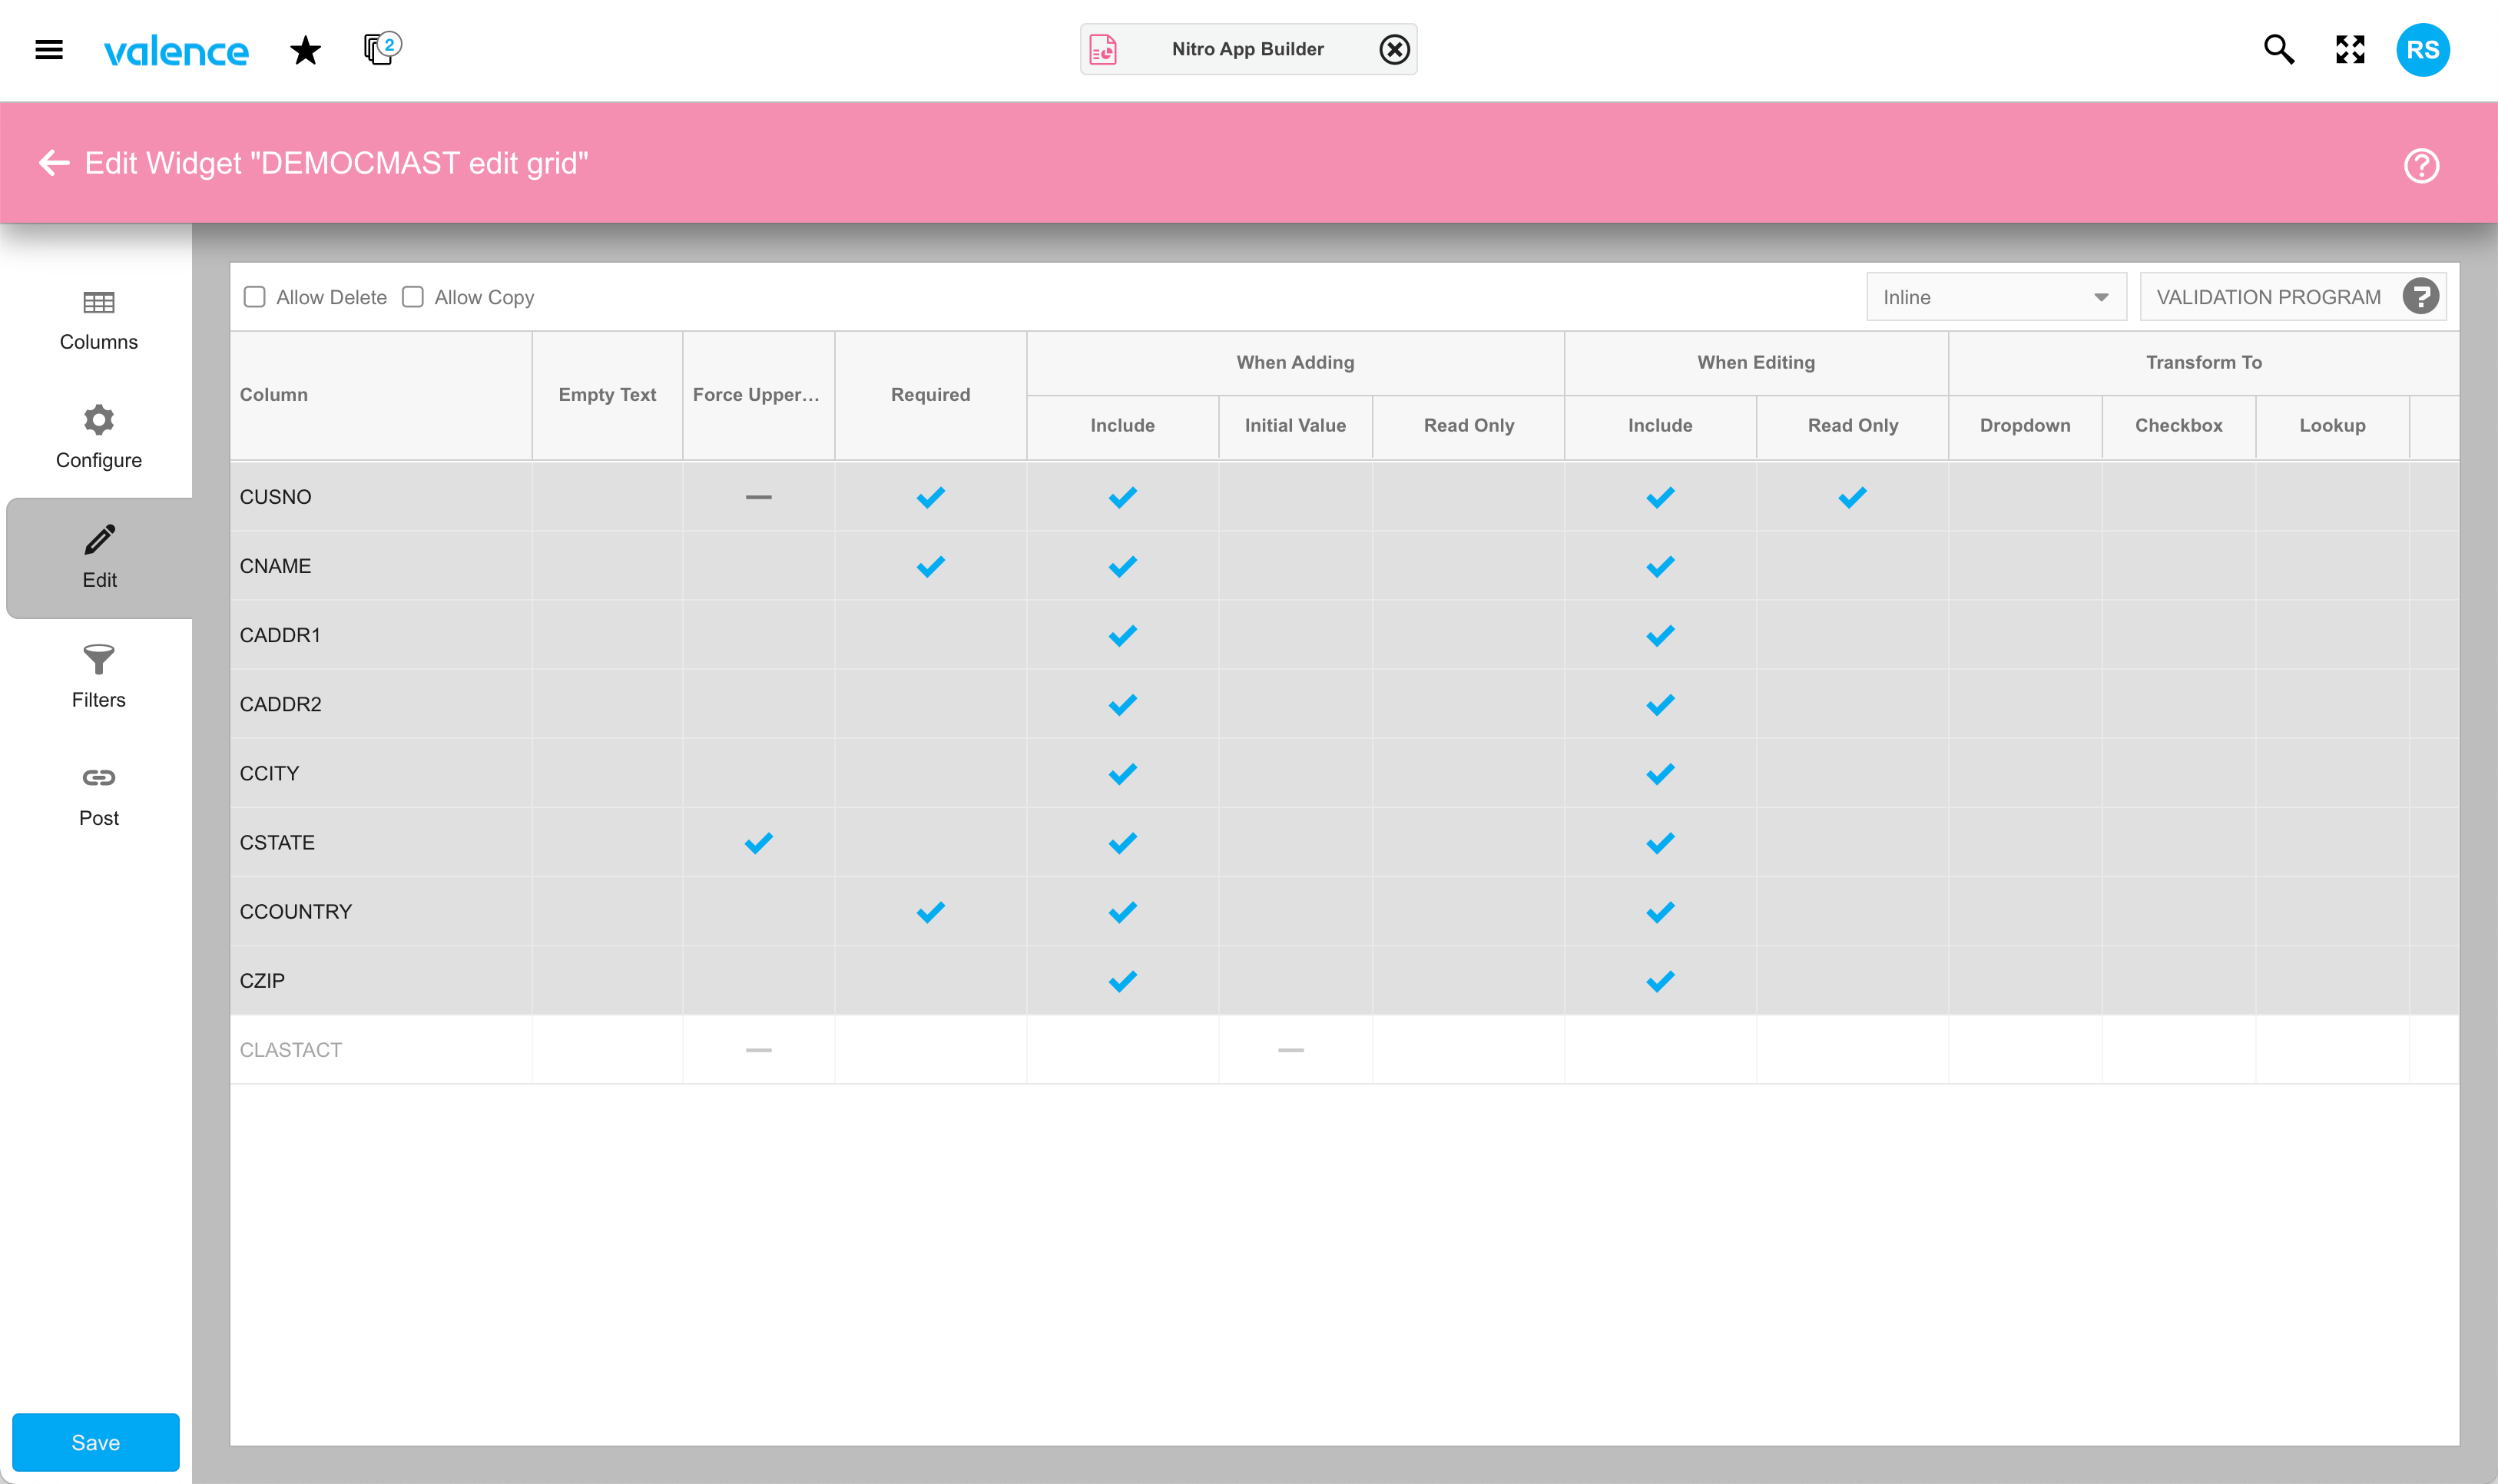
Whether CLASTACT and CYTDSALES are included in the underlying data source makes no difference. In this case we’ve included CLASTACT in the data source but not CYTDSALES.
So let’s say whenever a user adds a new record to DEMOCMAST we want to set the CLASTACT to today’s date and set CYTDSALES to -1 as an indication to some other program or routine that this is a newly added record. Since the users won’t be setting these fields themselves in the app, we must create a simple RPG program to handle it. For that we’ll start by making a copy of the edit grid validation template, EXNABVAL in QRPGLESRC.
Within this source you’ll find there are numerous placeholders for both edit checking data as well as performing tasks after an add/edit/delete has taken place. The former are accommodated in procedures ProcessAdd/ProcessEdit/ProcessDelete respectively, and the latter are handled in PostAdd/PostEdit/PostDelete.
Edit-checking data
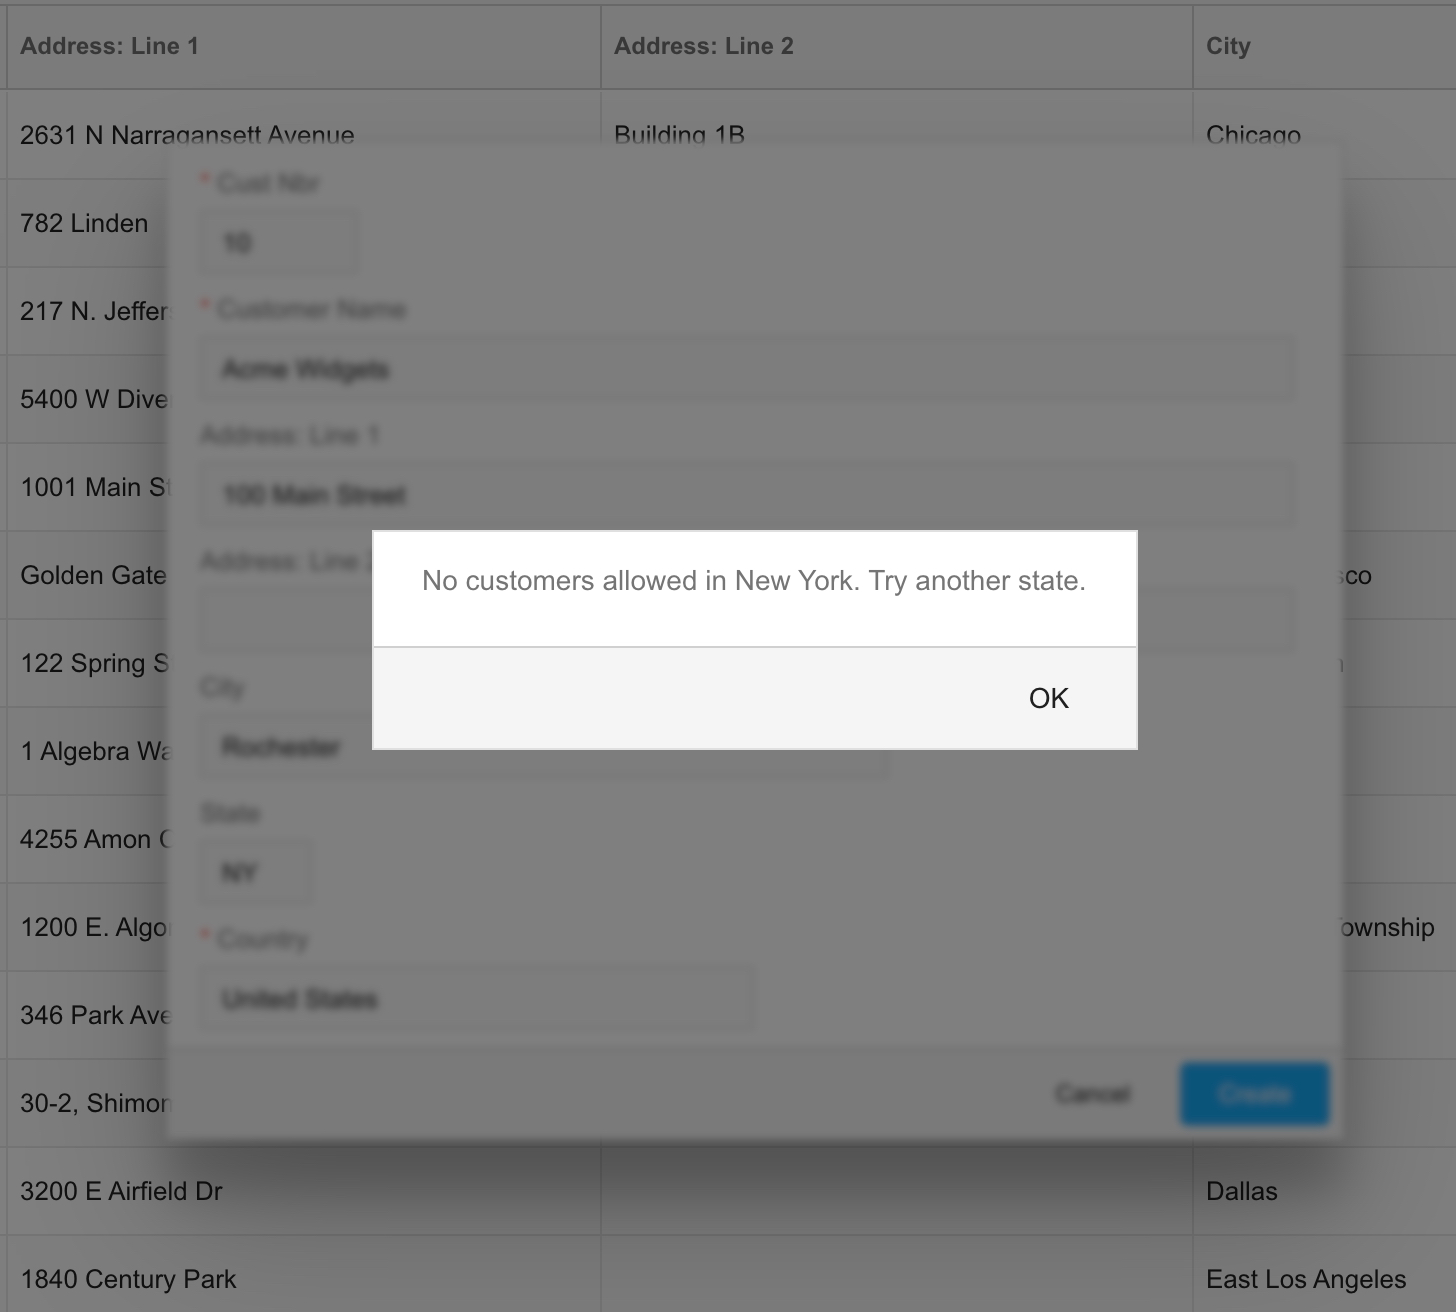
Before we delve into setting field values, let’s digress for a moment to talk about edit-checking and demonstrate a new feature that was added in the latest Valence 6.0 build (6.0.20220119.0). Previously, if a user made an errant entry in the edit window, you could abort the add/edit process and present the user with a pop-up message indicating which field is in error. That would be handled with a simple block of code inside the ProcessAdd or ProcessEdit procedure, something like this:
if GetValue('DEMOCMAST':'CSTATE') = 'NY';
  SendError('No customers allowed in New York. Try another state.');
endif;
Of course, if this edit check applies to both adds and edits, you could avoid duplicating code by creating your own separate procedure and having it called from both ProcessAdd and ProcessEdit. The resulting pop-up message would look like this:
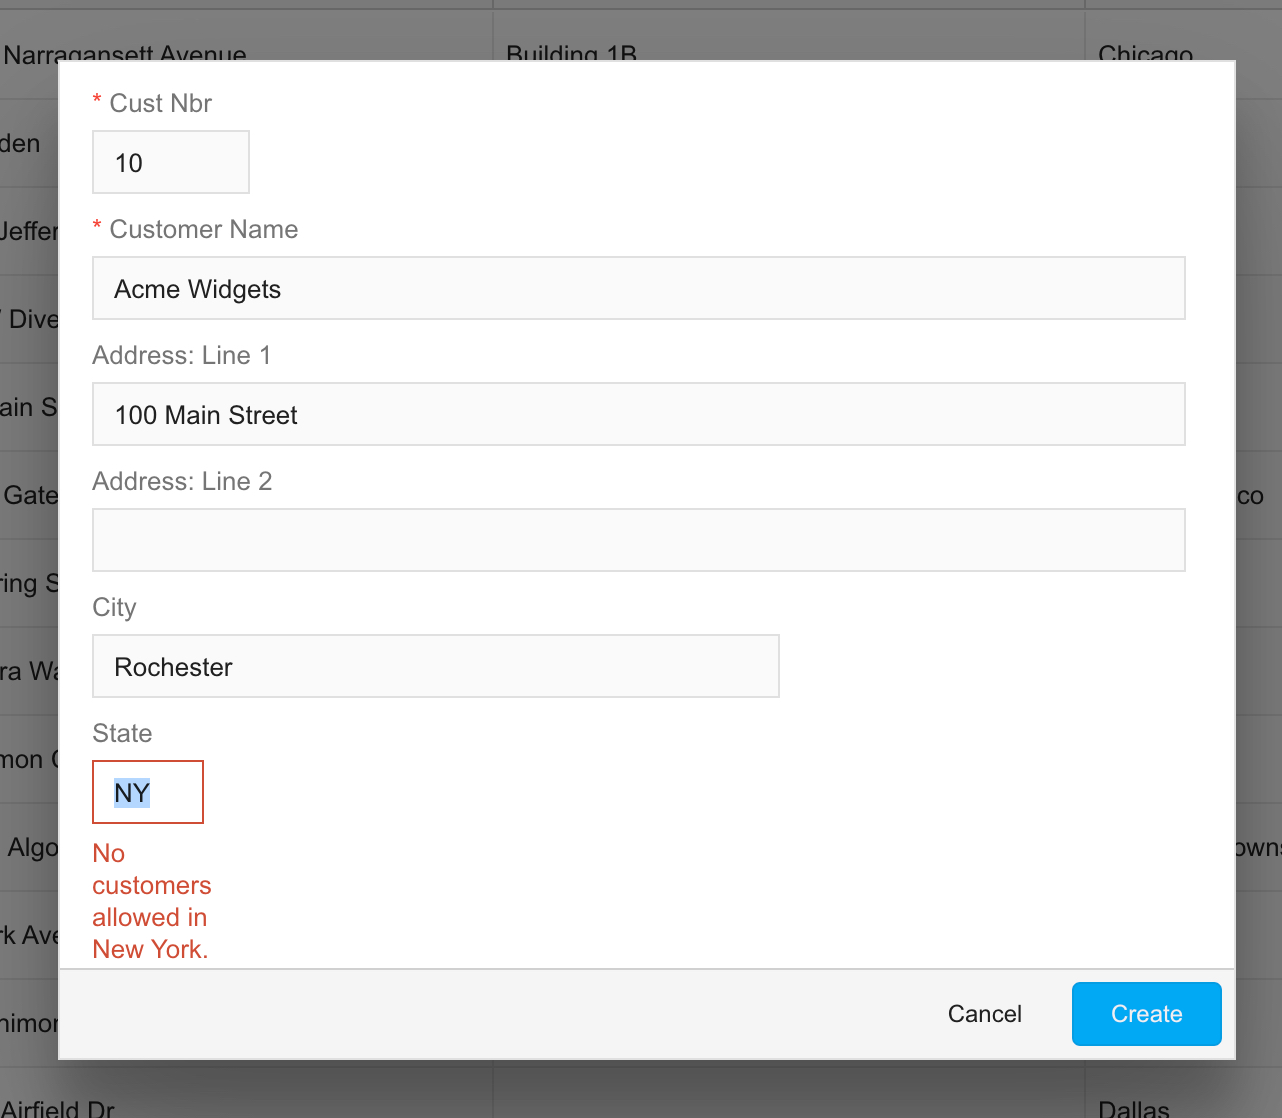
Note that this requires the user to click OK to dismiss the window, then locate and fix the field in error. Now, with the latest Valence 6.0 build installed, you can mark specific fields as being in error, and the error message will appear directly below the errant field rather than in a popup window that the user must dismiss.
if GetValue('DEMOCMAST':'CSTATE') = 'NY';
  SendError('No customers allowed in New York. Try another state.':'CSTATE');
endif;
Specifying the second parameter results in an in-line error message that would look like this:
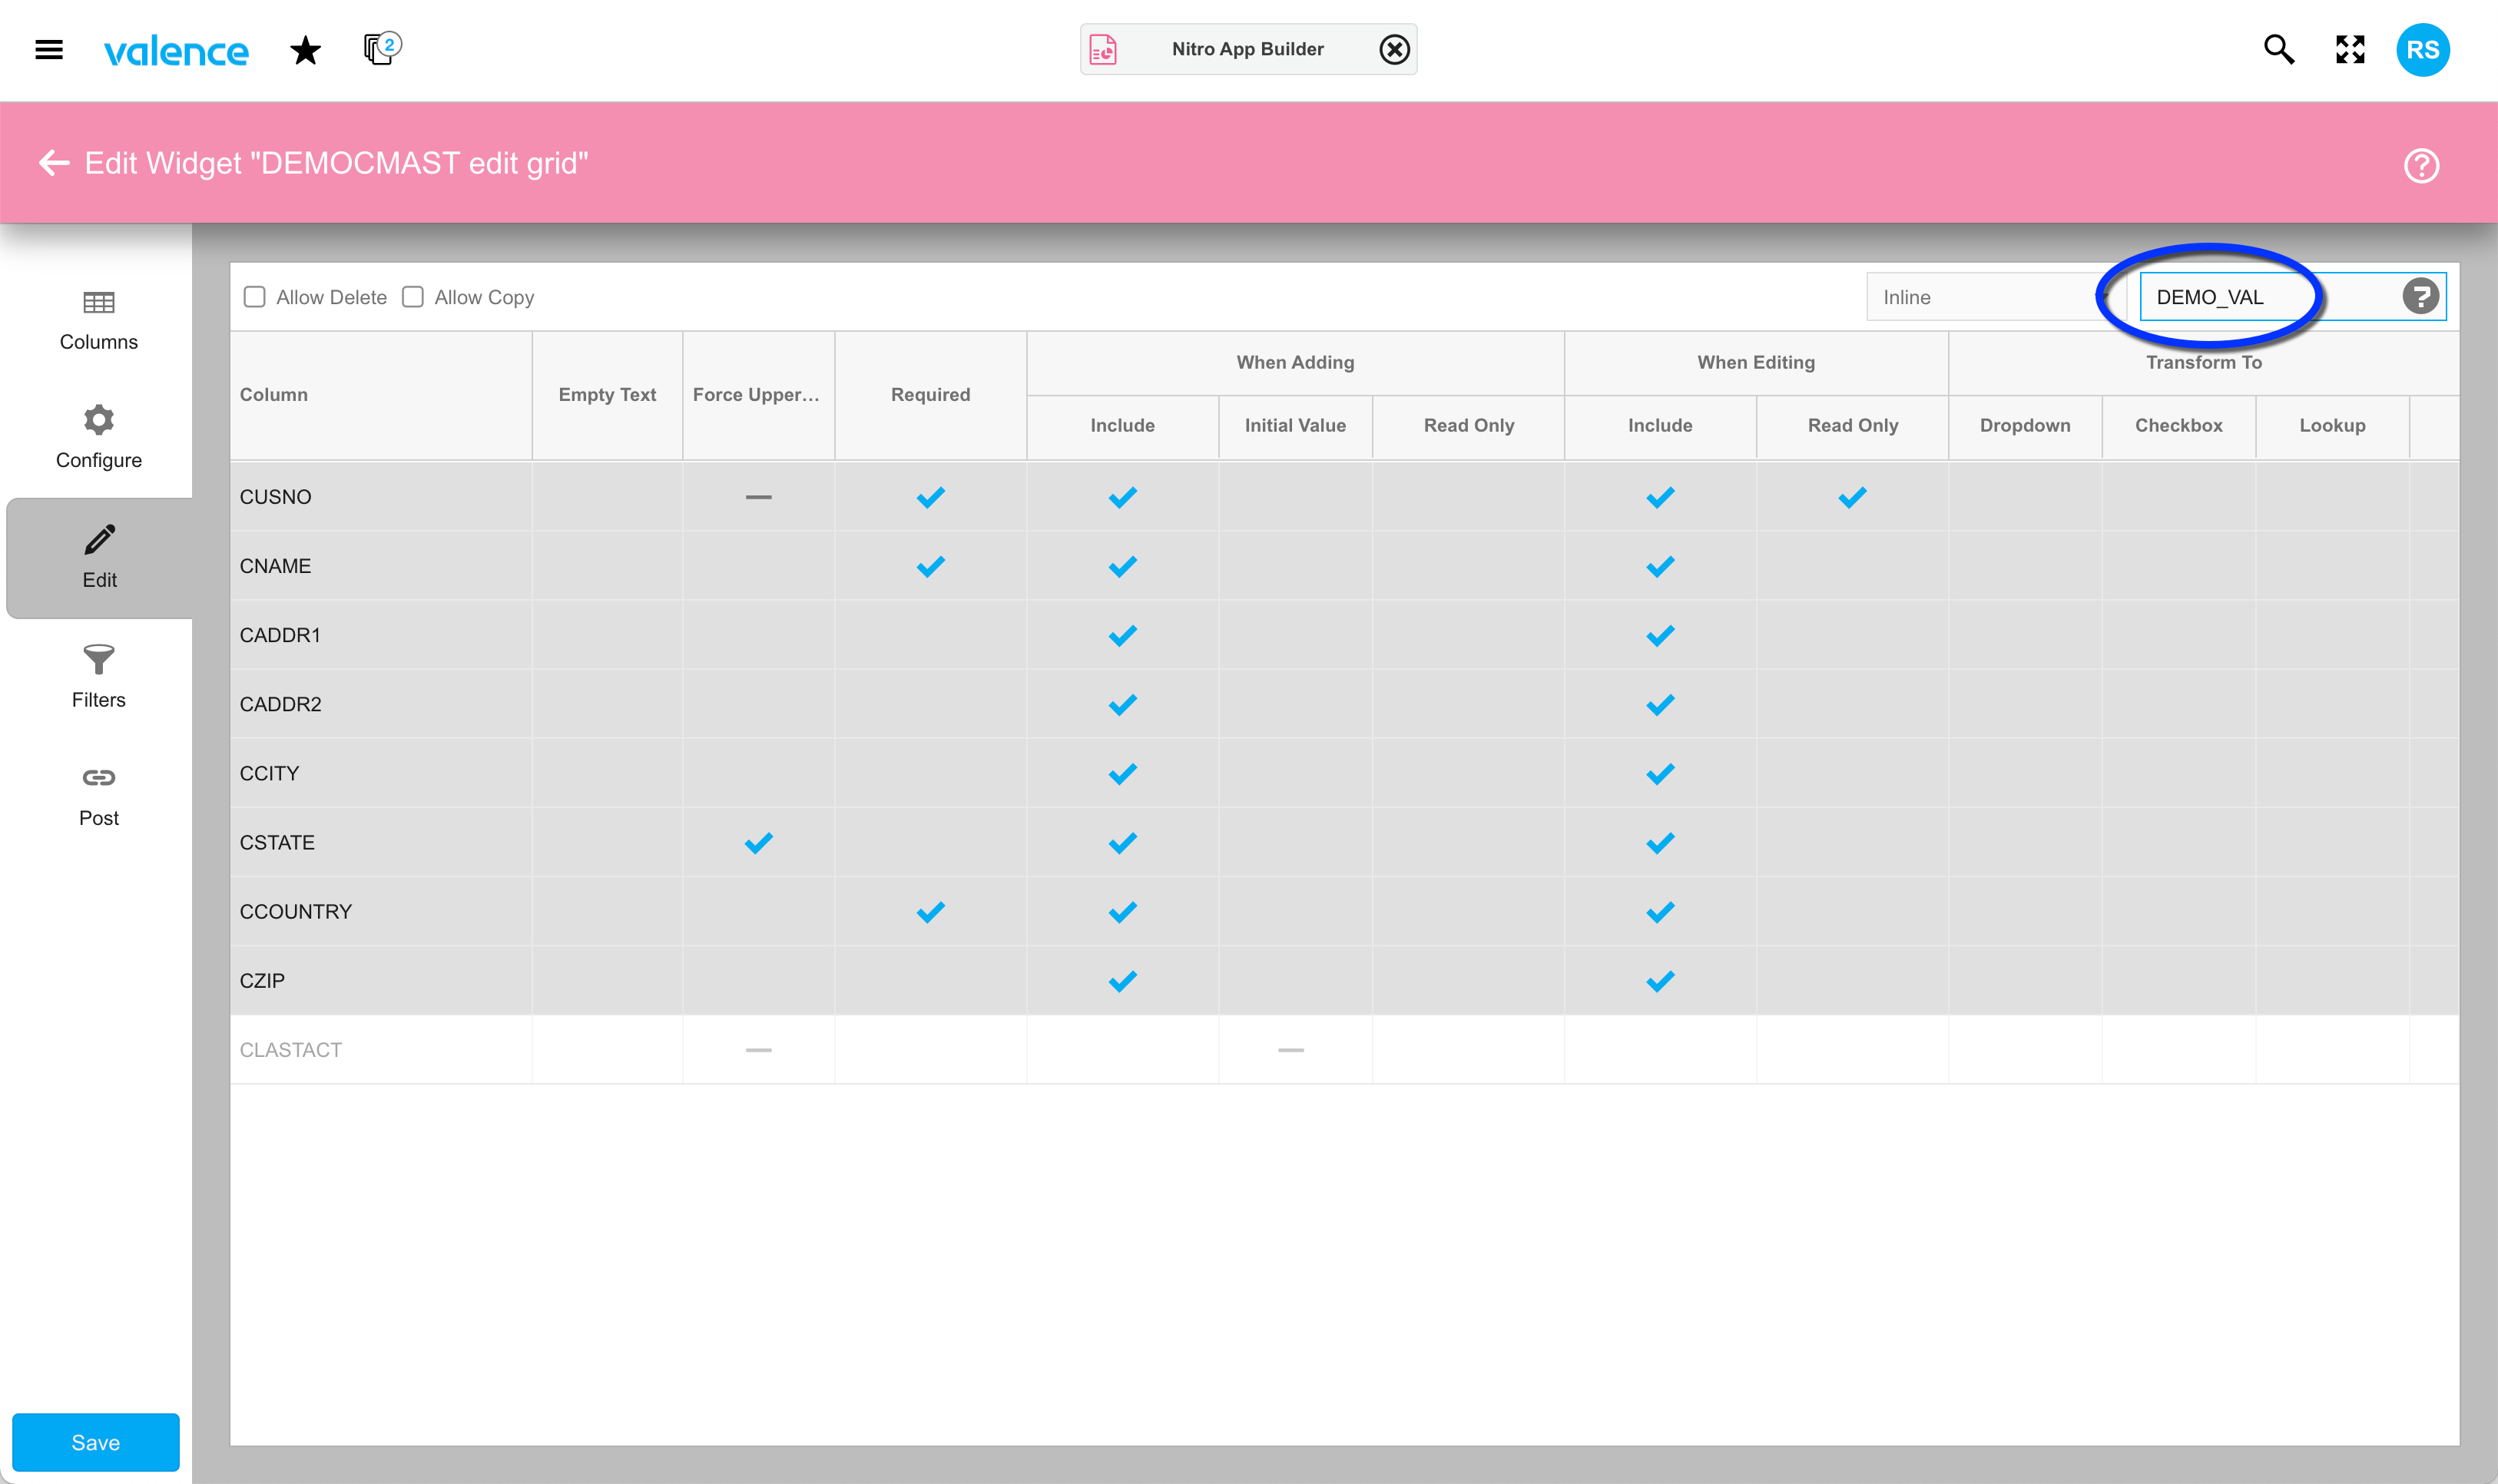
Note that GetValue, SendError and all other procedures available to the validation program are explained in the comment section at the top of the source. Once you’ve got your validation program compiled, the last step is to pop the program name in the Validation Program field of your Edit Grid widget. This is located in the upper right edge of the screen inside the Edit tab.
Setting field values “behind the scenes”
Now we’re back to our original objective, which is to initialize the CLASTACT and CYTDSALES whenever a user adds a new record to the file. As mentioned earlier, neither of these fields exist in the edit grid, and CYTDSALES isn’t even in the underlying data source. But that’s okay, because we can set values of any field belonging to any files specified in the data source.
So at the end of the ProcessAdd procedure, if we haven’t found any data-entry errors resulting in a SendError() response, we can tell NAB to assign specific values to as many fields as we like using SetValue. We could even override visible field values the user has specified. A possible use case for that could be to “pretty up” the format of a mailing address using some external validation routine your company has. Or, as a practical joke, you could use it to mess with a specific user’s entries — during testing only, of course!
Just as GetValue always returns the character string equivalent of a field value, SetValue must pass the character string equivalent. So the code for our DEMOCMAST objective would look like this at the end of the ProcessAdd procedure:
SetValue('DEMOCMAST':'CLASTACT':%char(%date()));
SetValue('DEMOCMAST':'CYTDSALES':'-1');
And with that, you’ve added some nifty behind-the-scenes functionality to your quick and easy edit grid creation!