Even as companies move toward a more paperless workplace, printed documents and paperwork remain an inevitable part of doing business. Whether it be a supplier invoice, a bill of lading, a certificate of quality, a signed contract, a proof-of-delivery or what-have-you, many business transactions are still supplemented with a piece of paper somewhere.

For users accustomed to processing the bulk of their clerical duties on a computer, the need to physically place a document into a file cabinet somewhere as part of completing a transaction can make an otherwise efficient process seem a bit cumbersome.
Fortunately Valence makes it easy to create an app through which IBM i users can upload scanned documents or image files straight to the IFS. Developers can use simple RPG code to set the name and stored location of the uploaded files such that they can later be retrieved through other apps.
Imagine a scenario where you have a list of customer orders and you’d like to make it possible for users to upload, say, a proof-of-packing form associated with the shipments. Let’s walk through the process of creating an app to accomplish this using Nitro App Builder.
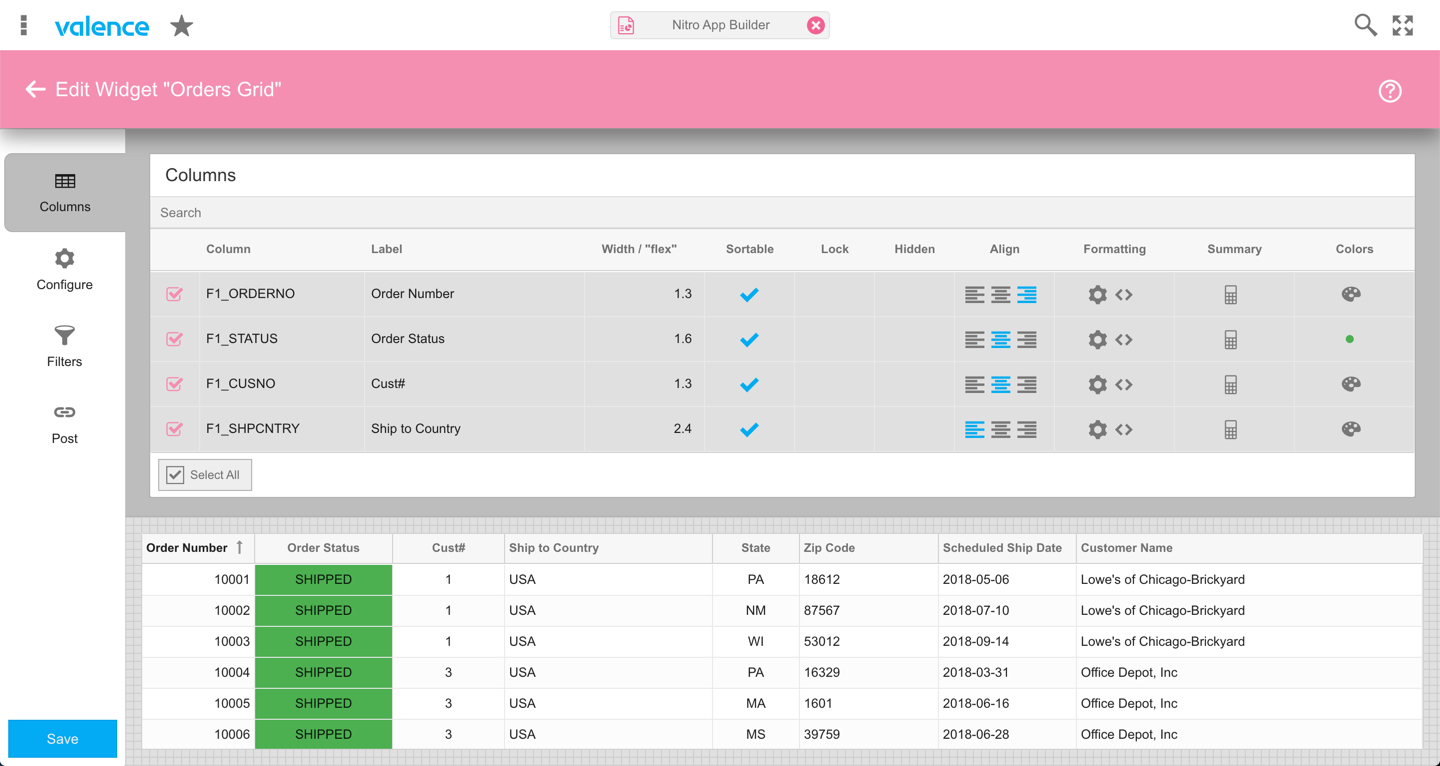
To kick off the process, let’s quickly create a list of customer orders using the DEMOORD_H customer order header file that’s included with Valence. The first step is to create a grid widget through which your users will interact with your data. You will of course first need to create a data source to feed the grid, then create the basic grid widget. The end result should look something like this:
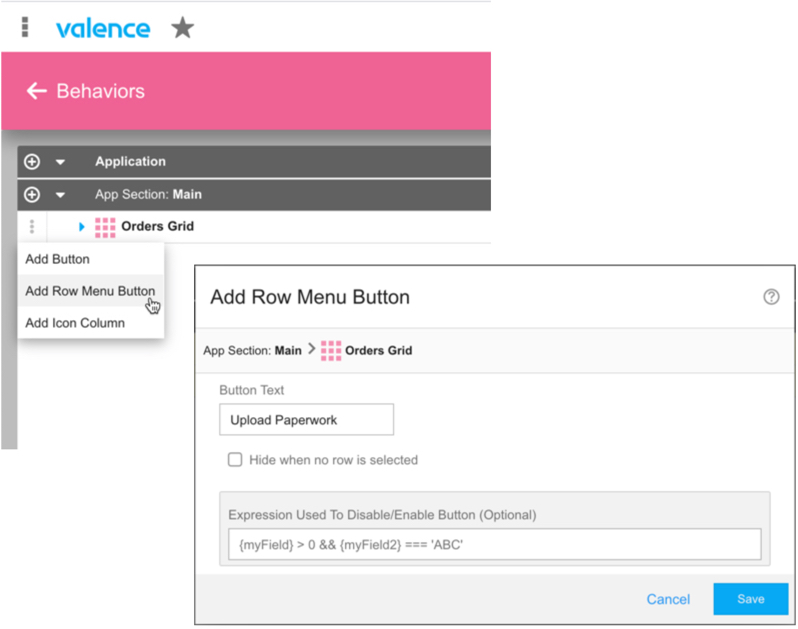
Next, start a new app and add the grid widget you just created (note that in this case we only need one widget, not multiple). Within the app we want to wire up a file upload option so users can link a printed form to an order. We’ll do this by clicking on the Behaviors button and adding a row menu to the grid with a label of “Upload Paperwork”:
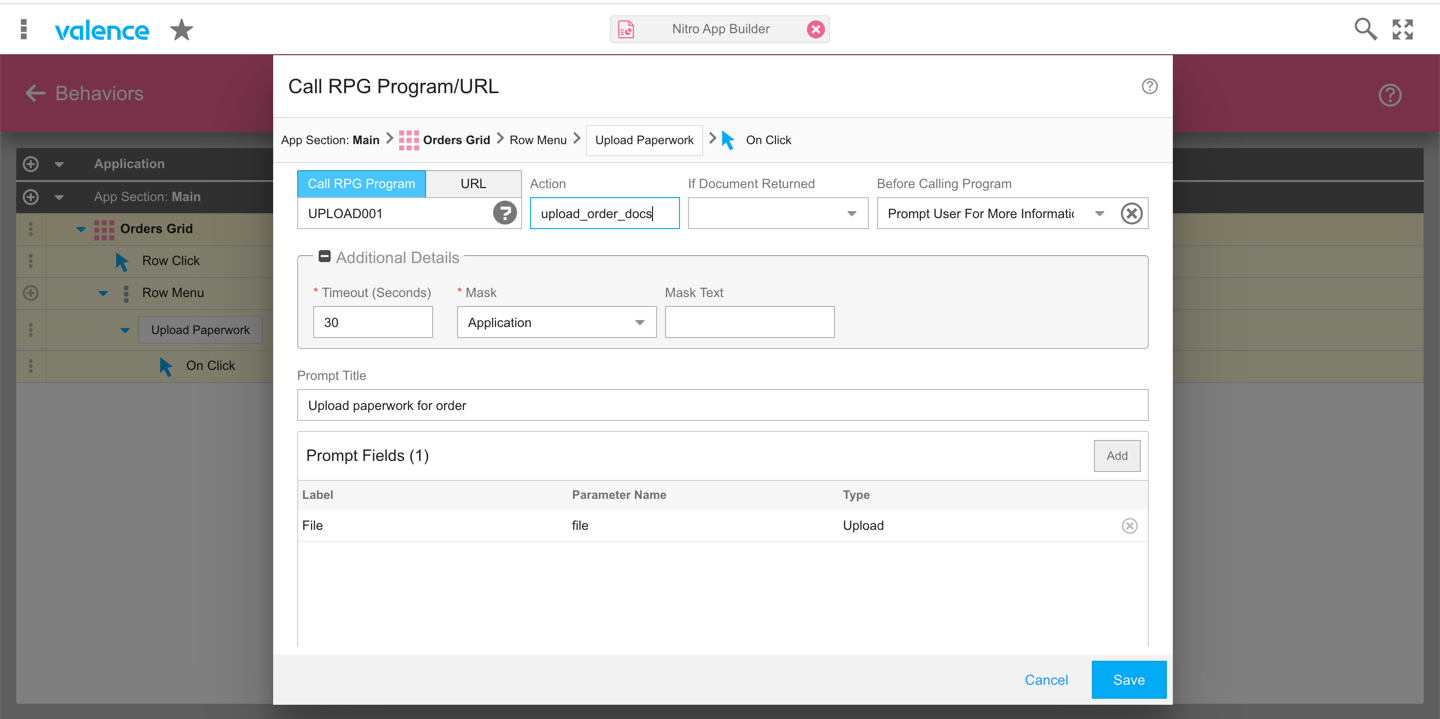
Finally, we’ll need to tell the app what to do when our new row menu option is used. So expand the Row Menu configuration, click on the “On Click” action and select “Call RPG Program/URL” option and specify the following:
- Call RPG Program: Enter the name of an RPG program that will process the uploaded file in the “Call RPG Program” space
- Action: Enter the name of action that your RPG program can look for. An action name is useful if your RPG program will be used to handle different types of uploads, either from within this app or from other apps. If your program will be dedicated to just this one type of upload you can leave the action blank.
- Before Calling Program: Select the “Prompt User for More Information” option, as the app will need to prompt the user for a file to upload.
- Prompt Title: Enter a string of text to tell the user what they’re doing (i.e., “Upload paperwork for order”)
- Prompt Fields: Click ADD to add a field — a good name might be “File” or “Filename” — to hold the path for the file being uploaded. Be sure to specify a Type of “Upload”
- Allowed file extensions: If you want to restrict the type of documents being uploaded to, say, PDFs, you can limit the uploads to “pdf” as a type of validation.
Save the changes and the front end of our app is ready to go. Let’s turn our attention now to the back end part of the process, the RPG program.
If you’ve downloaded the latest build, example source member EXNABBTN03 in VALENCE52/QRPGLESRC has some recently updated example code that makes for a good starting point for file uploads (the source has been winnowed down from the more general EXNABBTN member). The pertinent code is in the “Process” procedure. For our example here we’ll want to include the following code:
** --------------------------------------------------------------
p Process         b
d                 pi

d cusnoA          s              6a    varying
d ordnoA          s              6a    varying
d action          s             30a

  if gIsUpload;

    action = vvUtility_getSessVar('action':gSid);
    if action='upload_order_docs';

      // set up path and file name based on customer and order...
      cusnoA = GetSelectionChar(1:'F1_CUSNO');
      ordnoA = GetSelectionChar(1:'F1_ORDNO');
      vvIn.path = '/orderDocs/cust_'+cusnoA+'/';
      vvIn.filename = 'order_'+ordnoA+'.pdf';

      // pull in the file...
      vvIn_file(vvIn:'*NULL');

      if vvIn.error <> *blanks; // error encountered
        SetResponse('success':'false');
        SetResponse('msg':%trim(vvIn.error));

      else;  // successful download
        SetResponse('success':'true');
        SetResponse('info':'Document ' + %trim(vvIn.fileName) +
                    ' uploaded to ' + vvIn.path);
      endif;
    endif;
  endif;
p                 e
The code is fairly easy to follow, but let’s point out some of what it’s doing:
- Variable gIsUpload is set to *on whenever a program is being called as a result of a file upload.
- File uploads do not have access to query parameters so instead of using vvIn_Char() to obtain posted values from the browser we must access them through session variables. Hence, vvUtility_getSessVar() is used to pull in the “action” value.
- GetSelectionChar() is used to pull in character values from the selected grid row. If you’re in doubt about the column names being passed, you can inspect the data being sent using your browser’s developer tools, or by looking at the columns specified in the widget.
- If an error is encountered in the attempt to upload the user’s file, vvIn.error will be non blank after the call to vvIn_file(). You can use this to let the user know there was a problem.
- SetResponse() is used to send a response back to the browser. The only required response is “success” (true/false), but you can supplement that with other messages or instructions to the front-end, as delineated in the EXNABBTN source member beginning at line 55.00.
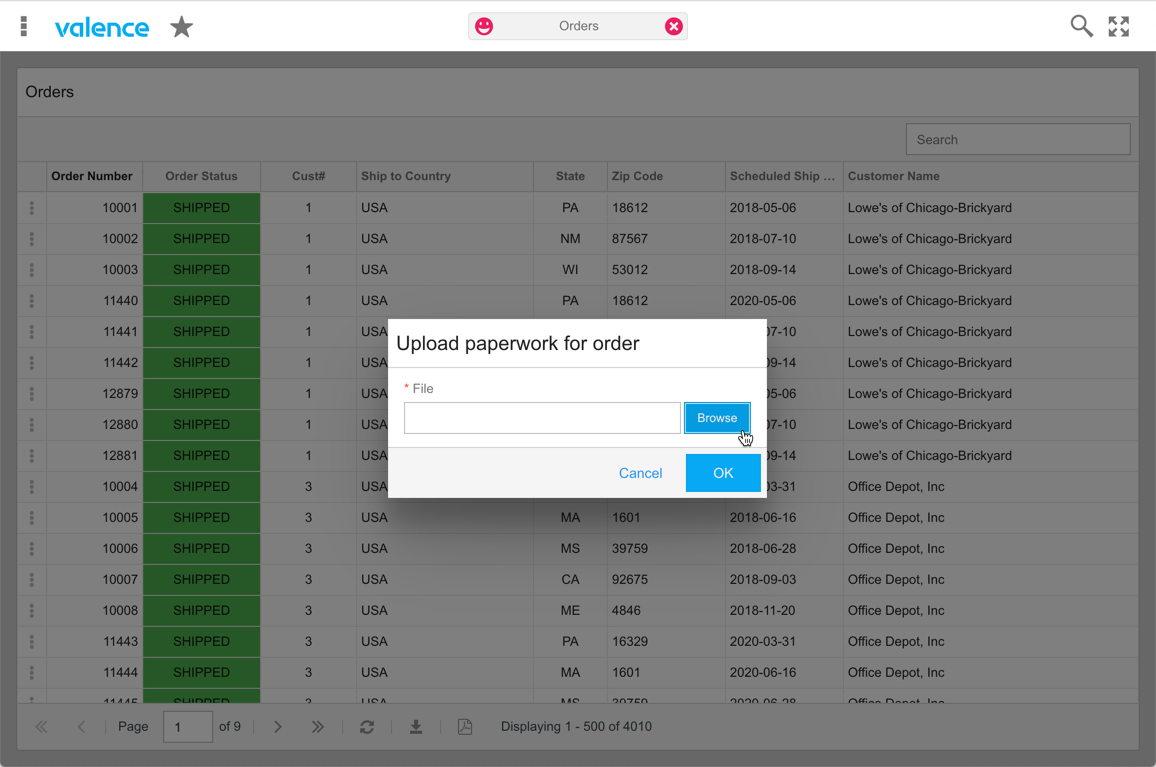
Once this back end RPG program is compiled (be sure its name is the same as what you specified in the NAB configuration earlier), then your app should be ready to roll. The upload prompt will be presented to the users like this, where they can click on the Browse button to locate the file on their PC:
In next month’s tip we’ll look at the other side of this process, demonstrating how to create an app in which your users can view and/or download previously uploaded documents.