AutoCode apps generated with Valence 4.2 use Ext JS 4.2 — the fact that these are the same version numbers iwherever possible it is recommended that you just regenerate the app using the new autocode that comes with valence 5. However, if you’ve made enhancements to AutoCode apps generated in Valence 4.2 then regeneration from scratch isn’t a very viable option.
Fortunately, if you’ve used Sencha Architect to apply those front-end modifications (versus making changes directly to the source), then you can follow the process outlined below to migrate and upgrade the apps to work with Valence 5 using Ext JS 6.
These are the general steps to follow:
- Copy the user interface code on the IFS from the old to the new Valence folder.
- Copy and compile the RPG source for the backend program.
- Create an app record for the app if you haven’t done a migration using the conversion app.
- Upgrade the app from Ext JS 4.2 to Ext JS 6 using Sencha Architect.
- Make a few configuration changes to the app using Sencha Architect.
- (optional) Change the old Neptune theme to the new Triton theme used in Valence 5.
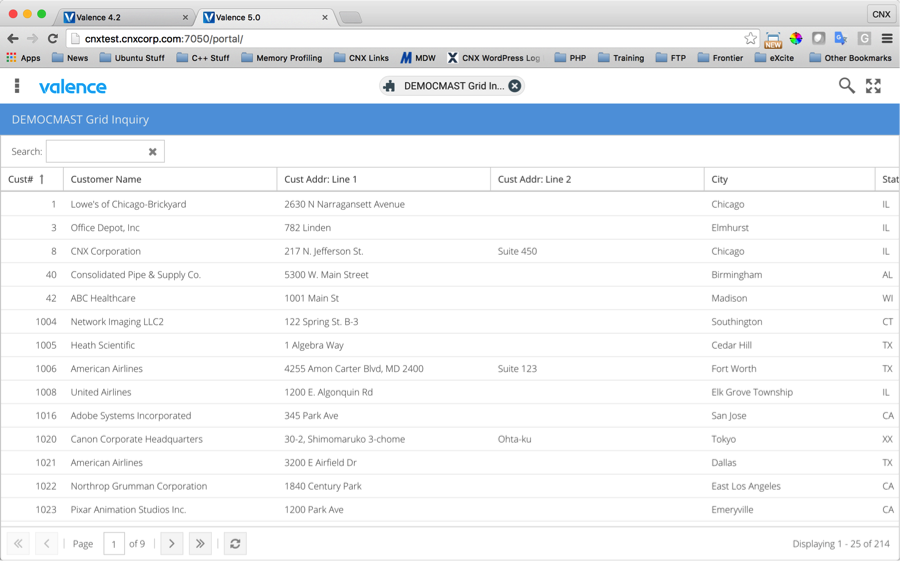
To illustrate the process, we will walk through upgrading a Valence 4.2-based AutoCode inquiry app based on the DEMOCMAST file.
Step 1: Copy the IFS files
Here’s what the app originally looked like in Valence 4.2 using Ext JS 4.2:
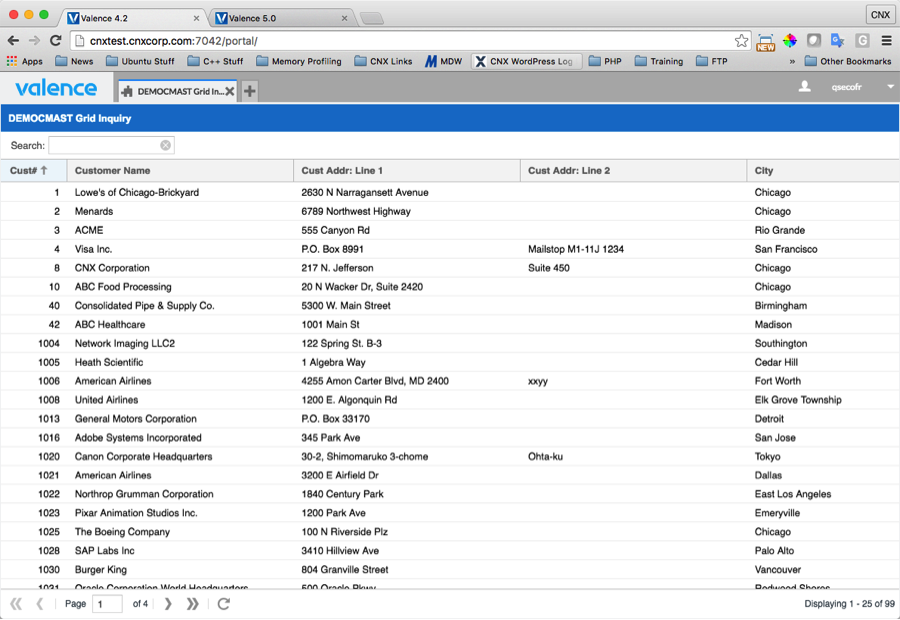
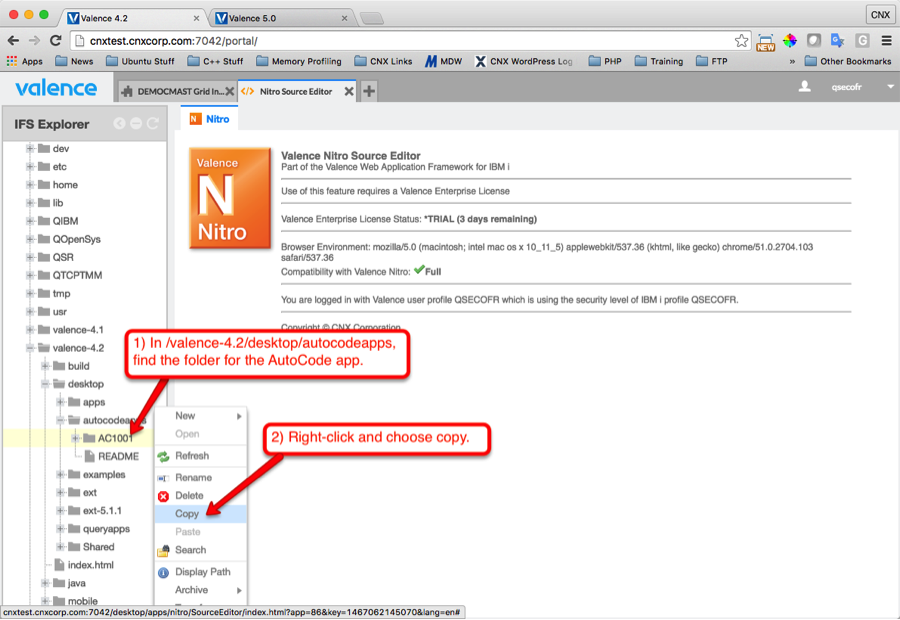
The first step is to copy the source from the original IFS folder and place it in the new folder for the 5.0 environment. We recommend placing it in the “desktop/autocodeApps” folder, as illustrated in figures 2 and 3:

Step 2: Copy and compile the RPG program
Now let’s focus on the back-end for a moment. In our example the RPG member name is AC1001 located in library VALENCE42, file QRPGLESRC. No screenshots necessary for this process!
- Use RDi, PDM or any other IDE to copy source member VALENCE42/QRPGLESRC(AC1001) to VALENCE50/QRPGLESRC(AC1001).
- Compile the program, making sure sure VALENCE50 is at the top of your library list.
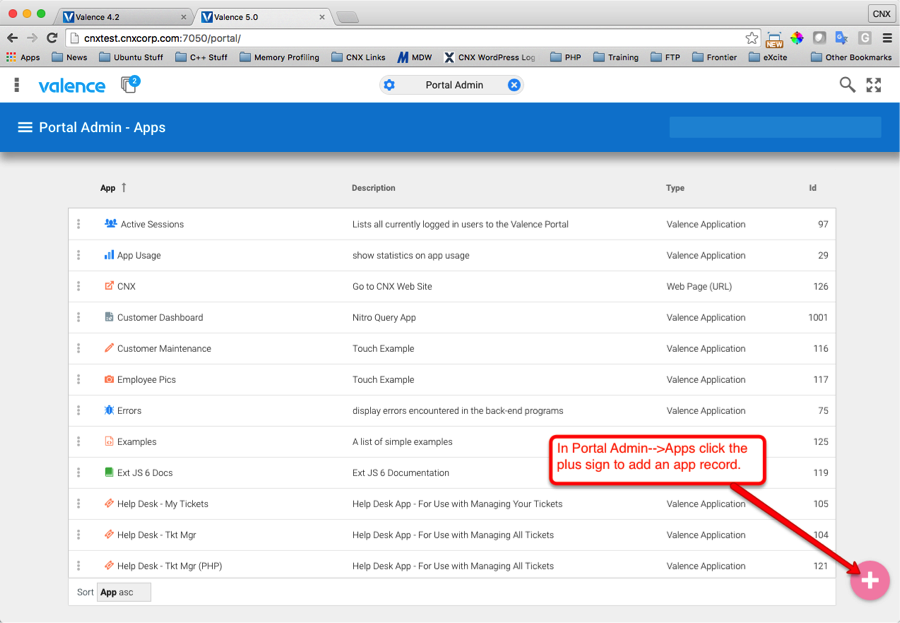
Step 3: Create a Portal App record for the AutoCode app
If you’ve already used VVMIGRATE to migrate portal data from your old instance then you can skip this step. Otherwise you will need to create a portal app record in Valence 5. Open up the Portal Admin app, go into the “Apps” section and follow the steps illustrated in figures 4 and 5:

Step 4: Use Sencha Architect to upgrade the app from Ext JS 4.2 to Ext JS 6
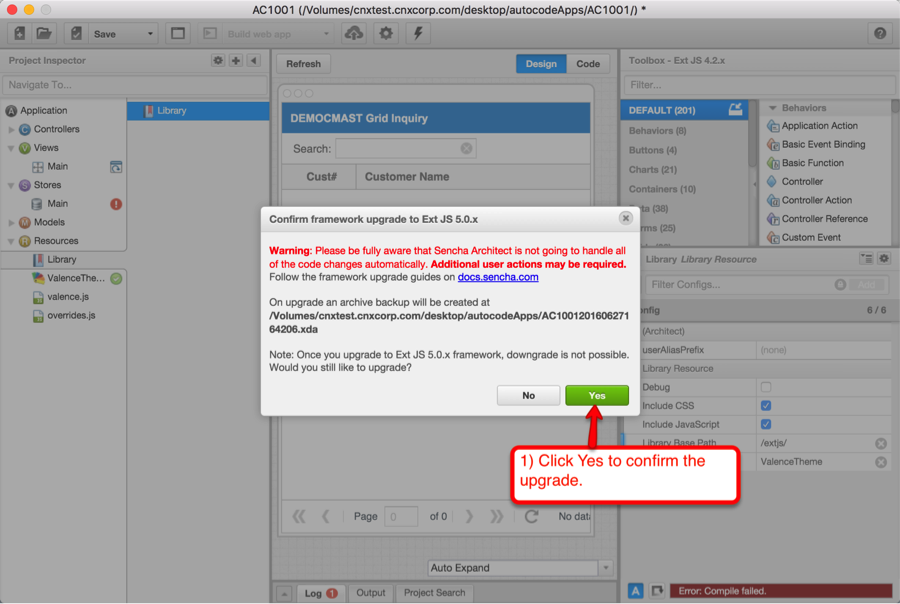
Now back to the front-end. Figures 6 through 9 illustrate the process of successively upgrading the app from one version of Ext JS to the next, until you reach Ext JS 6:
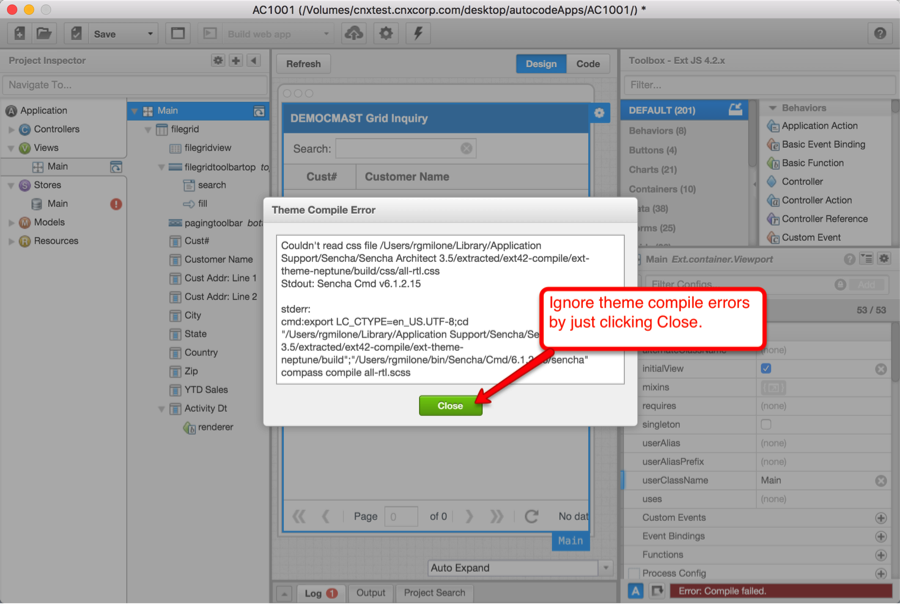

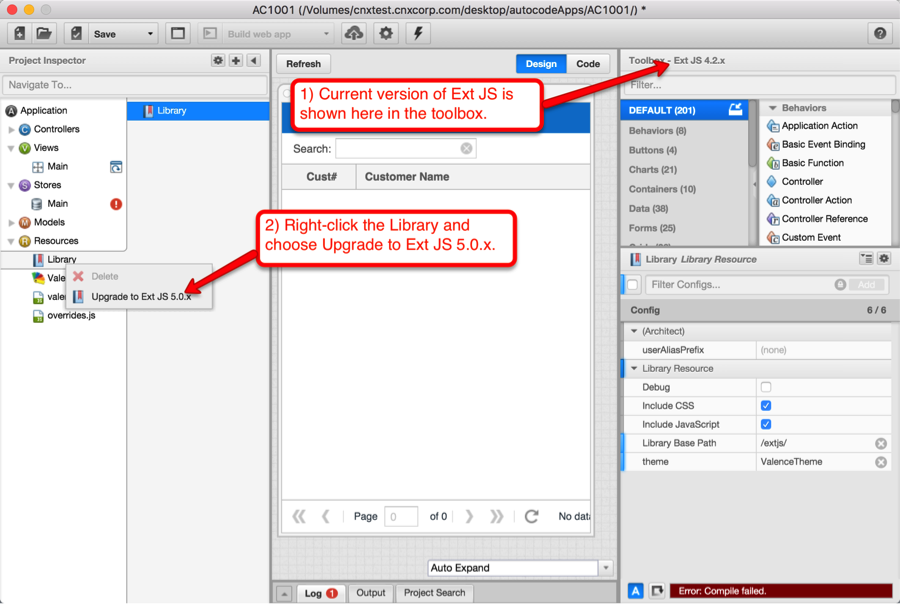
Sometimes an error message may come up in this process, but in most cases you can just choose ignore or close.
Repeat this process again to upgrade from Ext JS 5.0 to Ext JS 5.1, then again to go from Ext JS 5.1 to Ext JS 6.0.x.
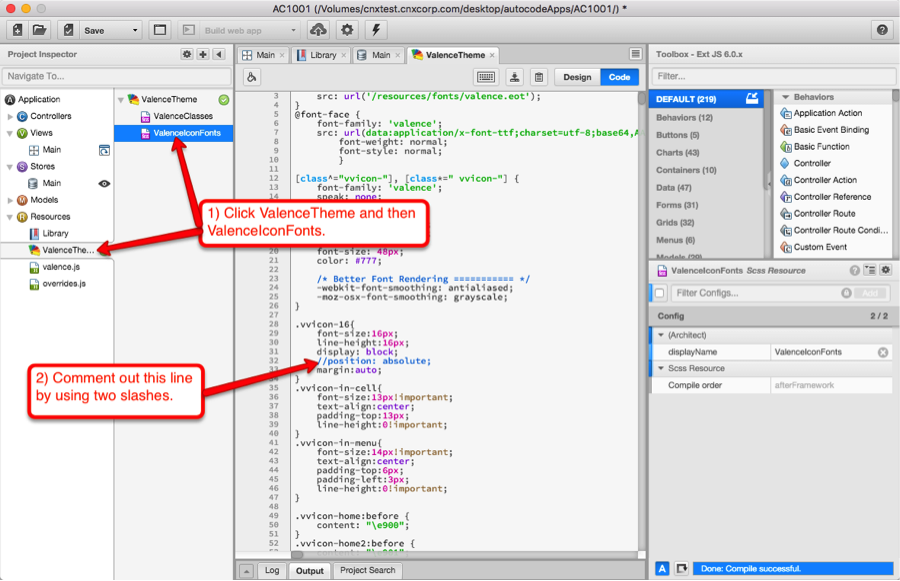
Step 5: Apply adjustments to ensure compatibility with Valence 5
Figures 10 through 12 illustrate the minor adjustments that should be made to get the app working within the Valence 5 portal:
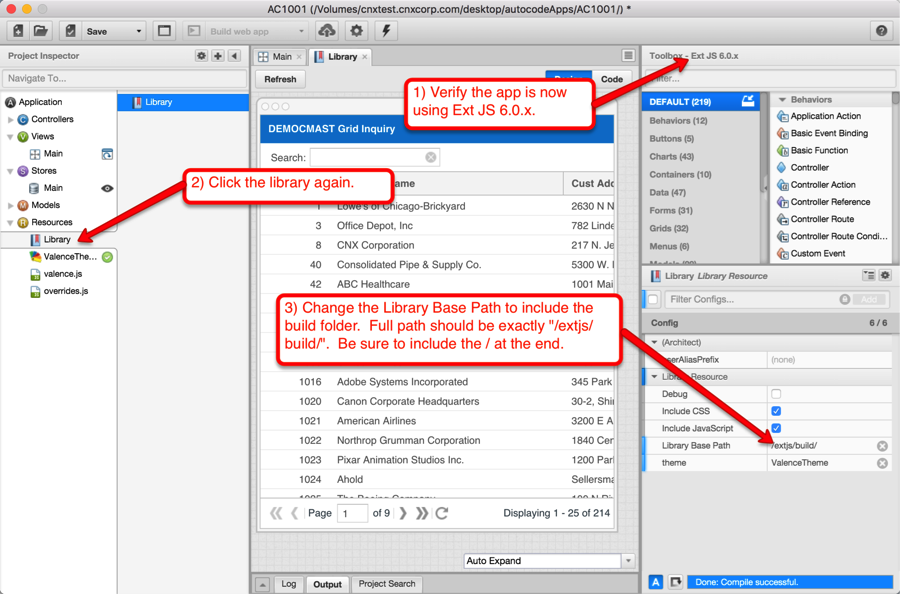
Figure 11: changing the store name from “main” to “Main”
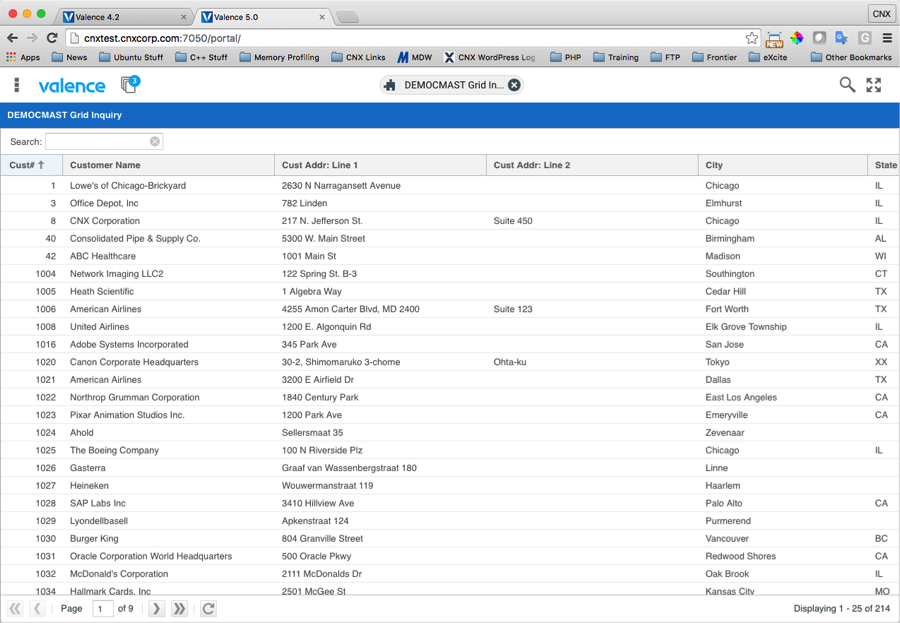
Once these changes have been applied, save the app and test that it now works in Valence 5 using the existing Neptune theme. It should look something like this:
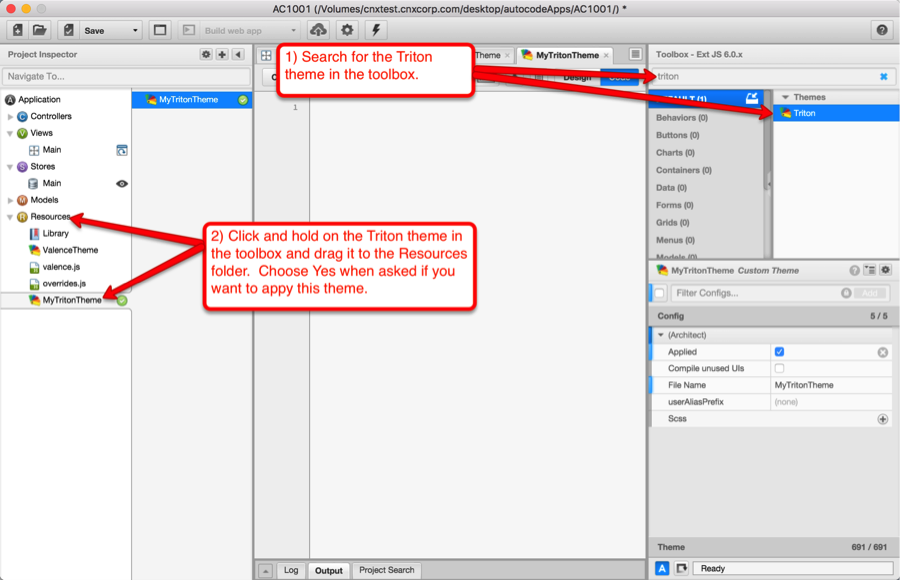
Step 6 (optional): Update the app to the new Triton theme in Valence 5
If you’d like your app to take on the same look and feel as the core Triton-themed apps distributed with Valence 5, figures 14 through 16 illustrate the changes you’ll need to make:

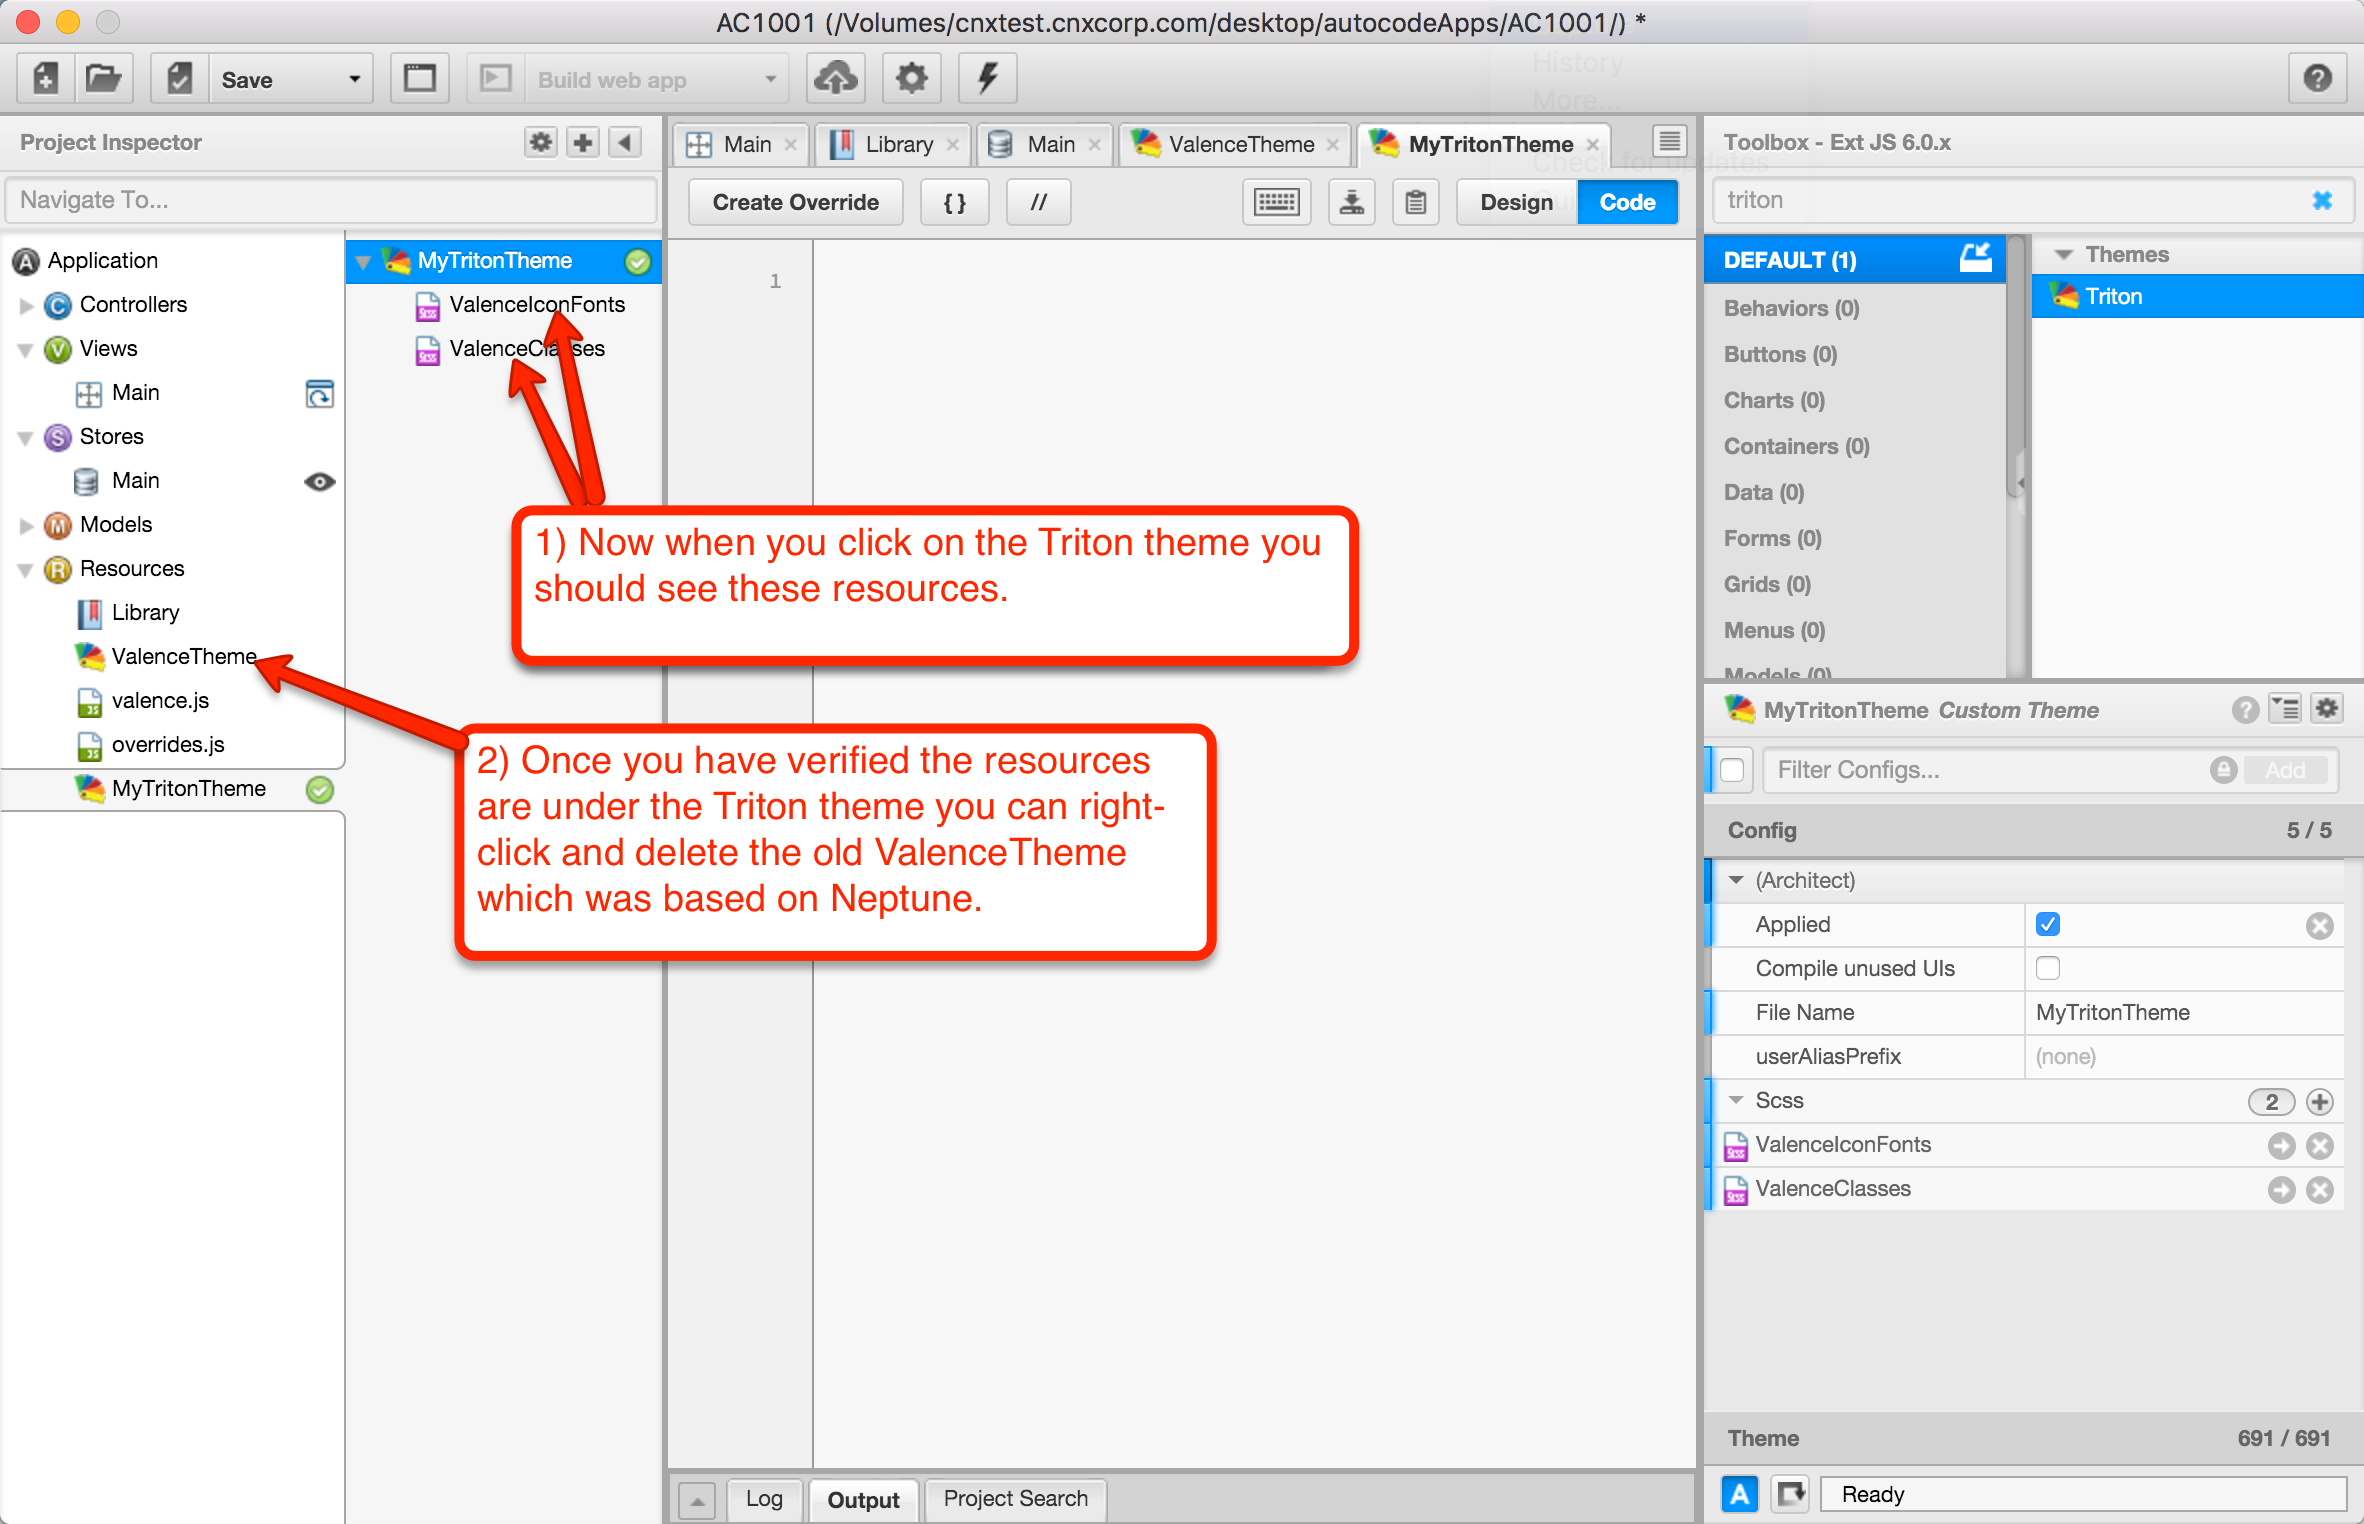
Now your app should be working in Valence 5 with the Triton theme, looking something like this: