One common trait we see at companies small and large is that users have a seemingly insatiable appetite for queries, dashboards and Excel downloads. Fortunately, the Nitro Query app included with Valence provides a great mechanism for quickly whipping out these kinds of apps without any programming.
With Valence 5, in addition to completely reengineering the Nitro Query interface, we’ve also added a new “click event” feature. This functionality makes it possible for users to intuitively click their way into greater details from any component on your app. Click events are great for providing a drill-down on data having a many-to-one relationship. For example, when a user is viewing a list of customers in a grid or pie chart, clicking on a row or slice corresponding to a customer would bring up a list of open orders for that specific customer number.
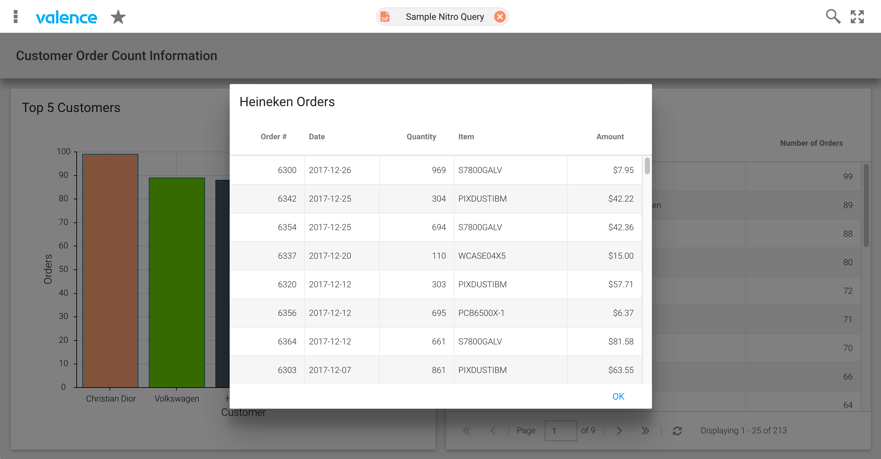
Alternatively, clicking on a row in a grid containing a list of orders could trigger a pop-up grid listing all the line items for that particular order number. Valence 5 includes an example of just such a click event in action. The “Sample Nitro Query” app, located in the Examples section of the Valence Portal launchpad, demonstrates a simple dashboard, the left side listing the top five customers (based on total number of orders), and the right side showing a list of all customers and their order counts. This content here is all based on the DEMOORDER file included with Valence. By clicking on a customer in either panel you will be presented with a pop-up grid listing all the orders behind the clicked component, as shown here:
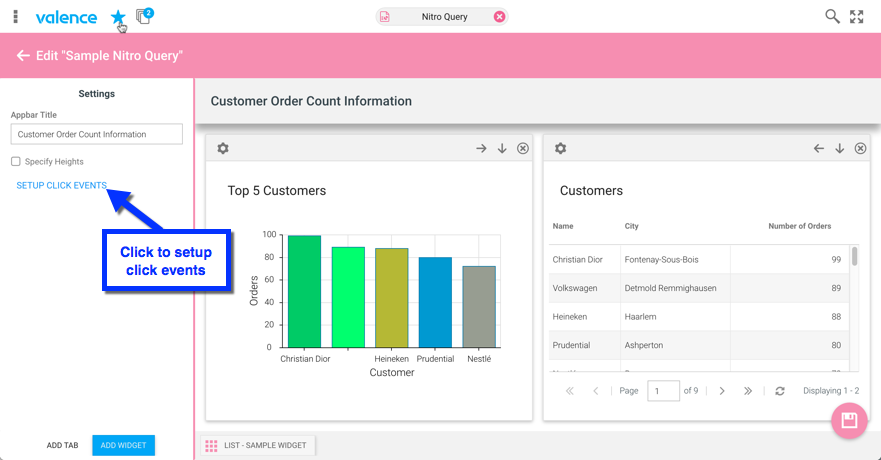
In order to set up a click event like this, you must of course first create a couple data sources and widgets in the Nitro Query app. Once you have defined both your primary widget and the widget you want to be triggered by a click-event, the next step is to simply add each of them to your query by clicking on the “Add Widget” button. Note that if you want your triggered widget to appear as a pop-up, you should click on the “ADD AS POPUP” text that appears on the right as you hover over the list of widgets. Once you have one or more widgets arranged in your query canvas, the key to incorporating the click event relationship is to simply click on the “SETUP CLICK EVENTS” link in the upper left, as illustrated below in figure 2.
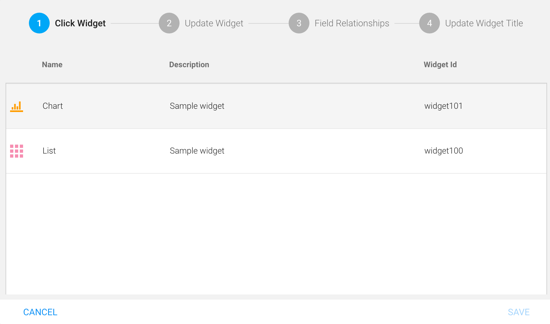
Configuring a click event is a matter of telling Nitro Query which field value in a particular widget should be used to drive the filter for the secondary widget. When you click on the “ADD CLICK EVENT” button in the upper right, the app will walk you through the process. The first step in the configuration is to pick the widget for which you want to establish a click event. This is referred to as the Click Widget.
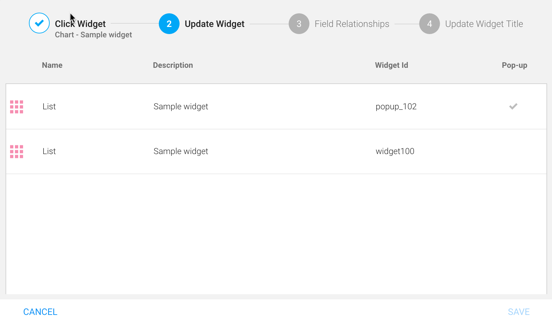
After selecting the Click Widget you are automatically advanced to step 2, where you select the widget you want to be updated or displayed in response to the click event. This is referred to as the Update Widget.
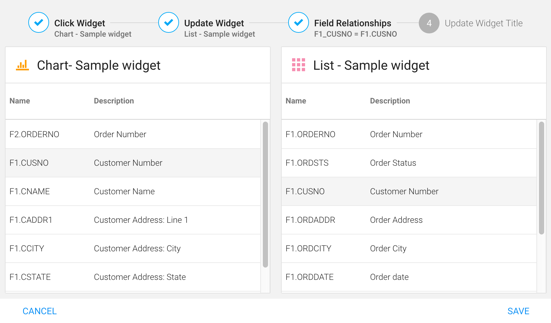
After selecting the widget to be updated, you are automatically advanced to step 3. In this step you indicate how the Update Widget should be filtered, based on a field in the Click Widget selected in step 1. Figure 5 below shows the customer number from the Click Widget being used to filter the content of the Update Widget.
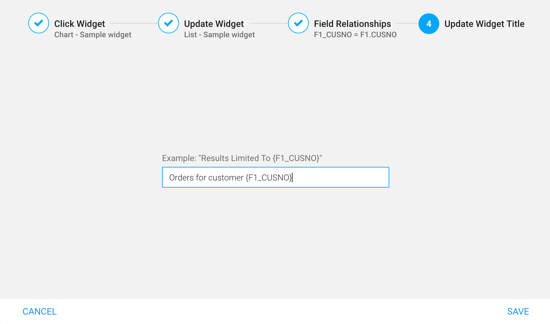
At this point you can click “SAVE” to complete the process, or click on the “4” icon to optionally specify how the click event should adjust the Update Widget’s title. An adjusted title can help clarify to the user how the data in the Update Widget is being constrained or filtered. Note that you can pull in the value of the filtered field by using the field name enclosed in curly brackets, as shown in figure 6 below.
It’s worth noting that while the Sample Nitro Query app is using a click event to trigger a pop-up window, it’s also possible to have a click event trigger an already visible widget to be adjusted. You can also set a widget in your query to be hidden until a click event triggers it by checking the “Initially hidden” checkbox on the widget configuration. We hope you find this new click event functionality handy!