Since the official Valence 6 release in September, many sites currently using a prior version of Valence face the somewhat daunting task of getting users to change their URLs to the new instance. If you’re not using some sort of an alias or permanent redirect in Apache — meaning the port number for your Valence instance is part of the URL — then you’re looking at potentially hundreds of users needing to update their browser bookmarks to point to a different port.

But there’s another way to get your users logging into the correct instance without having to touch their bookmarks: Simply have the old port number route to the new instance, in addition to the new port number you’ve been using to validate or test the new instance. This way if something goes wrong with your new instance, you can easily revert your users back to the original instance by undoing the port change.
Before we dive into this, let’s preface the discussion with a quick refresher on “best practices” for your Valence 6 setup. We highly recommend you do NOT have your users log into the base VALENCE6 instance for production apps. Rather, you should use Instance Manager to create a separate Valence instance for production (i.e., VALENCE6P), and perhaps one or more additional instances for development, testing, Q/A, etc. (i.e., VALENCE6T). This way you can download Valence updates to your base instance at any time, then roll them out to your other instances when you’re ready. See the Valence 6 Guide for further details.
With that out of the way, let’s get into how you can configure your new Valence 6 instance to listen on your old Valence 5.2 port. The process entails two steps: (1) Disassociate your former Valence instance from its current port, then (2) add the former port to your new Valence instance.
Now let’s walk through these items in detail…
Disassociating your old Valence instance from its current port
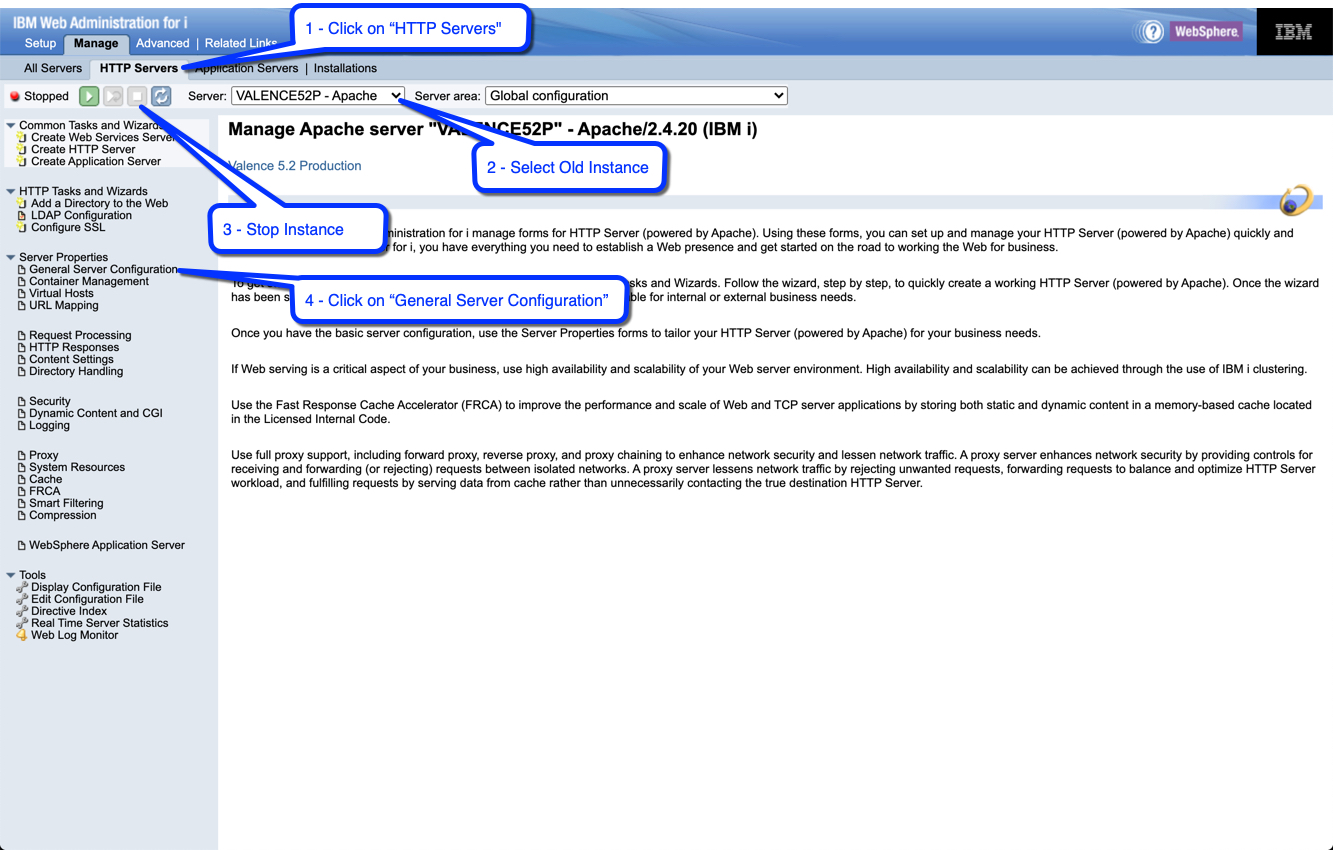
You should begin by logging into your IBM i Apache Admin at http://your_ibm_i_address:2001/HTTPAdmin, then:
- Click the “HTTP Servers” tab
- Select your old Valence instance. For sake of example, we’ll use VALENCE52P running on port 8052 as our former instance.
- Stop the instance if it’s currently running
- Click on “General Server Configuration”
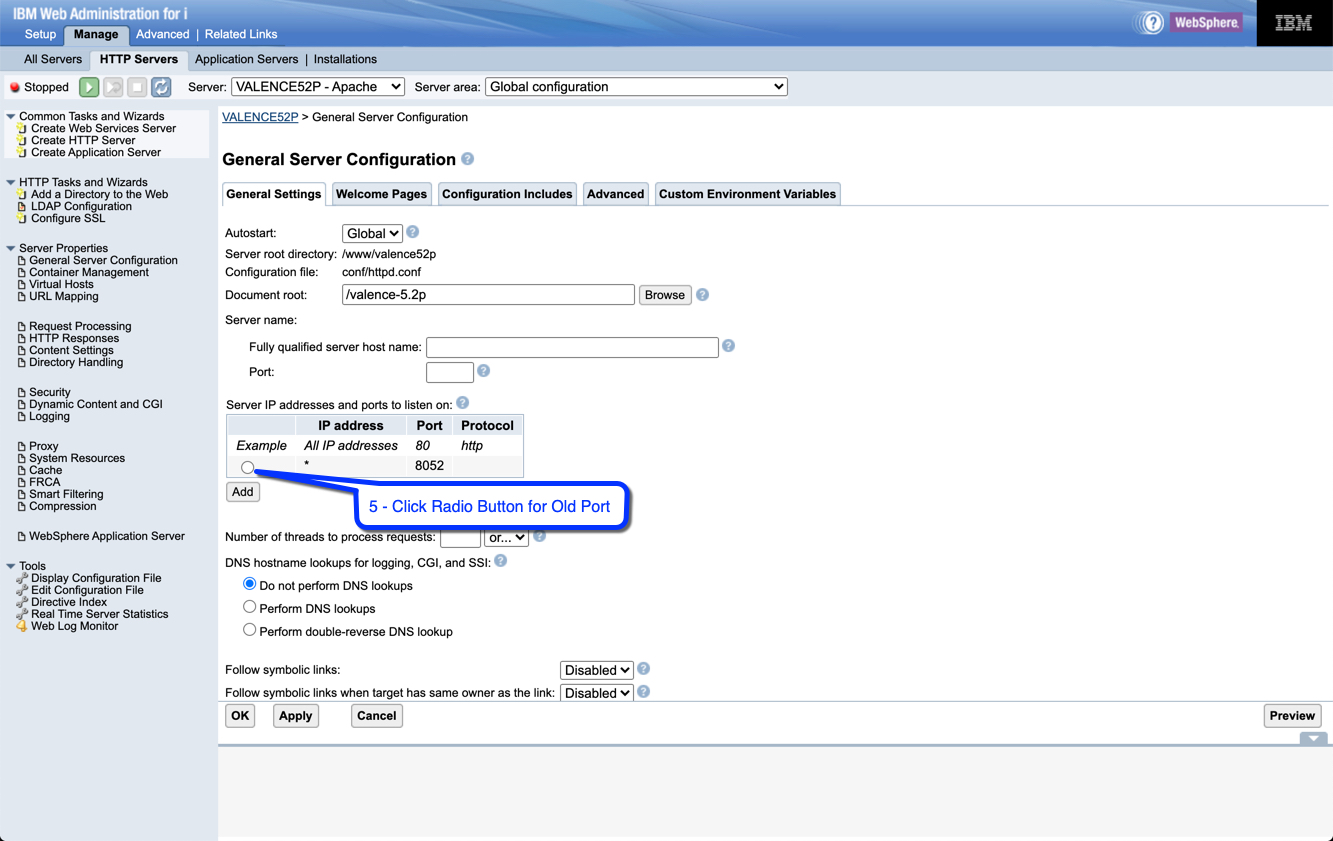
- Click on the radio button associated with the current port
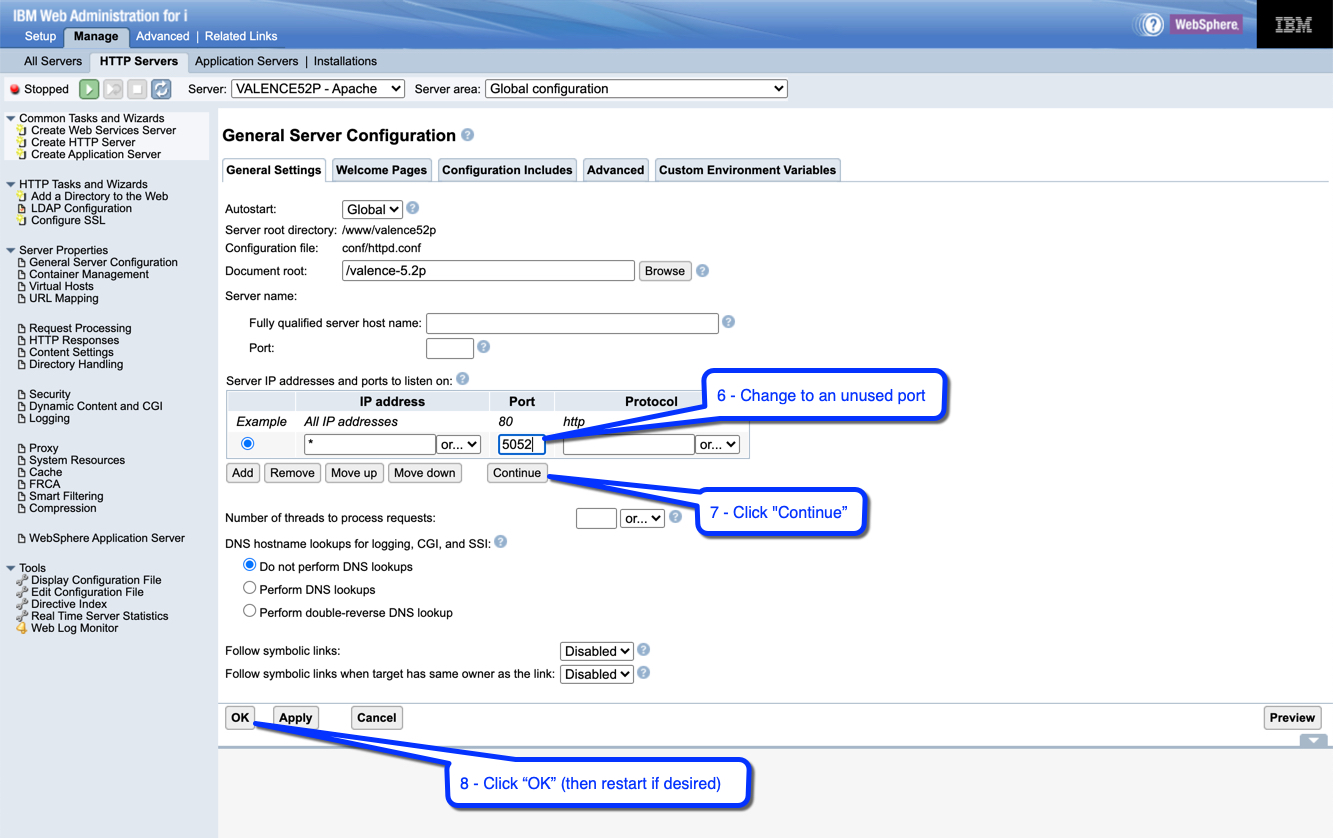
- Change the port to an available unused port. This way you can still log into the old instance if needed.
- Click “Continue”
- Click “OK” and restart the instance if you still want to be able to access it. If you don’t want the instance to run anymore, you should also change the “Autostart” value to “No” so it doesn’t fire back up again on your next IPL.
Adding a second port to your new Valence 6 instance
This is where we route your former Valence 5.2 port to the Valence 6 instance.
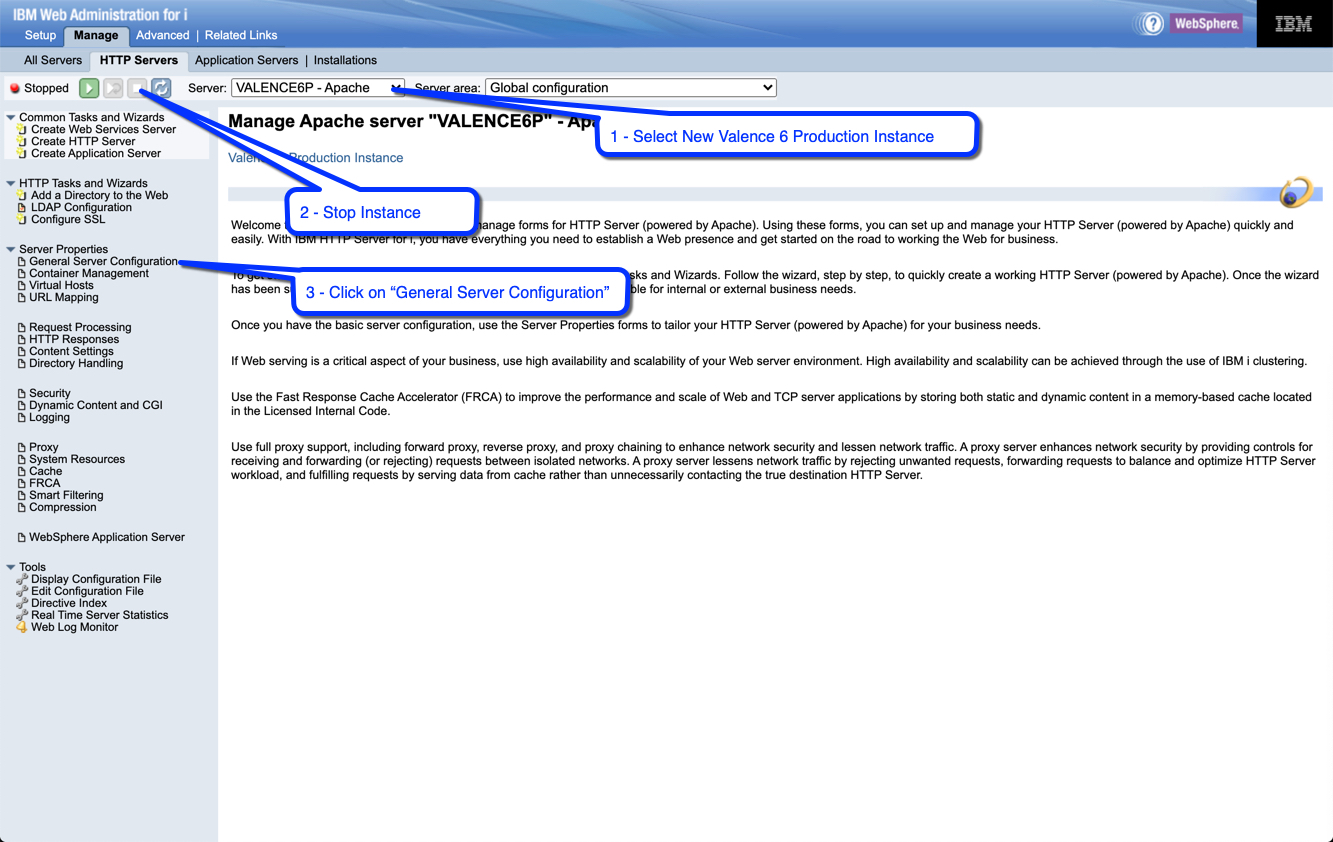
- Select your new Valence 6 production instance. For sake of example we’ll assume you’ve created a VALENCE6P instance already through Instance Manager, as described above.
- Stop the instance if it’s currently running.
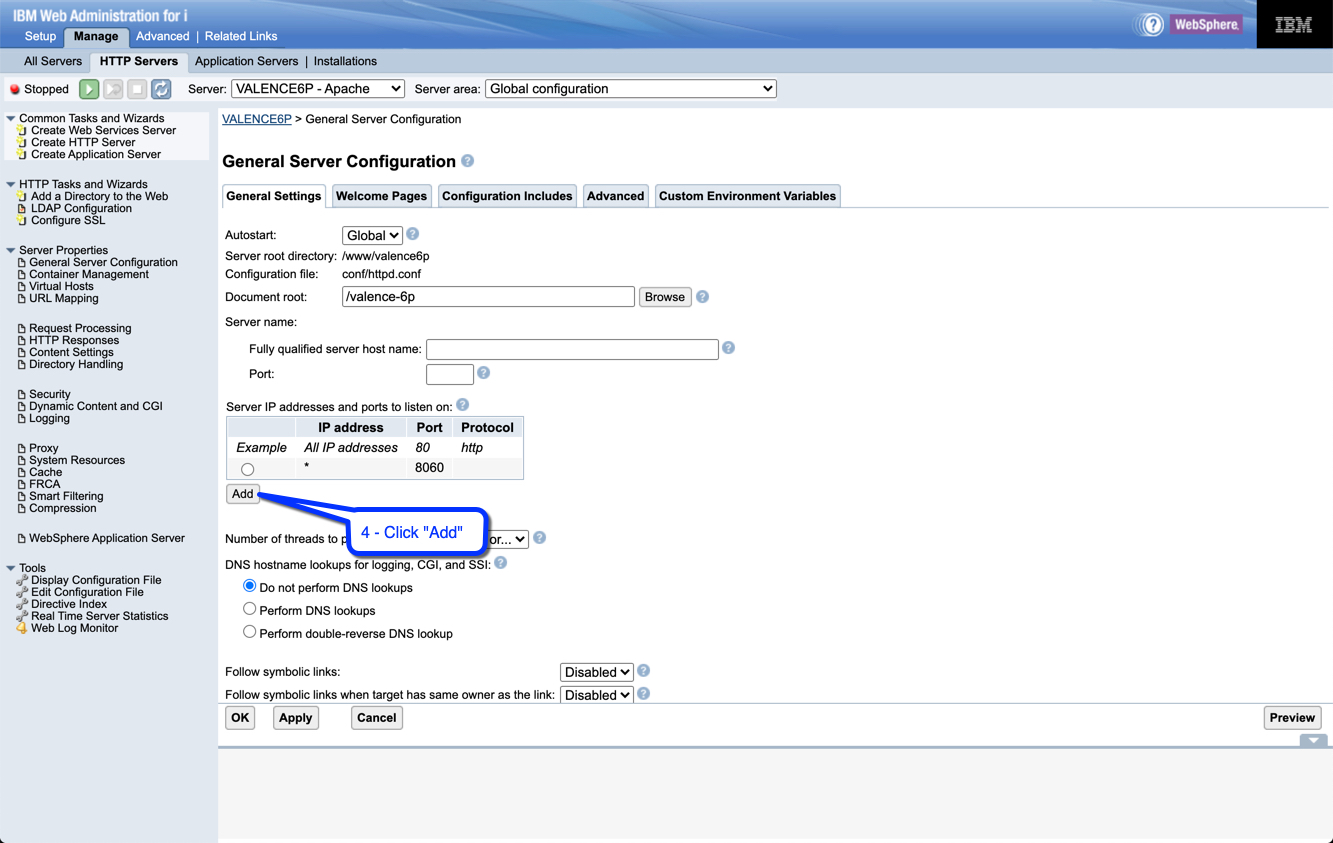
- Click on “General Server Configuration”
- Click “Add” to add another listener port
- Enter the port for your previous Valence production instance (8052 in our case)
- Click “OK”
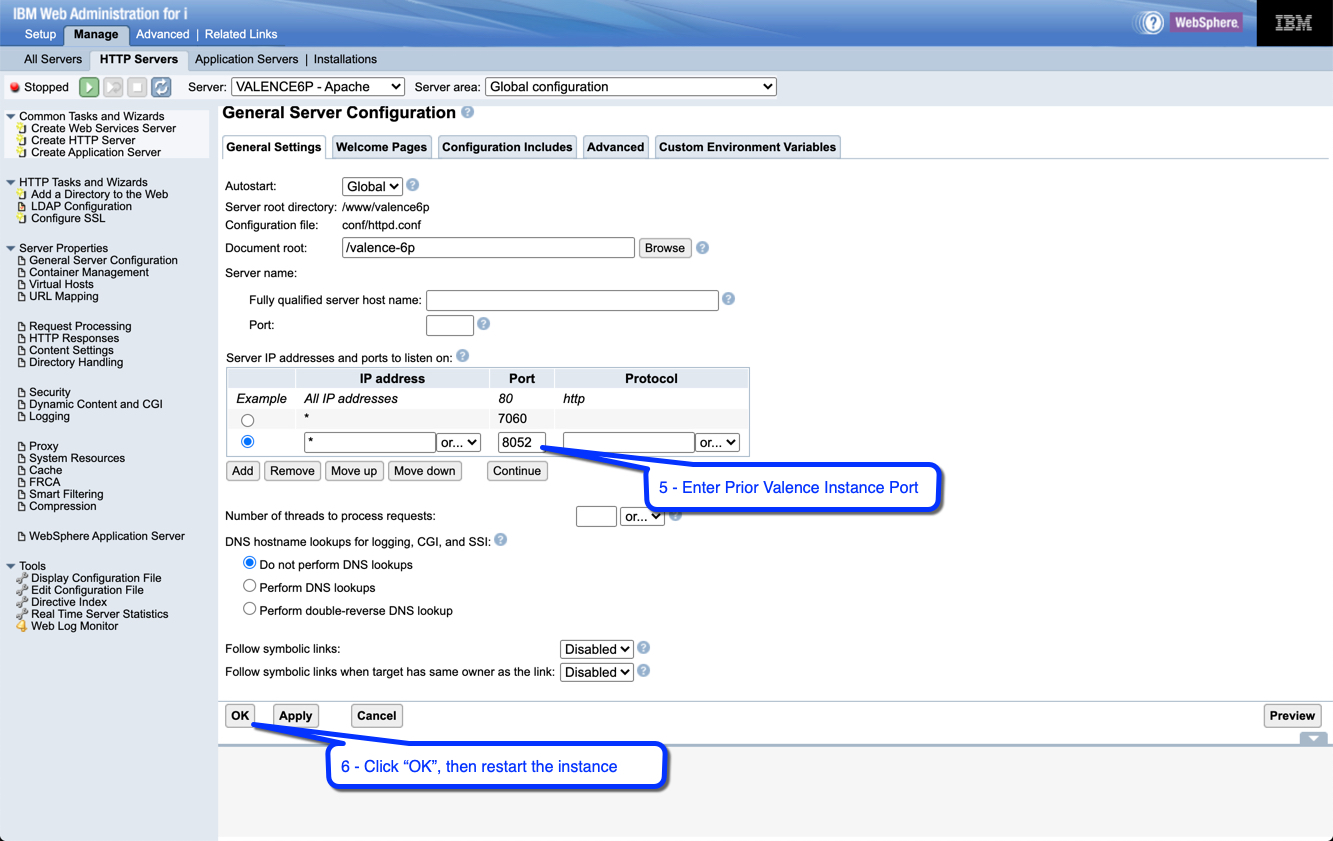
Once you restart your Valence 6 instance, you should be able to use the old Valence 5.2 URL to access the new Valence 6 instance login page. You can continue with this dual listener setup indefinitely, or until you’ve had time to get everyone’s bookmarks updated. And of course, in the unlikely event you need to revert everyone back to 5.2 for any reason, it’s as simple as undoing the port adjustments.